Why enrich a category?
To champion your industry, you need to offer the best product experience to your customers. Defining the relevant and appealing product information for a range or category of products, adapted to each of your sales channels, will help create more impactful showcases for product lines, hence reaching your omnichannel goals.
Enriched Categories offer an easy and efficient way to showcase a product range with contextualized information, through the ability to value categories with content such as images, descriptions, or SEO data.
Learn more at Akeneo Akademy
Deepen your understanding of Enriched Categories in this interactive course.
How to enrich a category?
To enrich a category, simply start by creating a category template. It will gather and display the attributes that will help you describe and qualify your categories.
The category template is created by category tree, then applies to all categories, subcategories, and sub-subcategories of this tree. Once the template is ready, the category attributes can be edited with values that are all scopable and localizable.
At any time, if you want to come back to simple category properties, you can delete the category template per tree, which will impact all associated categories.
From the user interface, Go to Settings/Categories.
Create a category template per category tree
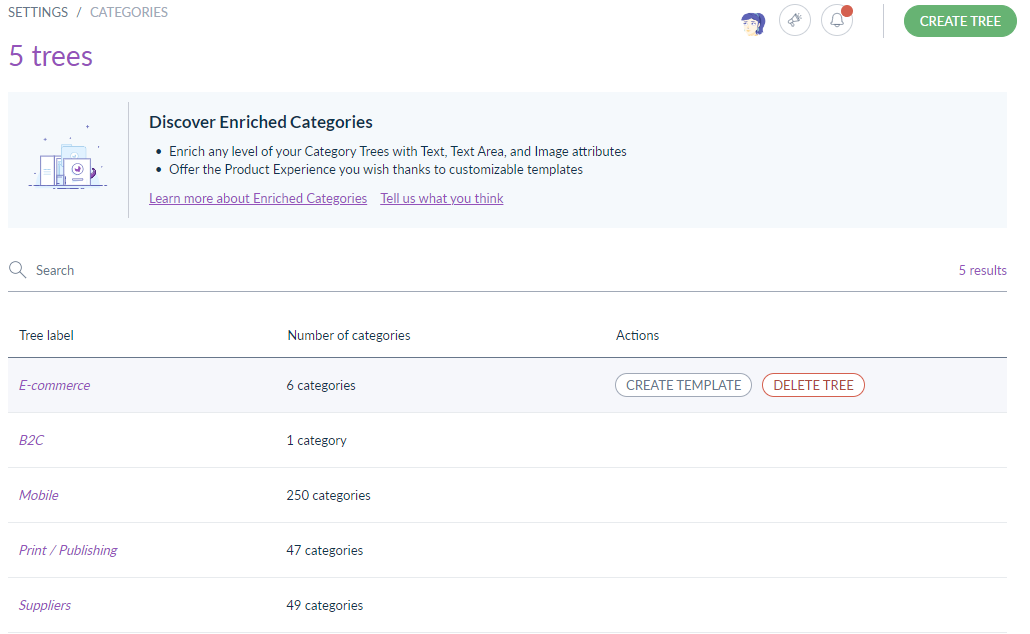
To create a new category template, hover on the tree name and click on the Create template button, then add a label (optional) and a code (required).
To add attributes to your category template and define the content to be enriched among Text, Text Area, Yes/No and Images attribute types, you can choose either to load a set of suggested attributes for some guidance or start by creating a first attribute so that the template can perfectly meet your needs.
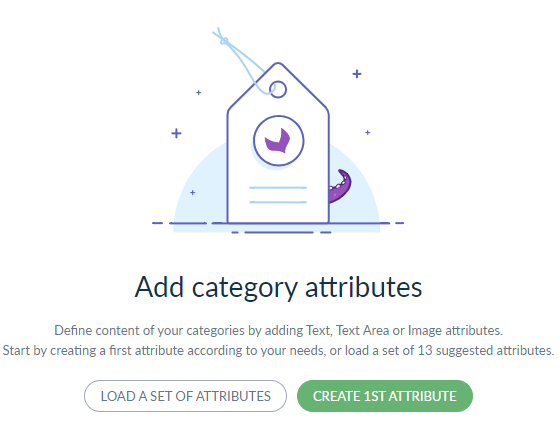
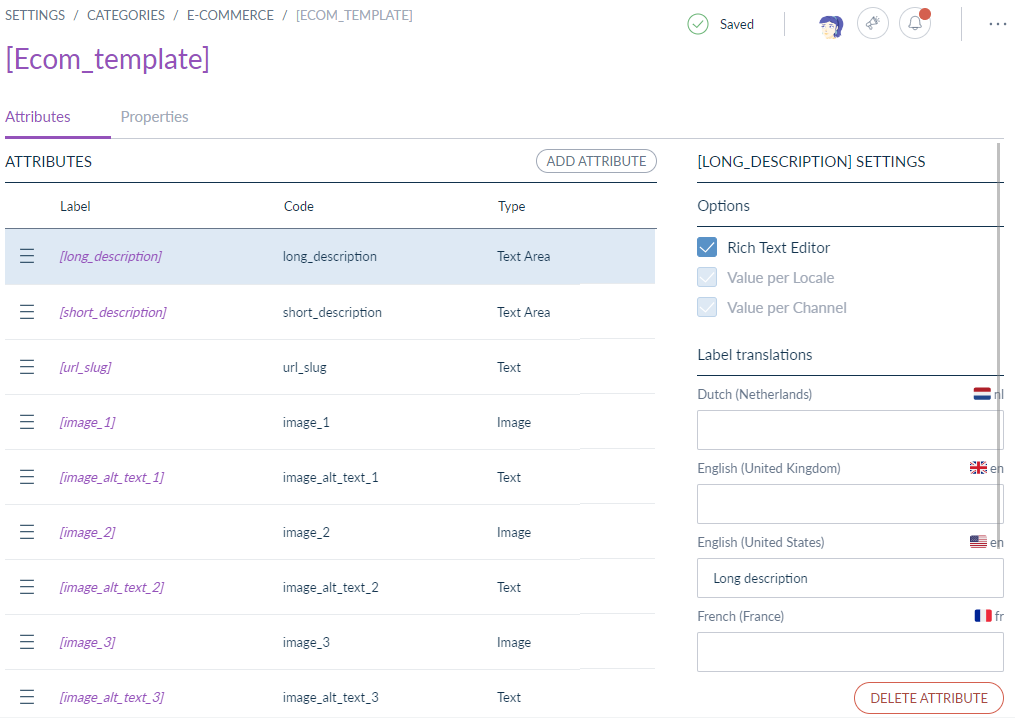
If you select Load a set of attributes, you will activate a pre-defined template with 13 suggested attributes, that you can edit to adapt to your specific needs.
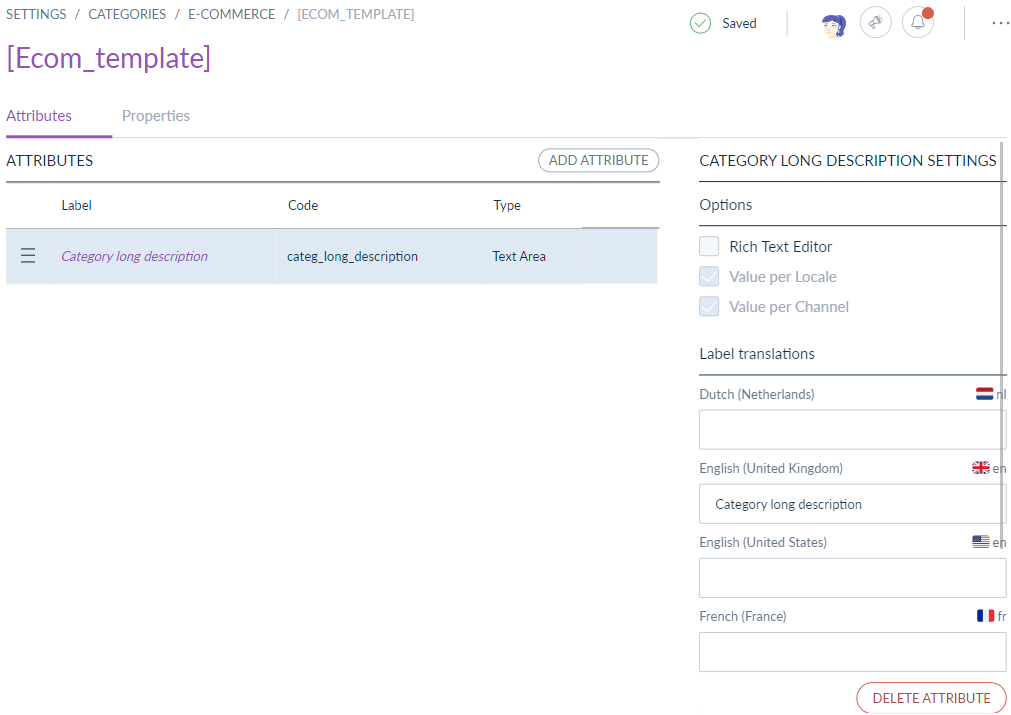
If you select Create 1st attribute, you will create your own template from the 1st attribute and add as many attributes as needed (up to 50 attributes).
If you cannot create the category template, you may not have the appropriate rights to manage category templates, then please refer to the Manage the interface and actions accesses > Rights on settings > Permissions on categories article.
In order to offer the best Product Experience for your customers, once created, you can customize the category template in the Attributes tab simply by defining the attributes that make sense for your strategy (1 category template per category tree).
Add attributes
From the user interface, go to Settings/Categories, hover on any category tree name for which a template has been created, and click on the Edit template button so that you can access the category template.
For any category template, simply click on the Add attribute button. You can create as many attributes as you wish, within the limit of 50 attributes per category template.
To create any new category attribute:
- Choose a label (optional),
- Choose a unique code (required),
- Select the attribute type (text, text area, Yes/No and image attribute types),
- Specify if the attribute value needs to be specific per channel and/or locale,
- Click on Create to save.
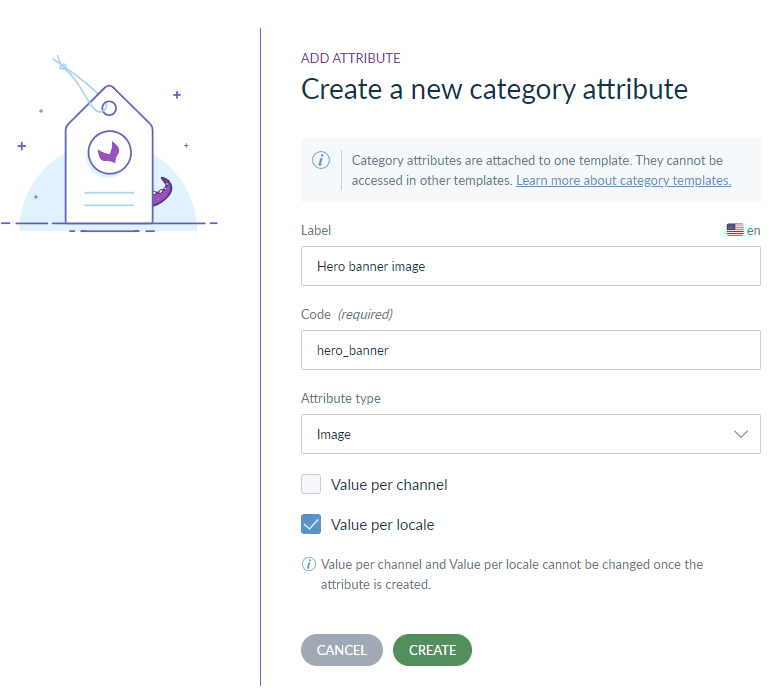
The newly created attribute will be added to your category template, at the end of the list of existing attributes.
Edit attributes
From the user interface, go to Settings/Categories, hover on any category tree name for which a template has been created, and click on the Edit template button so that you can access the category template.
For any category template, you can edit its attribute's setting through the right panel. For every selected attribute, you can edit its options Rich text editor and add or edit label translations so that every category attribute's details are specific to the need of the associated category enrichment (1 category template per category tree).
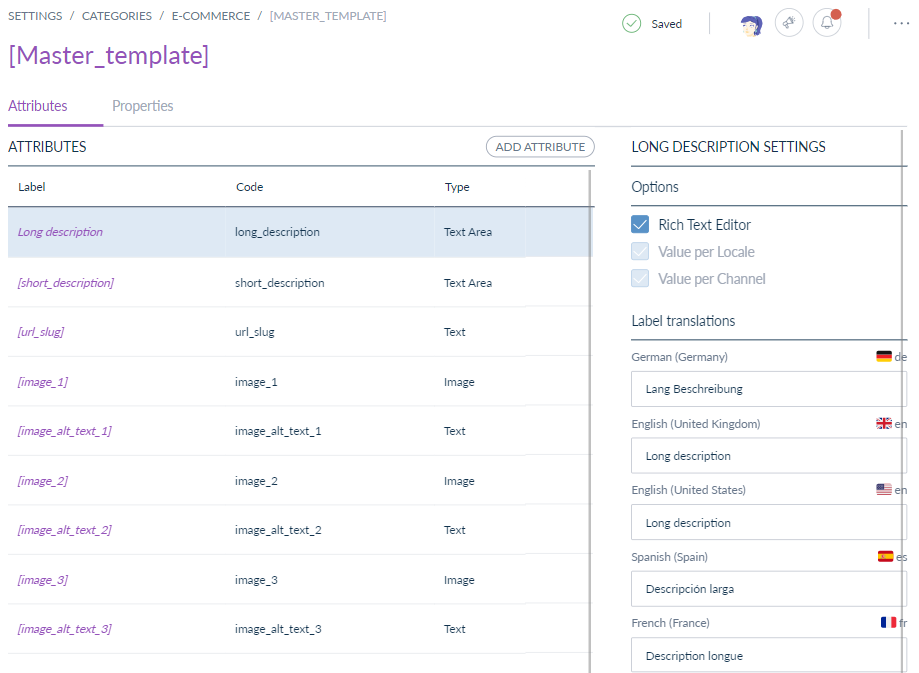
Every attribute detail edited is automatically saved to facilitate your journey and limit the risk for any unsaved change.
By default, every attribute inherited from the suggested list of attributes is both scopable and localizable. As Value per locale & Value per channel options are not editable, if you need to change them, we advise you to delete the attribute and re-create it with the options of your choice.
Sort attributes
From the user interface, go to Settings/Categories, hover on any category tree name for which a template has been created, and click on the Edit template button so that you can access the category template.
To change any attribute's position in the category template, you can simply drag & drop attributes.
Remove attributes
From the user interface, go to Settings/Categories, hover on any category tree name for which a template has been created, and click on the Edit template button so that you can access the category template.
For any category template, to remove any category attribute, click on the Delete attribute button.
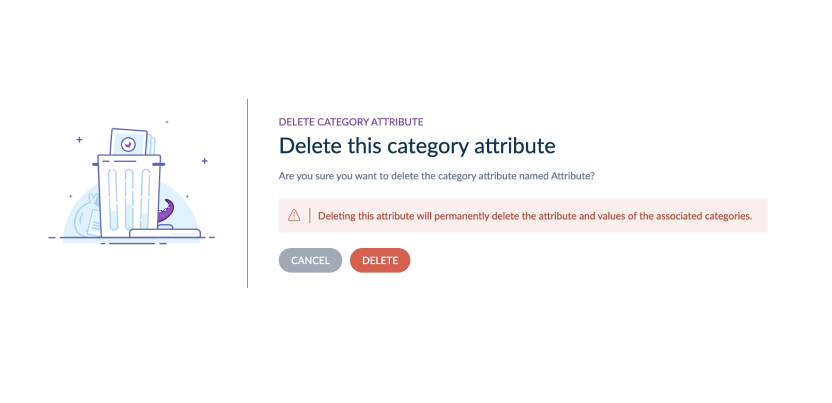
The selected attribute will be removed from the category template, and the values of all the associated categories will be automatically removed.
You can delete as many attributes as you wish, up to emptying the category template and starting again from the initial choice between the 13 suggested attributes or the 1st attribute.
Edit category template's label
From the user interface, go to Settings/Categories, hover on any category tree name for which a template has been created, and click on the Edit template button so that you can access the category template.
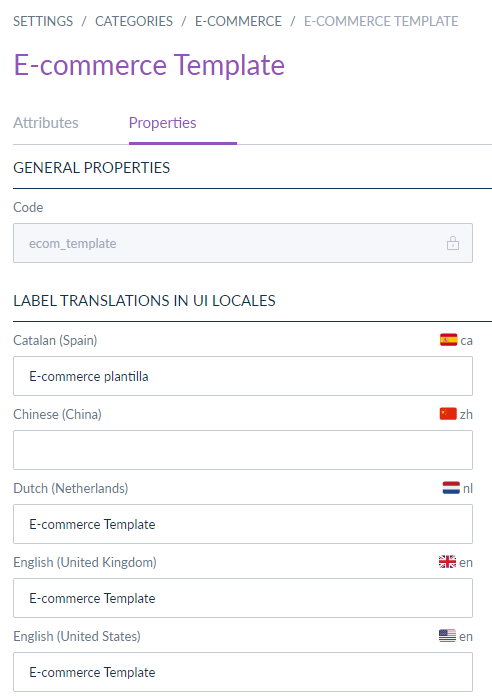
For any category template, to add or edit its label translations, click on the Properties tab.
To enrich a category, first, select your working context (channel/locale)
Go to Settings/Categories in the Akeneo PIM. To enrich the new category template’s attributes, click on the tree of your choice in the list and click on the category, subcategory or sub-subcategory you want to enrich.
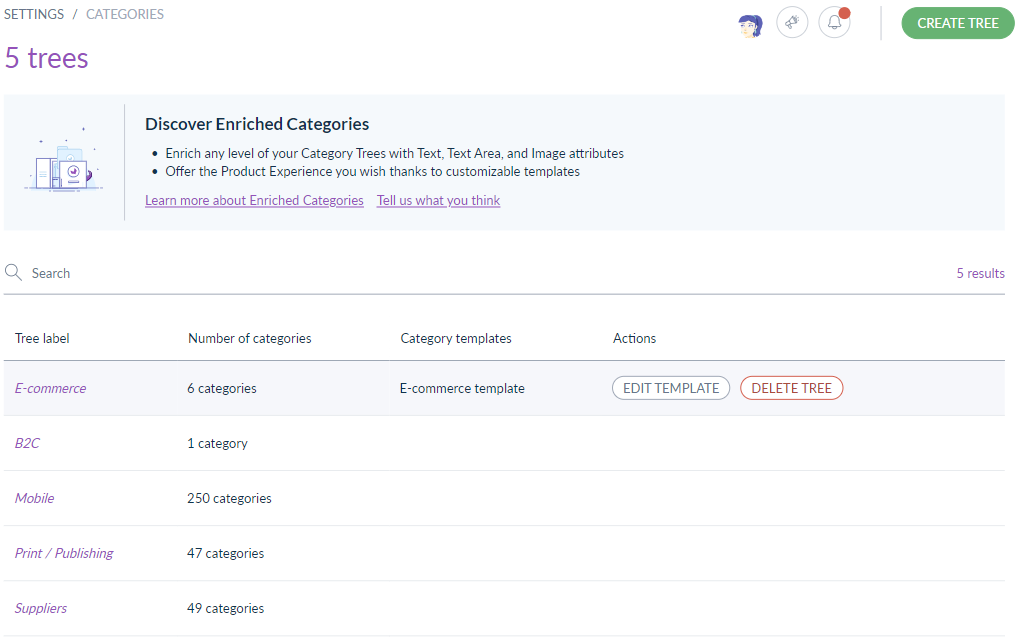
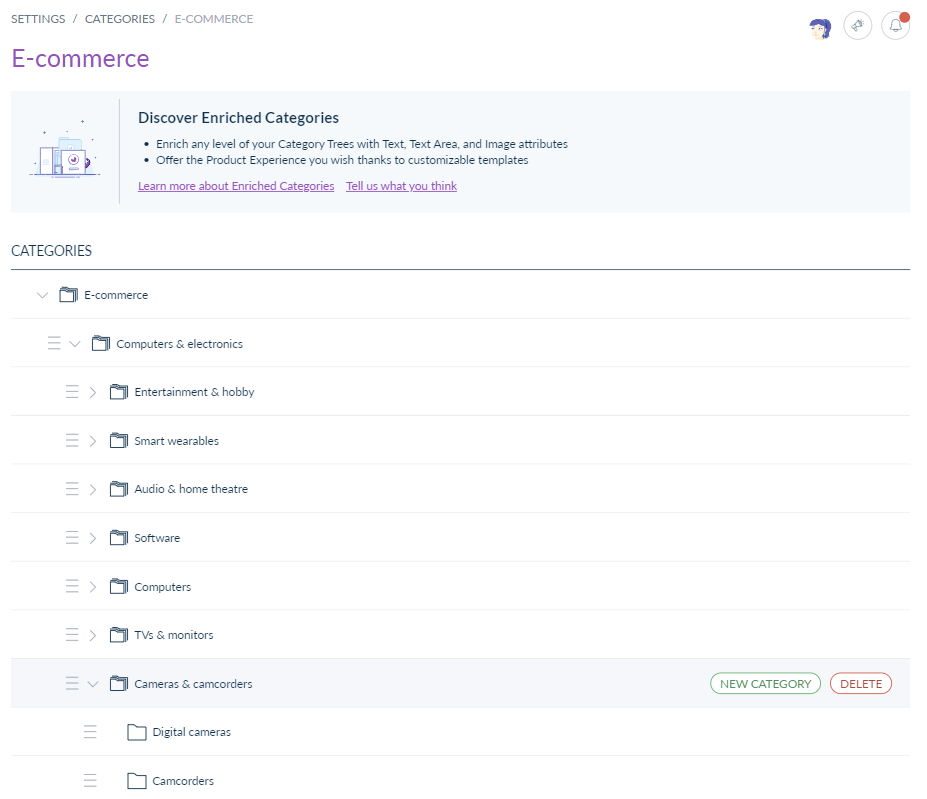
In the Attributes tab, you can view your template ready with category attributes to edit with values.
Your template will allow you to add or edit category attributes' values, hence enriching your categories with content such as description, images or SEO data. To do so, first, select your working context (channel and locale).
If you cannot find your working channel and/or locale listed, perhaps the channel and/or locale is not associated with the category tree you have selected: therefore it is not enabled. To manage the category tree linked to the working channel, please refer to Manage your channels and/or Manage your locales.
Select your working channel
To select the channel on which you want to edit values, select your channel in the drop-down list on the header of the Attributes tab.
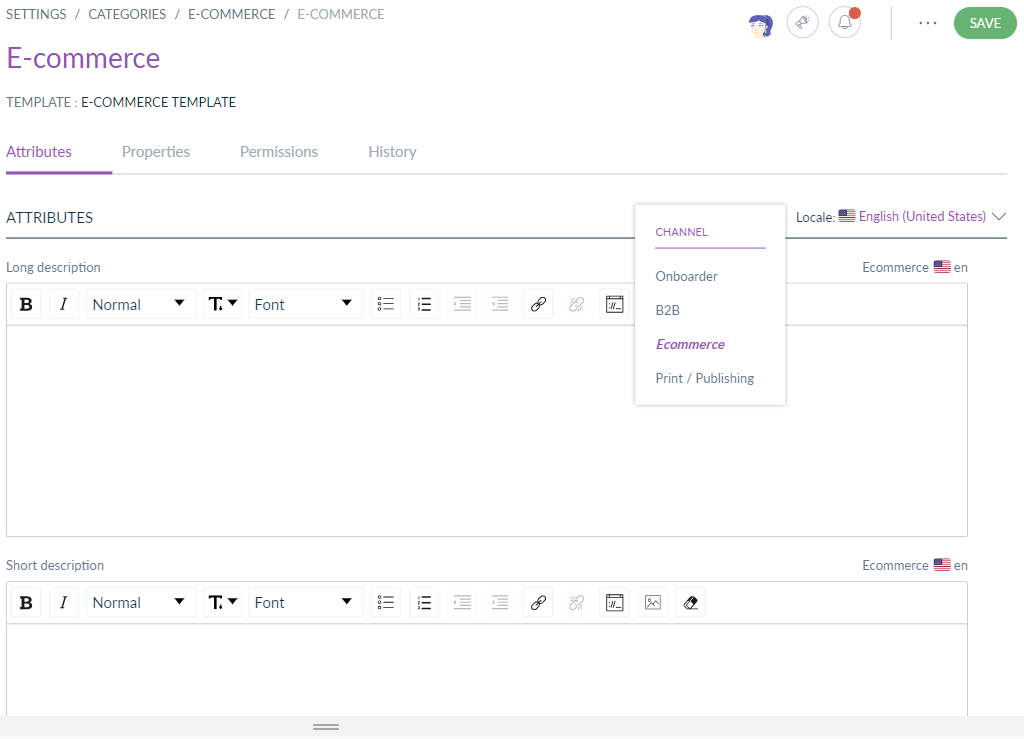
If you want to edit several values at once, you can edit the category attributes for one channel, then another, and save all changes at once.
Select your working locale
To select the locale on which you want to edit values, select your locale in the drop-down list on the header of the Attributes tab.
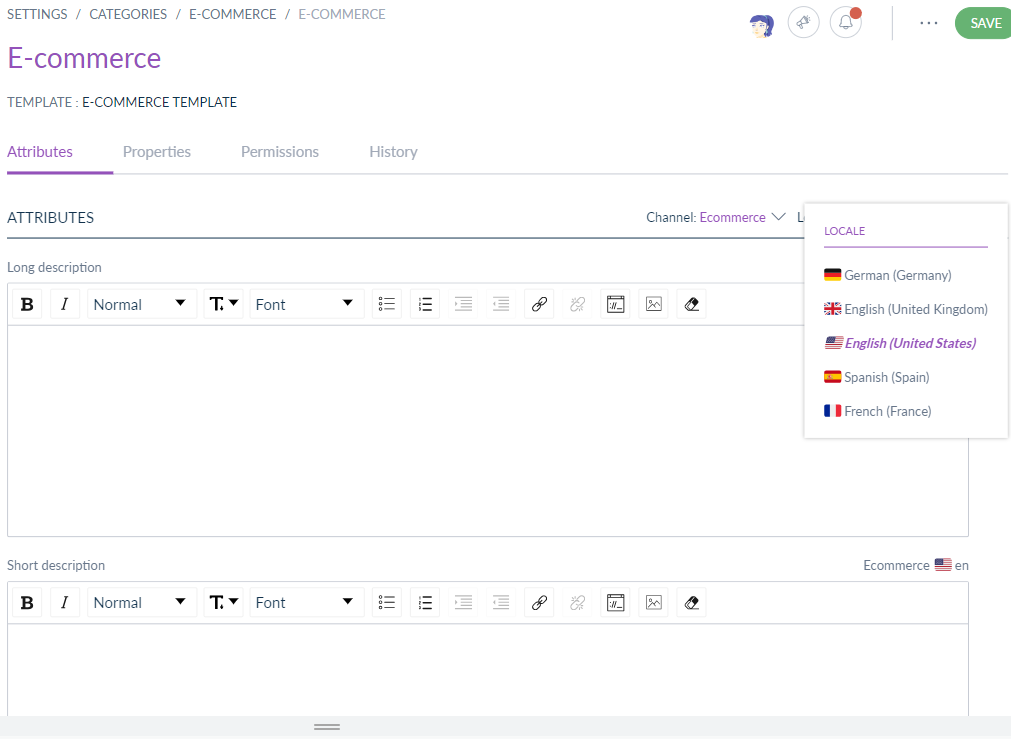
In the drop-down list, you will find the locales (that have been associated with the working channel in the Settings).
For the localizable attributes (with the indicated locale on the top right of the field), the entered values will be saved only for the working locale.
If you want to edit several values at once, you can edit the category attributes for one locale, then another, and save all changes at once.
By default and to allow flexibility, you can edit any of the attributes on the category template specifically by channel and by locale, locales being dependent on the channel. None of the attributes are mandatory so you can edit and enrich only part of the attributes with values.
Enrich category attributes
Go to Settings/Categories and once a category template has been created per tree, you can edit attributes and enrich any of your categories.
- Click on the Attributes tab
- Select the channel and locale you want to enrich
- Complete or change your category values
- Click on the Save button (top right-hand corner).
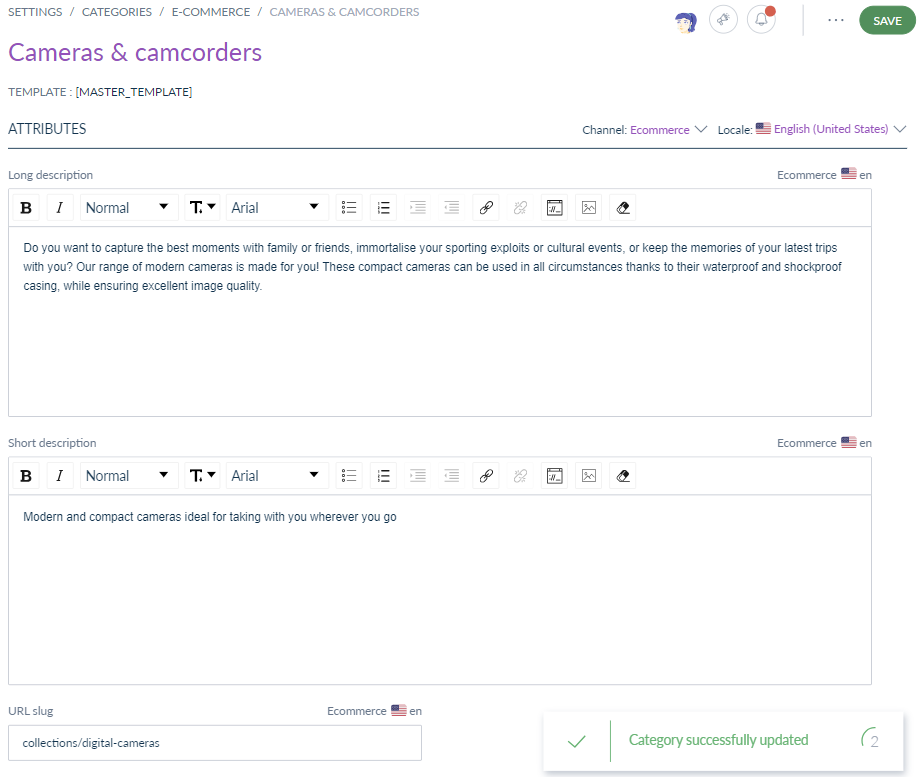
If you cannot add category content to enrich a category, you may not have the appropriate rights to Edit category attributes, please refer to the Manage the interface and actions accesses > Rights on settings > Permissions on categories article.
Delete a category template
You can delete a category template and thus delete the category’s attributes' content from the entire category tree, including all related categories, subcategories, and sub-subcategories.
From the user interface, go to Settings/Categories, hover on the tree name, and click on the Edit template button so that you can access Other actions in the Attribute tab and Delete template.
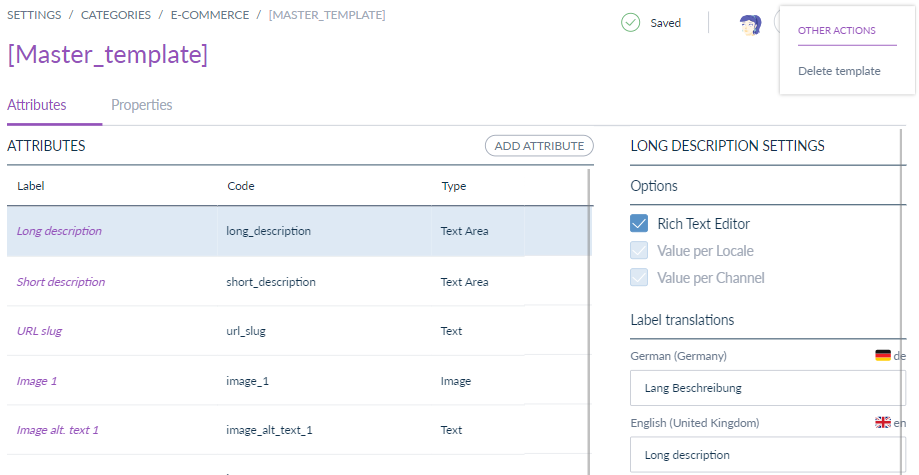

If you cannot delete the category template, you do not have the appropriate rights to Manage category templates (create, edit and delete), please refer to the Manage the interface and actions accesses > Rights on settings > Permissions on categories article.
Export enriched categories data
Guidelines
This feature allows you to provide your enriched category values to third parties like e-commerce platforms, mobile applications... or, more simply, if you want to extract information from the PIM for your usage, editing, or translation for example.
You have several ways to export your information:
- You can manually download the export file: execute the job from the PIM user interface, and download the generated file.
- You can automatically send the export file to the third-party, by setting a path in the export profile configuration enabling the PIM to drop the file when executing the command automatically (scheduling).
The exports can be done in two formats: CSV and XSLX.
Create a new enriched categories export profile
The file export process is straightforward. It consists in:
- Creating an export profile
- Launching a CSV or XLSX file export
To create a new export profile:
- Log in with a user account with Create an export profile permissions
- Go to the Exports menu
- Click on Create export profile with a code and a label
- Narrow down the list of displayed export jobs, and select either Enriched category export in XLXS or in CSV
- Click on Save to finalize the export profile creation. The profile page screen is displayed. You can then configure it.
To help you configure your new Enriched category export job in XLSX or in CSV, please refer to the Export your data article.
In the Content tab, you can choose how to filter the data to export. You can filter by:
- Category tree (as each enriched category template is created per category tree, then applies to all his sub-categories)
- Channel
- Locales


