


If you are unfamiliar with attributes, you can read the What is an attribute? article.
How to create an attribute?
Discover all attributes available in the Introduction to Akeneo attribute types article. Make sure you pick the most appropriate attribute type that perfectly matches your needs.
For example, if you want to ensure that your PIM users will select one option from a list of predefined options, select a simple select attribute type instead of a free text field.
Create a Measurement attribute to add a weight/size/length... for your products.
To create an attribute in Akeneo PIM:
- Go to Settings/Attributes
- Click on the Create attribute button:

- Select the attribute type you want:
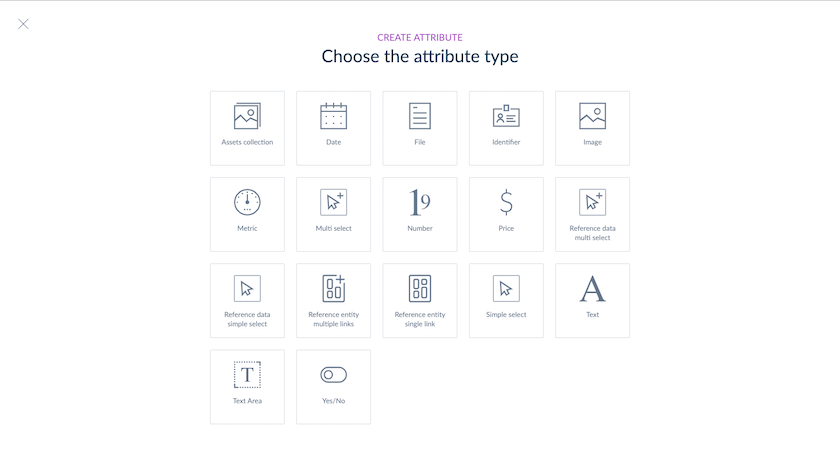
- The attribute edit form is displayed; fill in the following properties:
Under General Parameters:- A code (required) to identify the attribute.
- A type based on the attribute type selected in the previous screen.
- An attribute group (required) to which the new attribute will be added.
- In addition to these required attributes, you can select the following properties:
- Unique value (Yes/No). A unique value means that the values of the attribute must be different for each product. This setting is available for these attribute types only: text attributes, number attributes, and identifier attributes (a unique value is mandatory for this attribute).
- Value per channel (Yes/No): enable this property if you plan to have different product values per channel.
- Value per locale (Yes/No): enable this property if you plan to have different product values per locale.
- Read only (Yes/No) (Enterprise Edition only): to prevent this attribute from being edited through the UI, it will only be updated through imports, API or rules
- Mandatory (Yes/No): enable this property to make the attribute required when a product or product model is created or updated. The attribute will be mandatory in the UI, through imports, API, or rules, but only if it is part of the family. When enabled, mandatory attributes will also appear on the product creation screens, as long as they are available for the selected family. You can set up to 5 attributes as mandatory. Only the following attribute types can be set as mandatory: Identifier, Simple Select, Number, Reference Entity Single Link, Text, Text Area, and Yes/No. Important: Before enabling this setting, ensure that all your existing products have values enriched for these mandatory attributes to avoid future errors.
- Usable in grid (Yes/No): if you want to filter on this attribute in the product grid or use it as a column.
- Locale specific: this attribute will only be available for some locales.
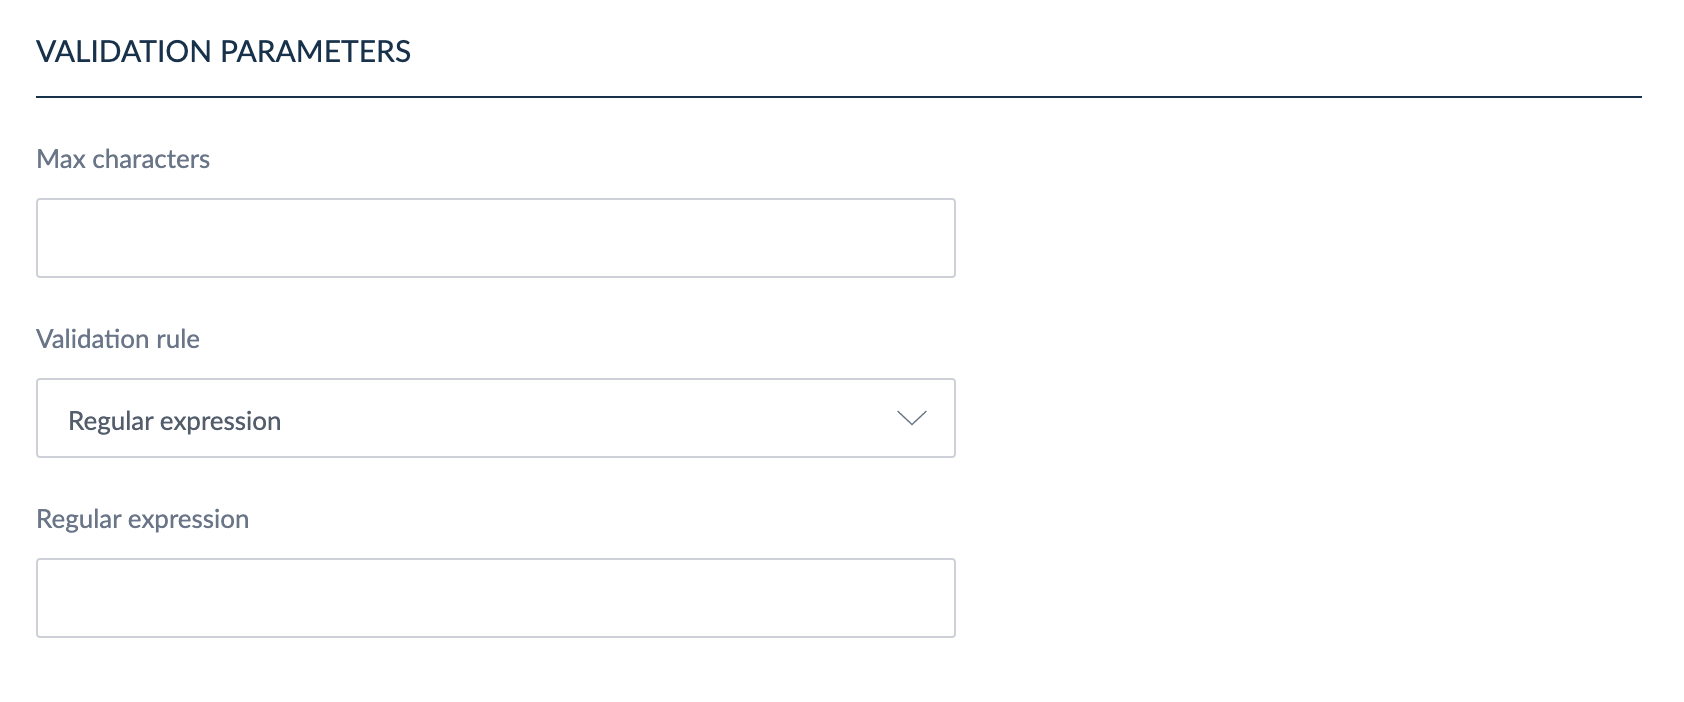
- Under Validation Parameters, add validations to control your data:
- Validation parameters: each attribute comes with validation parameters (see Add attributes validation parameters).
5. Click on Save to create your attribute.
Faster setup for select attributes - Add multiple options in the UI
When you create a simple select or multi-select attribute, you can now add multiple options at once from the attribute's Options tab : including codes, labels for all enabled locales and bulk fixes for invalid entries. This makes initializing or expanding option lists significantly faster than creating options one by one.
Find out more in the ‘Manage your attributes’ article.
Composable Products are now released!
With two new additions in the PIM, we are allowing our users to dynamically link products and products components. The new attribute type 'Product Link' and the 'Product Link' column within the table attribute were designed to enhance flexibility and scalability in the PIM.
Find out more about these new additions in the dedicated article ‘Manage Composable Products in the PIM’
Some attribute properties cannot be edited afterward, such as code, unique value. Make sure they fit your needs!
Please note that the following attribute codes cannot be used in Akeneo PIM:
id, ID, Identifier, identifier, associationTypes, category, categories, categoryId, completeness, enabled, family, Family, *_groups, associations, *_products, scope, treeId, values, label, LABEL, Label, parent, product_typology. We strongly recommend not to use any of these codes even if the letter case is different, for instance, Id, Groups.
Add attributes validation parameters
Each attribute has specific properties to add more control over attribute's values:
-
Identifier attribute:
- GTIN: Ensures that the attribute value has 8, 12, 13, or 14 digits and passes the checksum (or check digit) validation.
-
Date attribute:
- Min date: the earliest date that can be accepted
- Max date: the latest date that can be accepted
- Format (currently available in Beta): Specifies the required date format. This parameter ensures the input is validated against a defined standard, such as whether it includes only the date (e.g.,
YYYY-MM-DD) or a combination of date and time. The date time format is visible in the PIM with hours and minutes (e.g.,YYYY-MM-DD HH:MM), and exported/imported in ISO 8601 Format (2025-11-05T21:57:00Z) such as2025-11-05T21:57:00Z(whereZdenotes Zulu time, or UTC).
-
Text attribute:
- Maximum number of characters: maximum number of characters that an attribute value can have
- Validation rule: how the value should be validated: such as an URL, as an Email, or using a regular expression
- GTIN: Ensures that the attribute value has 8, 12, 13, or 14 digits and passes the checksum (or check digit) validation.
- Searchable in main search bar (Yes/No): Enable this setting to include the attribute’s values in the Product Grid main search bar. You may designate up to 20 text attributes as searchable. For localizable or scopable attributes, values across all configured channels and locales will be indexed and searchable.
- The maximum number of allowed characters is 255 for a text attribute.
-
Text area attribute:
- Maximum number of characters: maximum number of characters that an attribute value can have
- Rich text editor enabled: activates the Rich text editor feature. Please note that when using and saving a WYSIWYG field in the PEF, the WYSIWYG library will handle the HTML code ".
-
Remove HTML formatting on paste: When you paste text from a document or a website, sometimes it retains unwanted HTML formatting (such as bold, italics, links, etc.). The "Remove HTML formatting on paste" feature automatically strips out all these HTML tags, leaving only plain text. As this option doesn't remove line breaks from the pasted content, HTML tags, such as
<br>or<p>, can still be preserved or added to render them. Other special characters (like zero-width spaces) may also be preserved, as these are not considered HTML formatting. - Invalid characters: List characters that are prohibited when a product is updated. If the text contains any of these characters, the product won't be created or updated and an error will be thrown. You can enter the characters directly or use their Unicode code points (e.g., \u0026). For convenience, all characters will be automatically converted to Unicode code points upon saving, and you can preview them.
- The maximum number of allowed characters is 65535.
-
Asset collection attribute:
- Max number of items in the collection: maximum number of assets that can be linked to a product in this specific asset collectio
-
File attribute and image attribute:
- Maximum size allowed in MB
- Allowed extensions files
-
Measurement attribute:
- Allow negative values for the attribute
- Allow decimal values for this attribute
- Minimum value: the smallest value allowed
- Maximum value: the largest value allowed
- Measurement family: the measurement family used for the attribute (weight, length, area, etc.)
- The default measurement unit: the unit selected by default to enter a value for the measurement attribute
-
Price attribute:
- Allow decimals for the attribute values
- minimum value: the smallest allowed value
- maximum value: the largest allowed value
When importing prices from a file, the PIM expects you to submit every currency you want to keep – any currency column you omit or leave blank will overwrite (and thus clear) the existing value in the PIM for the impacted products.
For example, imagine product SKU ABC-123 has a price of:
- EUR 10
- USD 10
- GBP 10
If you import a file that updates only the EUR price from 10 to 15 (and leaves the USD and GBP columns empty), the import will:
- update EUR to 15
- clear USD (setting it to empty)
- clear GBP (setting it to empty)
i.e. USD and GBP will be imported as empty values, erasing the €10 and £10 previously stored.
-
Number attribute:
- Allow negative values for the attribute
- Allow decimals
- Minimum value: the smallest allowed value
- Maximum value: the largest allowed value
-
Reference entity single link attribute & reference entity multiple links attribute (Enterprise Edition only):
- Related reference entity: the reference entity linked to this attribute
-
Reference data simple select attribute & reference data multi select:
- Reference data type: choose an existing reference data value to link to your attribute
-
Asset collection attribute (Enterprise Edition only):
- Related asset family: the asset family linked to this attribute
-
Table attribute (Enterprise and Growth Editions only): depending on your column types, there can be several validation parameters:
- text column type: Maximum number of characters (it must be less than 300 characters)
-
number column type:
- Allow decimals
- Minimum value: the smallest allowed value
- Maximum value: the largest allowed value
- Default value: the default value when a new row is created
- Select column type:
- Default value: the default value when a new row is created
-
Yes/No (boolean):
- Default value: the default value when a new product is created (It only works when a family is assigned at the creation of a product)
-
Simple or Multi-Select attributes:
- Default value: the default value when a new product is created (It only works when a family is assigned at the creation of a product)
- Enable option creation during import: Automatically creates a new option when a new option code is included in a product or product model import or by API. By import & API, an additional parameter must be added in the API call or each import profile to allow the option creation. Labels can be added later in the options settings. For optimal performance, we still strongly recommend creating attribute options and creating/updating products in two separate steps.
For the text attribute type, you can add a regular expression to validate the content of the input. For instance, to control the right format of a EAN13 code, add a validation rule based on the following regular expression: /^[0-9]{13}$/
The Product link attribute has no specific validation properties.
Control decimal places
By default, when an attribute accepts decimals, the PIM has a default behavior concerning decimal places in export and APIs.
- Number attributes: formatting the numbers with decimal with at least 4 decimal places
- Measurement attributes: formatting the numbers with decimal with exactly 4 decimal places
- Price attributes: formatting the prices with 2 decimal places
Here are some examples showing how the PIM displays decimal values by default:
| Type | Number in PIM | Display in UI | Data exported via API and flat files |
|---|---|---|---|
| Number | 10.1 10.12 10.1234 10.123456789123456 |
10.1000 * 10.1200 10.1234 10.123456789123456 |
10.1000 10.1200 10.1234 10.123456789123456 |
| Measurement | 10.10 10.12 10.123 10.1234 10.12346 |
10.1000 * 10.1200 10.1230 10.1234 10.1235 |
10.1000 10.1200 10.1230 10.1234 10.1235 |
* decimal separator according to your locale
Please note that this configuration is only available for number and measurement attributes.
Prices can not have customized decimal places, and will automatically be formatted with 2 decimal places.
You might want to control the number of decimal places of the exports and APIs. To achieve this, you can chose a strategy for each attribute.
Available strategies
-
Round to a fixed number of decimal places: Every number will be formatted with the given number of decimal places that you've selected. During the import if more decimal places are given, the number will be rounded.
- Here is an example with 3 decimal places:
| Type | Imported number | Display in UI | Data exported via API and flat files |
|---|---|---|---|
| Number and measurement | 10 10.1 10.12 10.1234 10.1235 |
10.000 * 10.100 10.120 10.123 10.124 |
10.000 10.100 10.120 10.123 10.124 |
* decimal separator according to your locale
-
Define number of decimal places and forbid additional decimals: Every number will be formatted with the given number of decimal places that you've selected. If there are more decimal places than allowed in the attribute, the update will be rejected during product update.
- Here is an example with 3 decimal places:
| Type | Imported number | Display in UI | Data exported via API and flat files |
|---|---|---|---|
| Number and measurement | 10 10.1 10.12 10.1234 10.1235 |
10.000 * 10.100 10.120 10.123 10.124 |
10.000 10.100 10.120 10.123 10.124 |
* decimal separator according to your locale
- Trim trailing zeroes: the PIM will remove the unnecessary zeros at the end.
| Type | Imported number | Display in UI | Data exported via API and flat files |
|---|---|---|---|
| Number and measurement | 10.0000 10.100 10.1020 10.123456789123456 |
10 * 10.1 10.102 10.1235 |
10 10.1 10.102 10.1235 |
* decimal separator according to your locale
Translate your attribute labels
Once your attribute is created, translate it! You can add a translation for each enabled locale under the Label translations tab. If you need to edit another attribute's property, please refer to the section Edit attribute properties.
Simple and multi select attribute types rarely need to be localizable since all their options can be translated into any enabled locales in the PIM.
Edit attribute properties
To edit an attribute:
- Go to Settings/Attributes
- Select the attribute to edit in the grid and click on the line or on the edition shortcut
- Change the properties and click on Save

You can change the following properties of an attribute:
- Attribute group: the attribute group the attribute belongs to
- Labels: these are labels that appear when they are displayed in the PIM
- Locale specific: if it must apply to specific locales, not all of them
- Usable in the grid: whether or not the attribute can be displayed as a column or used as a filter in the product grid (Community and Enterprise Edition) or in the proposal grid (Enterprise Edition only)
- Read only: when enabled, it prevents this attribute from being edited in the UI; it can only be updated through imports or rules (Enterprise Edition only)
- Validation parameters (see Add attributes validation parameters)
- Options (for simple or multi select attribute types only): these are predefined values that the user can select
Find your attributes
Go to Settings/Attributes to see all the existing attributes or create a new one.
The attribute grid displays 25 attributes per page. To browse attribute pages, click on the page number you want to reach or use the filters.

You can sort out attributes by clicking on the column header on the grid.
Search on the grid
On its label
To quickly find an attribute, use the search bar above the grid. Use your attributes label to find what you are looking for.
If your attribute has no label translated, it will not pop in the search results. Make sure your attribute has its labels translated.
Use filters
Other filters are available on the right side of the screen; you can search attributes based on their code, and type...

- Enter your filter criteria
- The grid is automatically updated when a new filter is set
You can filter on the following attribute information:
- The attribute code
- The attribute type
- The attribute group it belongs to
- The family it belongs to
- The scopable property (one value per channel)
- The localizable property (one value per locale)
- The smart property (Yes/No) if there is a rule impacting this attribute (Enterprise Edition only)
- The quality status (Good/To improve) if there are spelling typos to correct (Enterprise Edition only)
By default, attributes will be displayed in the catalog locale selected in the product grid. If an attribute code appears in brackets like [color], it means it has not been translated into the current locale.
Identifying Attributes that are not assigned to families
To help you keep your catalog structure clean and organized, a filter is available directly in the attribute list. Use the "Family" filter to quickly identify which attributes belong to a family and which ones don't.
This is particularly useful when auditing your data model or cleaning up unused attributes.
Shortcut actions on each attribute
There is a set of actions available for each attribute. You can find it on the right side of the grid. Buttons are visible when you hover your mouse over the line.

The shortcut actions are only displayed if you have been granted the appropriate rights. Please refer to Manage your user roles to learn more about roles.
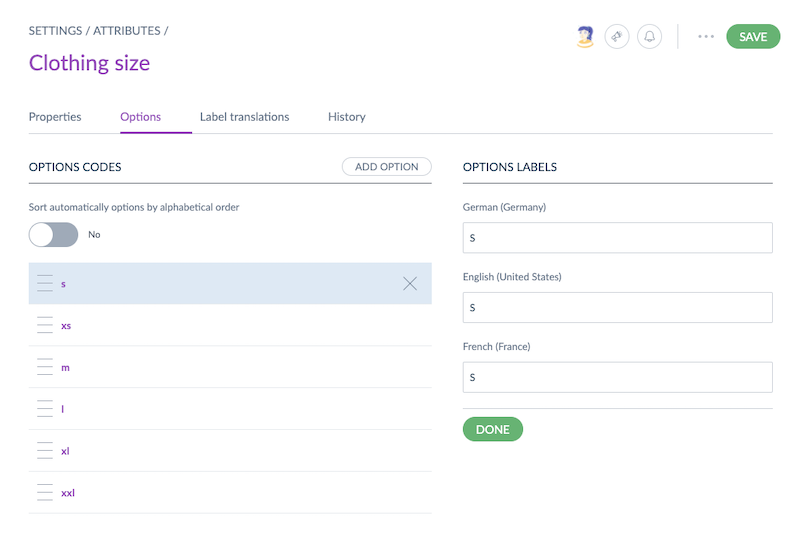
Manage simple and multi-select attribute options
You can define option values for simple and multi-select attribute types. Options can be added, edited, sorted, or deleted.
Find the attribute options
To manage your simple and multi-selects attribute options, remove an option or add a new one:
- Go to Settings/Attributes
- Select the attribute to edit, then click on the relevant row in the attribute data grid
- Click on the Options tab
Add a new option
- Click on Add an option button
- Give a unique code to the new option
- Click on the Done button
The option is instantly created.
You cannot use the main Save button to record your new options.
Please be aware that exceeding 100 options may impact the performance of the user interface, potentially causing slower response times.
Add multiple options at once
If you need to create several options for a simple or multi-select attribute, you don't have to add them one by one. The PIM lets you create multiple options in a single action, directly from the attribute's Options tab.
This is particularly useful when:
- You are initializing a new attribute with a long list of options (e.g., colors, materials, sizes).
- You are migrating option lists from another system or a spreadsheet.
- You want to set up codes and translated labels for all your options in one go.
How to add multiple options at once
- Go to Settings / Attributes and select the simple or multi-select attribute you want to enrich.
- Click on the Options tab.
- Click on the Add multiple options button.
- Enter or paste your list of option codes. Accepted separators are: commas, semicolons,
- Review the preview of the options to be created.
- If needed, fix any errors directly in the interface (for example, invalid characters, duplicates, or codes that conflict with existing options). Errors are highlighted so you can correct them inline before saving.
- Bulk transform codes if necessary: for example, applying a consistent case (lower / upper) or cleaning up formatting across all entries at once.
- Save and then add labels for each enabled locale directly in the same interface, without having to open each option individually. You can copy them from the codes to facilitate your work if necessary.
- Click on Save to create all the options in one go.
The options are created instantly and become available for product enrichment.

Some details to keep in mind
- Option codes must follow the usual attribute option code rules (no spaces, no special characters other than underscores or hyphens, etc.).
- Labels can still be edited later, individually, from the same Options tab.
- You can enter 500 options at once but as a reminder, exceeding 100 options per attribute may impact the performance of the user interface. If your use case requires more, consider using a reference entity instead.
Edit option labels
- Click on the option name in the left column of the screen
- Edit the labels you wish to update
- Click on the Done button
Delete an option
- Roll over the option name in the left column of the screen
- Click on the cross at the end of the blue line
A deleted option can no longer be used as a value for the attribute of a product. If a product had this value, it would be removed from the product's attribute.
If an attribute option is used in a variant product or a product model as a variant axis value, the option cannot be removed; an error message will be displayed. Please refer to the what is a family variant article for more details about variant axes.
Merge attribute options
When your catalog grows, it's common to end up with duplicate or redundant options in a simple or multi-select attribute, for example, color_redand red all representing the same value. The Merge options feature lets you consolidate these into a single option, automatically reassigning all impacted product values in the process.
How to merge options
- Go to Settings > Attributes and open the simple select or multi-select attribute you want to clean up.
- Click on the Options tab.
- Select at least 2 options to merge (you can select up to 500 at a time). The Merge button remains disabled until at least two options are selected.
- Click the Merge button. A confirmation window opens.
- In the confirmation window, choose the option to keep (the target). By default, the first option you selected is proposed. All other selected options are the sources: their values will be reassigned to the target, then deleted.
- Review the number of impacted products shown in the window. If any products are affected, a warning is displayed. The Confirm button is disabled until this count has finished loading.
- Click Confirm to launch the merge. You'll then receive a notification with a link to track the execution in the process tracker.

For every product and product model that uses a source option, across all locales and channels:
- Simple select: the source value will be replaced by the target option.
- Multi select: the source options will be removed and the target will be added, if not already present (no duplicates are created).
If a product cannot be updated due to a validation error, the source option is kept for that product: no value will be lost. You can fix the reported products and relaunch the merge to finish it.
Relaunching is always safe: the operation resumes where it left off.
Sort options
Options can be automatically sorted by alphabetical order using the toggle button Sort automatically options by alphabetical order on the top of the attribute's options page.
If you want to define your own sort, you can manually drag and drop option rows to reorder options.
Manage rules on attributes (EE only)
If you are unfamiliar with the concept of rules, you can read our What is a rule? article.
If a rule applies to your attribute, this rule will be visible under the Rules tab.
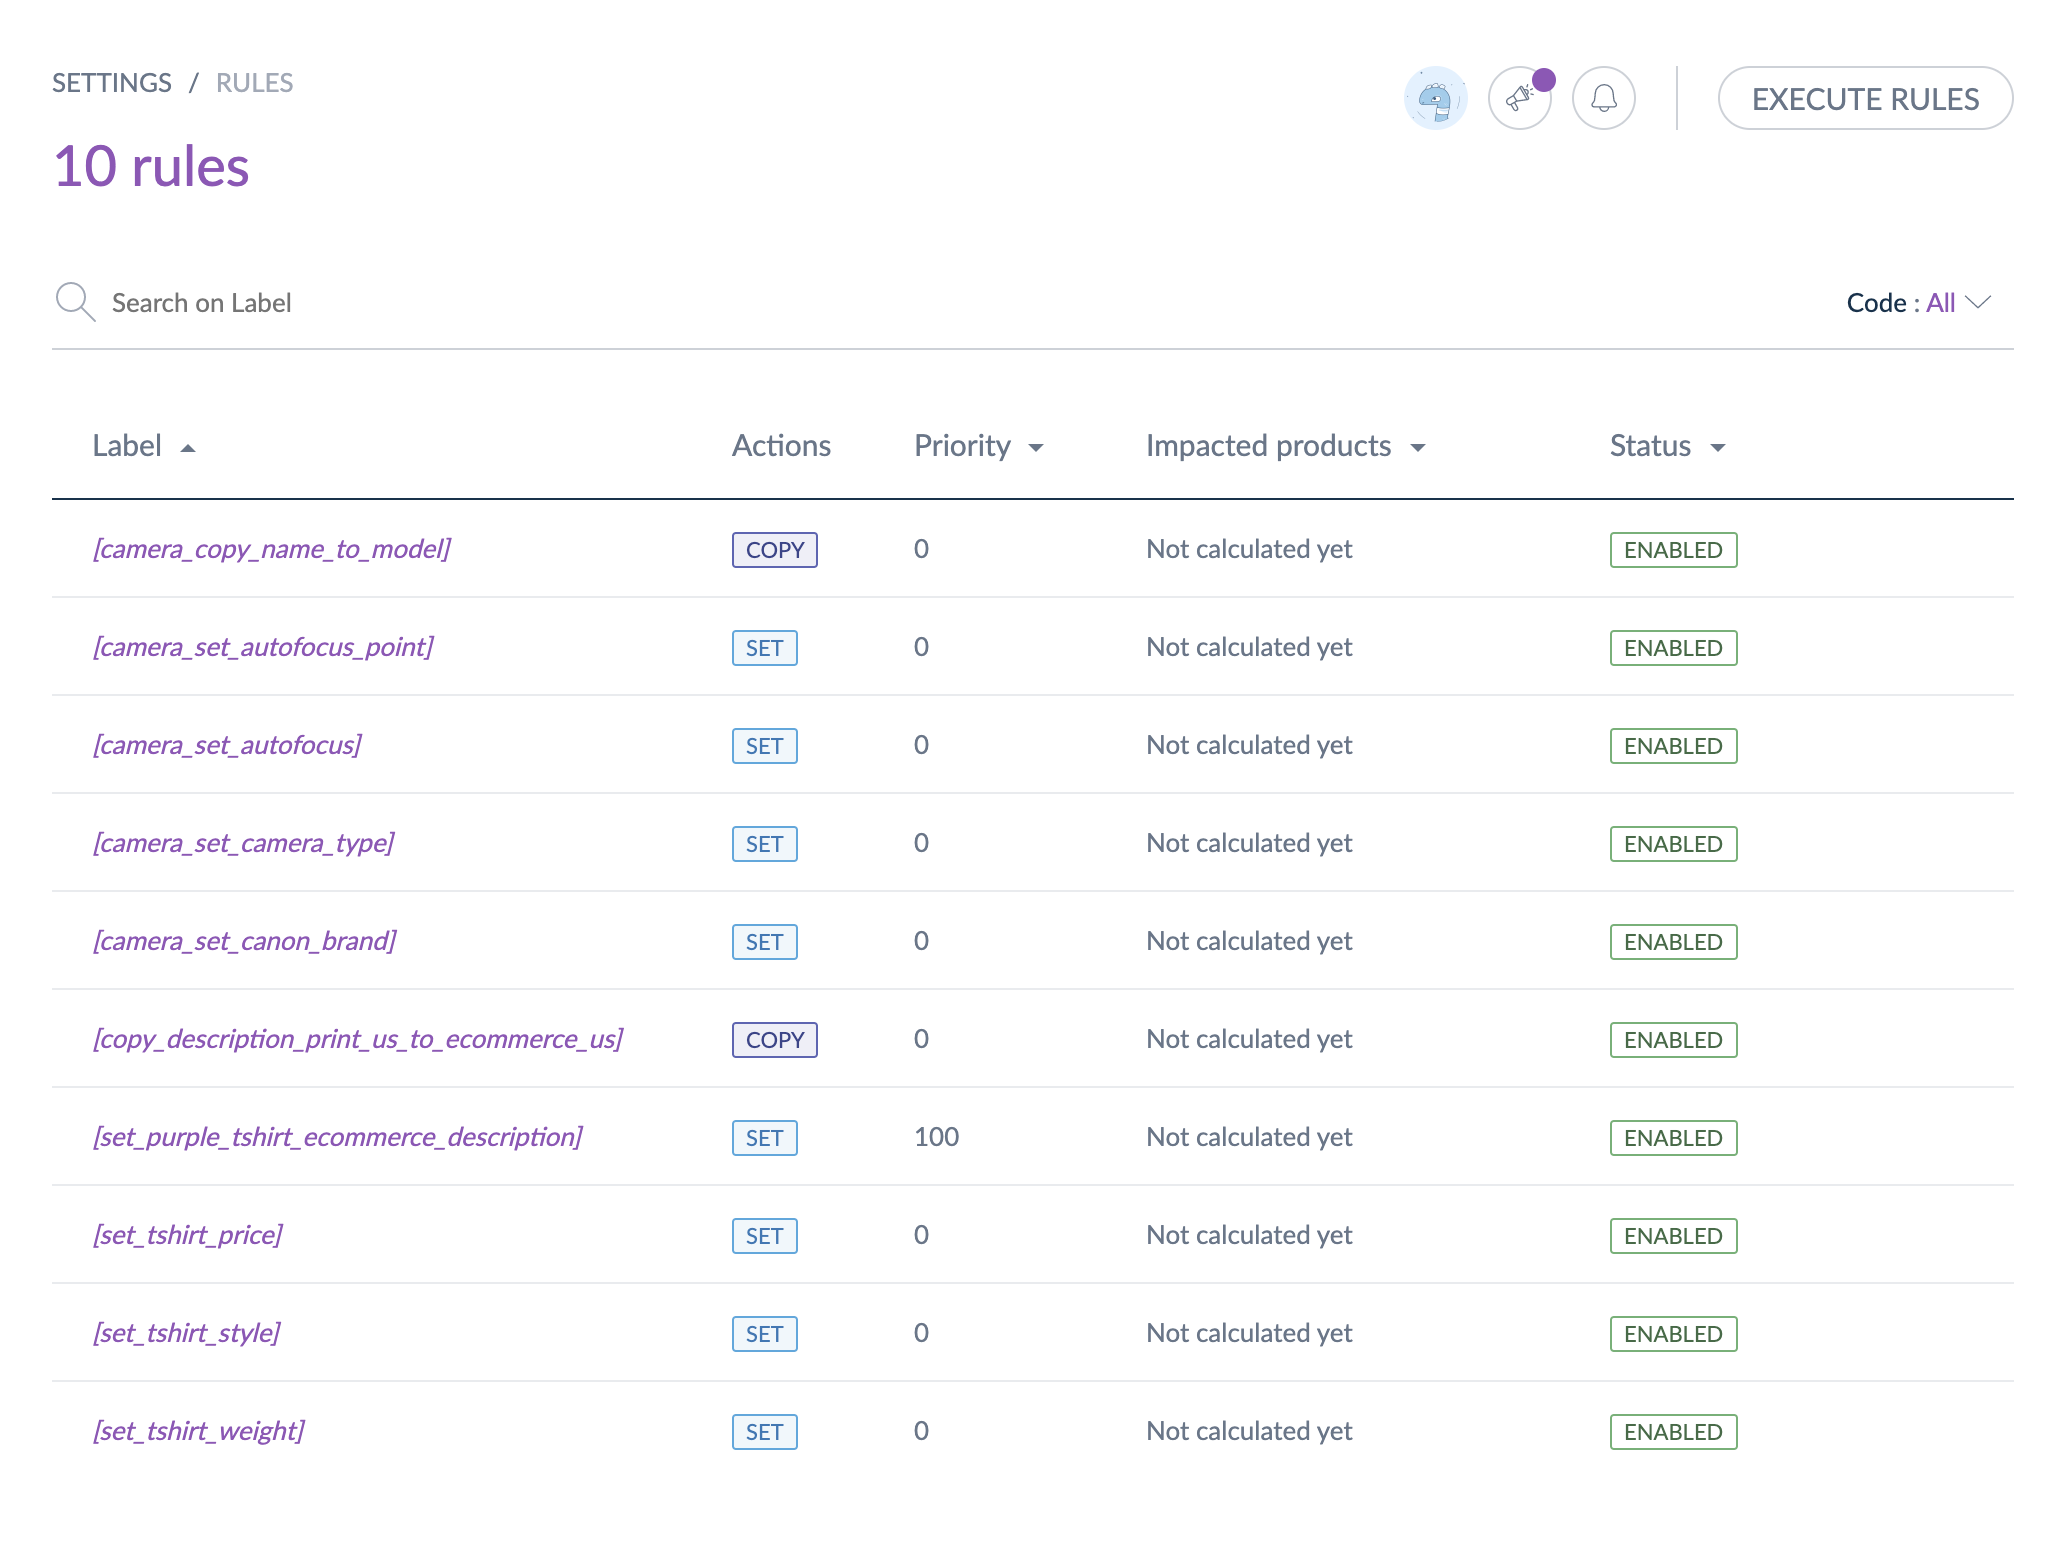
The Rules screen is composed of several information:
- Rule's code: the name of the rule imported
- Rule's condition(s): the conditions to apply the rule, starting with “If”
- Rule’s action(s): the actions to do if the product matches the condition(s), starting with “Then”
- A number of affected products (if calculated): the number of products impacted by the rule (this calculation can be run from the Settings/Rules page; see the dedicated section Calculate the number of affected products for rules.
The rules must be read from left to right: conditions and then actions.
Like on the Settings/Rules page, you can execute or delete rules from the Rules tab.
All active rules can be seen on the Settings/Rules page. See our Get started with the rules engine to learn everything about rules.
Check the attribute history
All changes made on attributes are saved and visible under the attribute’s history, for example: a label change, a property change, etc.
For each change, an attribute version is created. The following information is tracked down for each version:
- The person or system that made the changes
- The date and time (up to seconds) of the changes
- The old value and the new value of each modified field
To view the attribute versions:
- Open and edit the attribute page
- Click on the History tab and the list of version will be displayed
Unlike products you cannot restore or revert an attribute’s version.
Make Attribute Scopable / Localizable
Previously, to change an attribute property (to make it scopable and/or localizable), you would have to go through a tedious workaround by exporting product information, families and/or family variants, deleting the attribute, recreating another attribute, and reimporting the information.
We've now introduced greater flexibility for our users by enabling direct changes to attribute properties. You can now seamlessly convert non-scopable attributes to scopable and non-localizable attributes to localizable (and vice versa), without product data loss by choosing which scopes or locales the data should be copied to.
Permissions
As this change can have impacts on your catalog, a new permission has been added, under System > Roles > Attributes > Edit scopable and localizable properties. You need to tick the box in order to have access to the migration process.

Process
Then, to make these changes, navigate to the Settings of your PIM, and open the Attributes section.
Select the attribute you wish to modify and access the Attribute Setup subsection to update its properties.
Depending on your use case, select the ‘Make scopable’ / ‘Make non scopable’ / ‘Make localizable’ or ‘Make non localizable’ button to start the migration.
The process might take time depending on the number of impacted products, product models and proposals that contain this attribute.

Only one migration can be done at the same time, directly in the User Interface: if you would like to change several attribute properties you will need to wait until the former migration has ended.
Performing this change in bulk is currently under study.
The migration can take some time depending on the number of impacted products, product models and proposals that contain this attribute.
Updating the attribute value in products is still possible when there is an undergoing migration.
The migration might affect your PIM configurations (catalog, apps, rules, export profiles, processes, etc.) as well as your upstream and downstream integrations (e.g., ERP, e-commerce). Be sure to adjust them as needed after the migration.
Limitations
Please note that this change of property cannot be made, if the attribute is:
- a price, a table or an identifier attribute
- unique
- set as the main image
- set as the main label
- set as a variant axis
- in a triggering attribute of an active dependency
- attribute is mandatory
If you want to modify the properties for these specific cases, follow the manual steps detailed in either the "Delete an attribute without keeping the data" or "Delete an attribute and keep the related data" section, depending on whether you wish to retain the existing data or not.
Change attribute types
Previously, to change an attribute type, you would have to go through a tedious workaround by exporting product information, families and/or family variants, deleting the attribute, recreating another attribute, and reimporting the information.
We've now introduced greater flexibility for our users by enabling direct changes to attribute types.
This new feature comes with important warnings and limitations that can impact your upstream and downstream systems. Make sure you have a read at them before undertaking any changes to your data model.
Here is an overview of the possible attribute type changes as of today:
-
Text :
- → Text Area
-
Number :
- → Text
- → Text Area
-
Identifier :
- → Text : The attribute will be migrated to a text type with the 'unique' property enabled
-
Simple Select :
- → Text : The option code will be copied into a text, and all options will be deleted
- → Text Area : The option code will be copied into a text area, and all options will be deleted
- → Multiselect
- → Reference entity Simple Link : All options will be converted into records, and the name of the targeted Reference Entity will be requested in the migration modal
- → Reference entity Multi Link : All options will be converted into records, and the name of the targeted Reference Entity will be requested in the migration modal
-
Multiselect :
- → Reference entity Multi Link : All options will be transformed into records, the name of the targeted Reference Entity will be requested in the migration migration screen
-
Reference entity Simple :
- → Reference entity Multi Link

Permissions
This operation can have great impacts on your overall catalog structure, on the product data and on the upstream and downstream systems connected to the PIM.
This is why we introduced a dedicated ACL permission to give access to that feature for specific roles such as Administrator or Catalog managers.
This new permission has been added, under;System > Roles > Attributes > Edit type properties.
You need to tick the box in order to have access to the migration process.
.png)
.png)
Warnings and limitations
Only one migration can be done at the same time, directly in the User Interface: if you would like to change several attribute properties you will need to wait until the former migration has ended.
During attribute migration it is not possible to update:
- Another properties of this attribute
- The family, for the properties :
-
attribute as main labelif the target type is incompatible -
variant axes
-
The migration can take some time depending on the number of impacted products, product models and proposals that contain this attribute.
Updating the attribute value in products is still possible when there is an undergoing migration.
Versioning
The versioning of the attribute will be updated to indicate that it has been modified.
Additionally, all products with values for the attribute being migrated will have a new history entry, and their update date will be modified.
However, the impact on the versioning of the product model is not currently supported.
Apps and integrations
The migration might affect your PIM configurations (workflows, catalog, apps, rules, export profiles, processes, etc.) as well as your upstream and downstream integrations (e.g., ERP, e-commerce).
Make sure to adjust them as needed after the migration so these features work as expected.
During the migration all catalogs referencing this attribute will be deactivated.
A manual reactivation has to be performed to enable those catalogs again.
Non-eligible attributes
Please note that this change of property cannot be made, if the attribute is:
- Set as the main image
- Set as the main label
- Set as a variant axis
- In a triggering attribute or as a dependent attribute in an active dependency
- Is unique (except if it is an identifier attribute type, then it’s still possible to migrate into another type while keeping the unique property)
- A main identifier
- Mandatory
- If a
validation ruleis not compatible with the target type
If you still want to modify the type for these specific cases, follow the manual steps detailed in either the "Delete an attribute without keeping the data" or "Delete an attribute and keep the related data" section, depending on whether you wish to retain the existing data or not.
Delete an attribute
There are two ways to remove an attribute:
- Through the attribute edit form
- Through the delete shortcut in the grid
All the product values set for this attribute will be cleared when you remove an attribute.
If you want to keep them, please read the dedicated section.
If you cannot access the attribute page or if you cannot add/delete an attribute, it is probably because you do not have permission to.
Please refer to Manage your user roles to learn about roles.
If you are using an Akeneo connector, make sure your data mapping is updated in the connector to maintain accurate data consistency.
Delete an attribute without keeping the related data
Through the attribute edit form
- Go to Settings / Attributes
- Select the attribute you want to delete
- Click on ... for other actions and then Delete on the top right corner
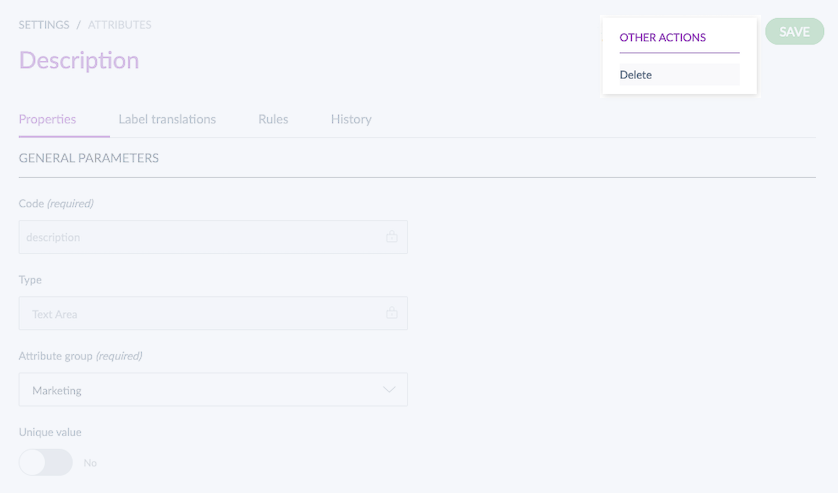
- Confirm the action in the pop in
Through the delete shortcut in the grid
- Go to Settings / Attributes
- Select the attribute you want to remove from the attribute grid
- Place your mouse over the line of the attribute in the grid, a bin icon appears

- Click on it
- Confirm the action in the pop in
The attribute and all its relevant information will be deleted in Akeneo PIM. Once you have confirmed the action, it cannot be reverted.
Delete an attribute and keep the related data
If you need to change an attribute property (to make it scopable and/or localizable), you can perform this change using our new unitary actions in the PIM (accessible under this part of the article).
You will still need to perform the detailed list of actions here below to be able to change properties for attributes that are not compatible with this change (full list here).
Before doing so, if you plan to create another attribute using the same code, and if you want to keep the data already input for this attribute, you will need to:
- Export the product information
- Export the families and/or family variants
- Delete the attribute
- Create a new attribute
- Import back the families and/or family variants
- Import the product information back
This walkthrough will help you go through the different steps.
First step: export the product information
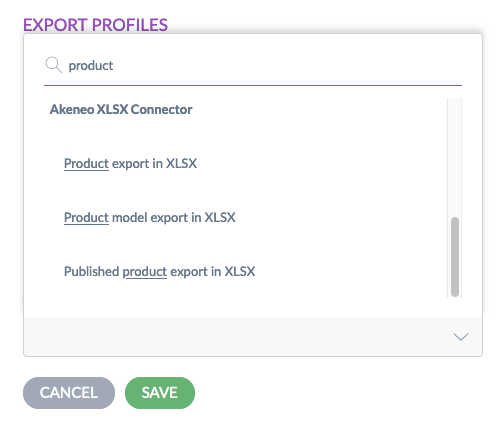
Before you begin, make sure you know how to configure a new export profile. If you need more help, please read How to create a new product export profile.
- Go to Exports and click on Create export profile
- Define a code and a label
- Select the job in the job field, whether you want to export products or product models (if you need to export both, you will need to create an export profile for each)
- In Content, filter the products by clicking on Add attribute and select the attribute you want to delete
- Set the value to Is not empty
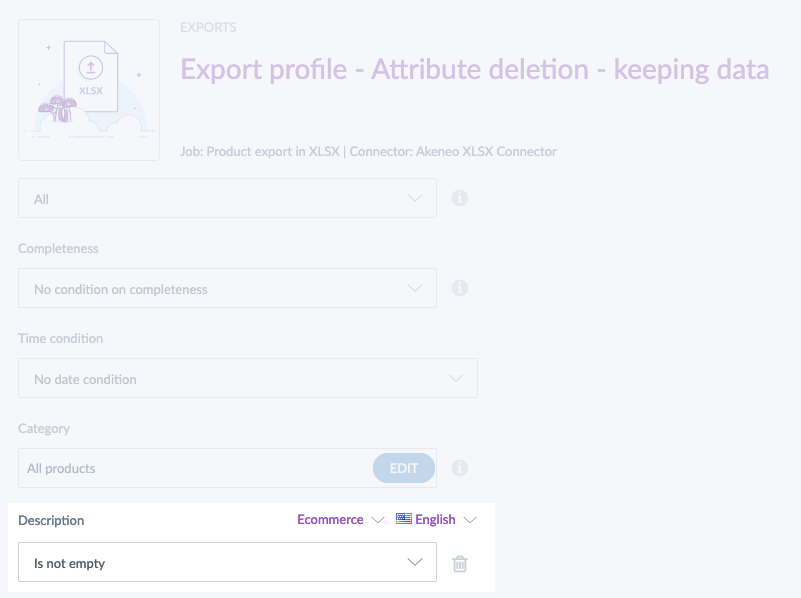
- In Global settings, make sure the option Export with labels is not activated
- Check the different other options (channel, locales, format...) to refine your export and click on Save
- Click on Export now
If you plan to delete a simple or multi-select attribute, and if you want to keep their data, you will also need to export the attribute options through the Akeneo default export profile named Demo XLSX attribute option export. If this profile is unavailable in your PIM, please go back to the third step, and instead of selecting the product or the product model job, select the attribute options export.
Second step: export the families and/or family variants
- Go to Exports and click on Create export profile
- Define a code and a label
- Select the job in the job field, whether you want to export the families or the family variants
- Click on Save and on Export now
Third step: delete the attribute
To delete the attribute, you have two options:
- From the attribute edit form
- From the delete shortcut in the grid
Fourth step: create the new attribute
To complete this step, please read how to create an attribute. Here you can create the new attribute using the same code used for the attribute you deleted.
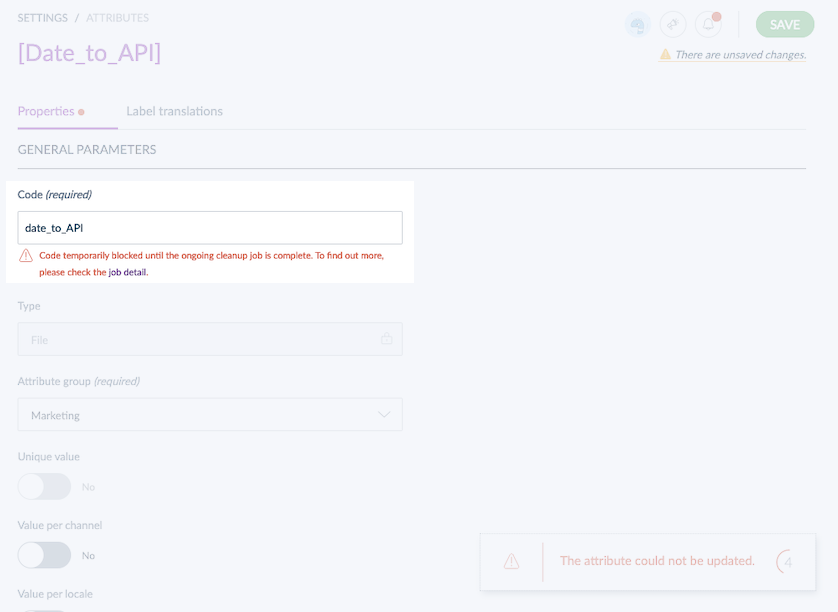
Once you've deleted an attribute, a process starts to clear all product values set for this attribute. While this process runs, you cannot create another attribute with the same code.
Fifth step: import back the families and/or family variants
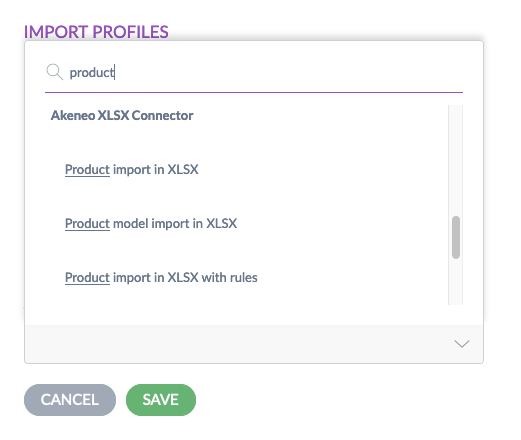
- Go to Imports and click on Create import profile
- Define a code and a label
- Select the job in the job field, whether you want to import the families or the family variants
- Drop your file and click on Upload and import now
Sixth step: Import the product information back
- Go to Imports and click on Create import profile
- Define a code and a label
- Select the job in the job field, whether you want to import products, product models and/or attribute options (if you need to export all of them, you will need to create an import profile for each)
- Check the different options (format, enable product...) to refine your import and click on Save
- Drop your file and click on Upload and import now
This walkthrough is now complete, and you should have kept your data. Congratulations! 😉
Attribute Dependencies for Products and Product Models
You can now create dependencies that will serve as additional rules that attributes must comply with. This new feature will enable you to control attribute visibility based on conditional logic, but also to restrict or customize allowed attribute values based on specific condition.
Find our more on our article dedicated to Attribute Dependencies!