


Overview
This feature allows you to automate your product imports and/or exports and is available only for our Enterprise Edition or Growth Edition users. You will be able to:
- Connect your product imports/exports to remote storage (Amazon S3, Microsoft Azure, Google Cloud Storage, or any SFTP server).
- Automate them by scheduling their executions.
Connect your import/export profile to a remote storage
To connect your product import/export to a remote storage:
- Go to Imports or Exports
- Select the profile you would like to automate
- Click Edit in the top right corner
- Click Properties
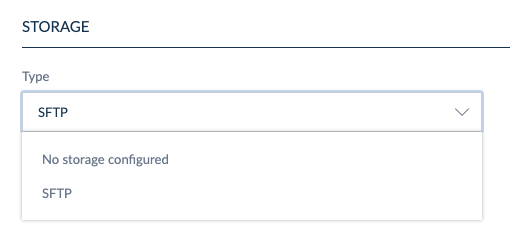
- Under "Connection", select any choice from the dropdown list. For instance: SFTP
- Fill in all mandatory fields: Filepath, Compress files into ZIP, Port, Login and Password

- Click Save in the top right corner of the screen
- If you want to automate your product exports, we support the patterns %job_label% & %datetime%. You can combine them to create a filepath like: "/myfolder1/mysubfolder2/export_%job_label%_%datetime%.xlsx".
- Both relative (ex. “mysubfolder/myexport.xlsx”) and absolute filepaths (ex. "/myfolder/mysubfolder/export.xlsx") are supported
- If you want to authenticate your SFTP server, paste its fingerprint in the optional field Host fingerprint. The accepted format of the fingerprint depends on the server's public key format: MD5 for ssh-rsa signatures, SHA-512 for others.
It is important to note that the scheduling does not support versioning. This means that the exported file will not have a different name each time it is generated and will overwrite the existing file on the server unless a specific pattern is specified in the file name configuration, as explained in the callout above. To avoid accidental data loss or overwriting, we recommend setting up a naming pattern that includes dynamic elements such as %datetime%.
- You can only import media files with a .ZIP archive. Your spreadsheet should contain a filepath column.
- If you export media files to a remote server, it will create a folder with the spreadsheet and the related media files. You can also decide to compress all the files into a single .ZIP archive.
Please note that if you're importing from a remote server, your configured host will be displayed.
Connect to an SFTP remote server
To connect your product import/export to an SFTP remote storage:
- Go to Imports or Exports
- Select the profile you would like to automate
- Click Edit in the top right corner
- Click Properties
- Under "Type", select SFTP

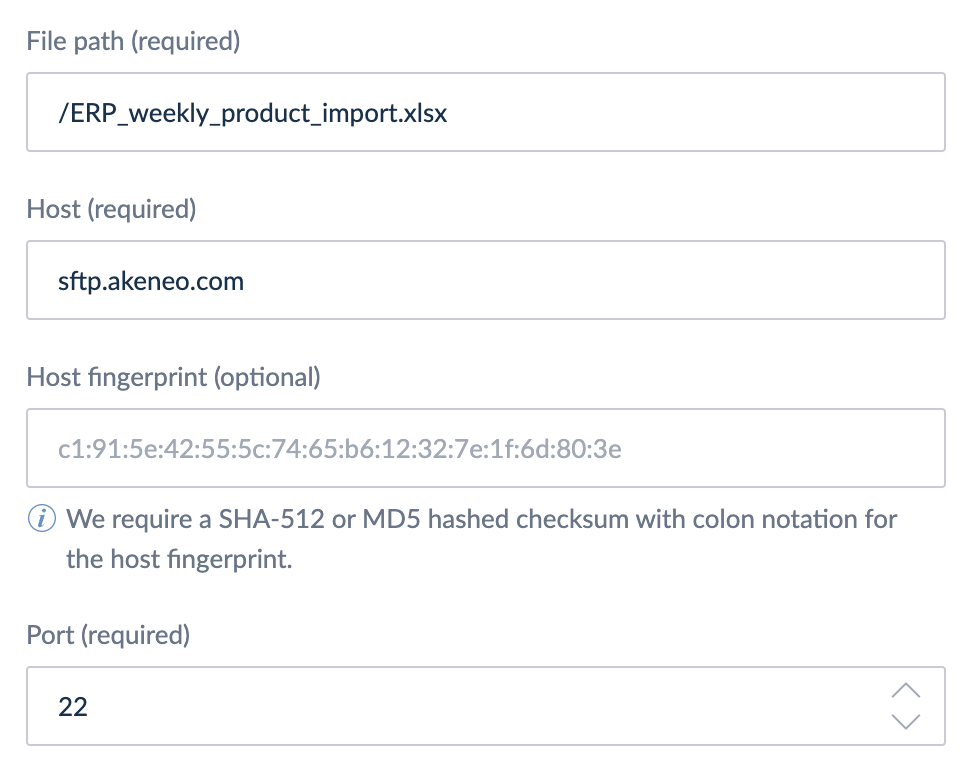
- Fill in all mandatory fields: Filepath, Host & Port
- Select the authentication method Login & Password or Private key
* If you're using Login & Password, enter a login and a password, then proceed to step
* If you're using Private key, the PIM will provide you a public key that you need to install on your SFTP server. In that case, ask your PIM administrator. Then proceed to step 8.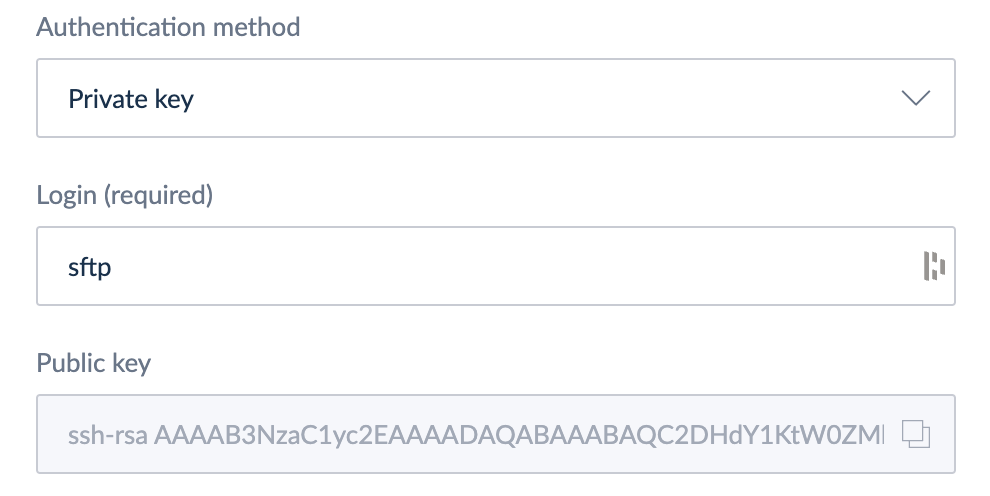
- Click Save in the top right corner of the screen
If you want to authenticate your SFTP server, you can paste its fingerprint in the optional field Host fingerprint.
The accepted format of the fingerprint depends on the format of the server's public key: MD5 for ssh-rsa signatures, SHA-512 for others.
Connect to Amazon S3
To connect your product import/export to Amazon S3:
- Go to Imports or Exports
- Select the profile you would like to automate
- Click Edit in the top right corner
- Click Properties
- Under "Type", select Amazon S3
- Fill in all mandatory fields: Filepath, Region, Bucket name, Key, and Secret
- Click Save in the top right corner of the screen
Permissions for Amazon S3
The following permissions need to be granted depending on these needs:
- To check the connection settings:
s3:ListBucket- To import files from Amazon S3:
s3:GetObject- To export files to Amazon S3:
s3:ListBucket
s3:PutObject
s3:GetObject
s3:GetObjectAcl
s3:DeleteObject
Connect to Microsoft Azure
To connect your product import/export to Microsoft Azure:
- Go to Imports or Exports
- Select the profile you would like to automate
- Click Edit in the top right corner
- Click Properties
- Under "Type", select Microsoft Azure
- Fill in all mandatory fields: Filepath, Connection string, and Container name
- Click Save in the top right corner of the screen
Permissions for Microsoft Azure
The following permissions need to be granted for Azure SAS (Shared Access Signature):
- To check the connection settings:
Allowed services: Blob
Allowed resource types: Container
Allowed permissions: Read- To import files from Azure:
Allowed services: Blob
Allowed resource types: Object
Allowed permissions: Read- To export files to Azure:
Allowed services: Blob
Allowed resource types: Object
Allowed permissions: Read, Write, Delete
Connect to Google Cloud Storage
To connect your product import/export to Google Cloud Storage:
- Go to Imports or Exports
- Select the profile you would like to automate
- Click Edit in the top right corner
- Click Properties
- Under "Type", select Google Cloud Storage
- Fill in all mandatory fields: Filepath, Project ID, Service account, and Bucket
The Service account is JSON information needed for the service account field that can only be retrieved at the key creation in the Google Cloud Console interface. Please paste the whole JSON key.
Note that once created, it cannot be downloaded afterward. If lost, a new key must be created directly in the Google Cloud Console. - Click Save in the top right corner of the screen
Permissions for GCS (service account)
The following permissions need to be granted depending on these needs:
- To check the connection settings:
storage.buckets.get- To import files from GCS:
storage.objects.get- To export files to GCS:
storage.objects.create
storage.objects.delete
storage.objects.get
Schedule and automate your import/export profile
To automatically execute an import/export profile:
- Go to Imports or Exports
- Select the profile you would like to automate
- Click Edit in the top right corner
- Click Properties
- Under "Automation", switch "Enable scheduling" button to Yes
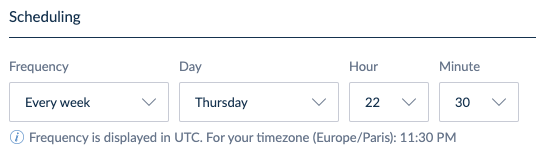
- Under "Scheduling", select your preferred frequency of execution
- Then, select the user group to apply the related permissions to this automated job can apply (EE only)

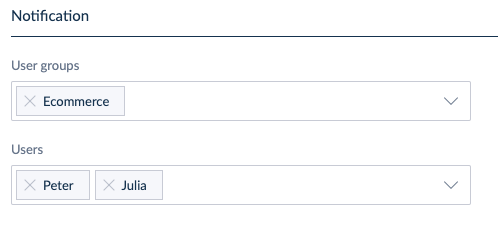
- Finally, select the user groups and/or users to be notified when a job is completed with success, has failed, or can't even be launched. One e-mail and one in-app notification will be sent for each job status.
- Click Save in the top right corner of the screen
- The minimum frequency of execution is set to every 2 hours.
- Frequencies executed multiple times a day start at midnight (UTC).
- Frequencies are displayed in UTC.
- To set up custom scheduling (e.g., at 11:15 PM on the last Friday of every month), select the ‘Custom’ frequency option and configure a cron job. You can use an external website to help generate the appropriate cron expression. Please note that there may be a delay of up to 10 minutes between your scheduled time and when the task actually executes.
- A system user will execute automated jobs, so if you want to see the job in the Process Tracker, please check the permission View all jobs in process tracker under the user roles' permissions.
- To automate an import job, you must configure a remote storage. If this is not done, scheduled exports will still trigger, but the file will not be sent to remote storage; instead, it will be available for download.
- Queued jobs might take a few minutes to start. If you have scheduled a frequency and expect your job to start precisely on time, it may take slightly longer. This is normal, so don’t worry.
- Additionally, please note that if a scheduled import job is already running and another instance of the same job is scheduled to start before the first one finishes, the new job will not be started. This occurrence will be marked as FAILED in the process tracker, accompanied by a dedicated error message.
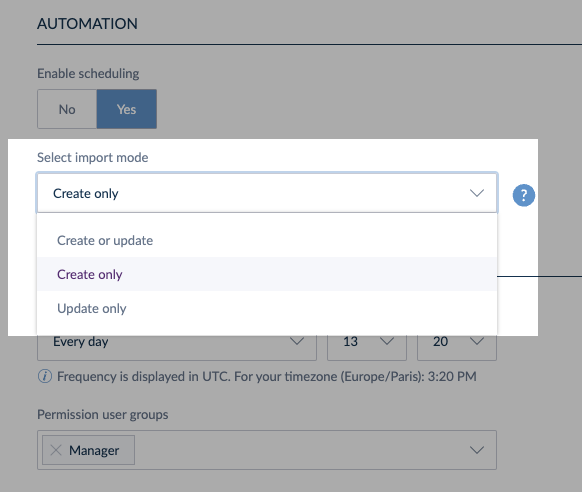
Select your import mode
For users seeking greater control over their product data imports, an import mode selection is available. It offers increased flexibility with three import modes:
- Create or update: allows updating existing products and creating new ones.
- Create only: allows creating new products while skipping updates.
- Update only: allows updating existing products without creating new ones.
The availability of these three options depends on the user role permissions. For instance, if a user does not have permission to create new products, the Create only option will not be available in the import mode selection, even though the job will be executed by the PIM system and not the user.
This ensures that users only see the options relevant to their access level, maintaining security and control over product data management. Read more about import mode here.
If the user who created the job loses certain permissions (e.g., the ability to Create products), they may not see the original import mode they selected when revisiting the job.
For instance, if the job was initially set to Create only, and the user’s permissions change, this option will be grayed out. The next available option, such as Update only, will be displayed.
If the user clicks Save in this state, the job will be updated with the new import mode, potentially altering its behavior significantly.
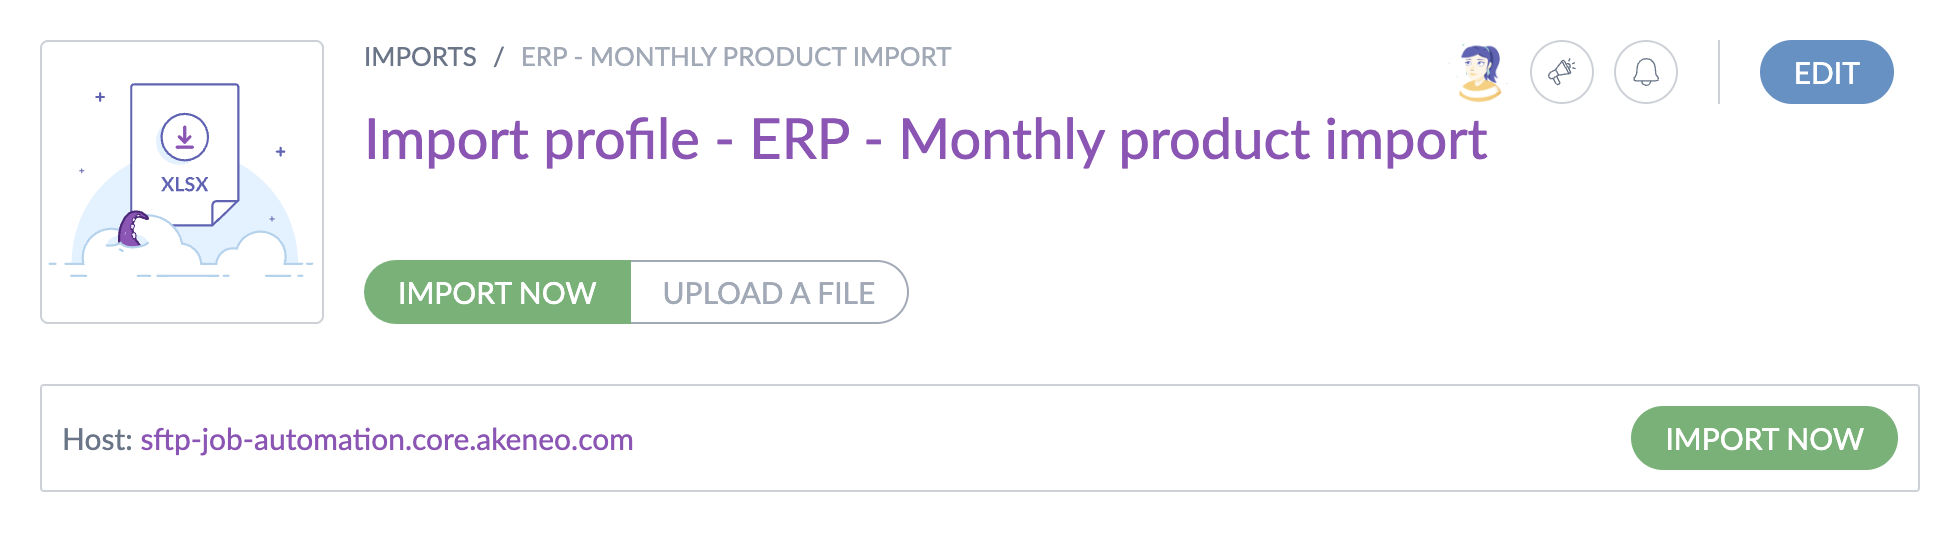
Manually execute an import/export profile connected to a remote storage
Once you have connected your import/export profile to a remote server, go back to the root of your profile by clicking on its name in the breadcrumb, and click on Import now to import from a remote server or Export now to export to a remote server.
Test connection settings
You can use the Test connection settings button to check your settings and ensure your connection is valid.This button serves to verify the following:
- Correctness of credentials: it checks if the entered credentials are correct.
- Server reachability: it ensures that the PIM can successfully reach the specified server.
Please note that while the Test connection settings button checks credentials and server accessibility, it does not check the server's permissions. This means it does not confirm whether the server has the appropriate permissions set to read from or write to the specified directories. Users must ensure that these permissions are correctly configured on the server side to allow proper file operation.