


Overview
Tailored Imports is a new import profile available to all SaaS users (Enterprise and Growth Edition). It helps you import your product information in an XLSX or CSV file with different structures than the PIM usually accepts.
For instance, let's assume your supplier or brand sends you their product information in different XLSX or CSV files, each with different structures:
- Supplier A sends a file with columns named: "Product ID", "Model Name", "Online description", and "Color".
- Brand B sends a file with columns named: "Gencod", "Web title", "Long label", "Web description", and "Supplied accessories".
Without Tailored Import, you must manually modify your spreadsheet to conform with a regular import profile. This includes time spent converting attributes from label to code, transforming labels, converting measurements, and many more manual operations.
Thanks to Tailored Import, you can configure all your needs (mapping, operations) via an import and use it as often as necessary. You no longer need to manually edit your CSV & XLSX files when importing product information.
🎓 Put your knowledge into Practice
Please watch our dedicated training to learn more about Tailored Import and how to use this feature.
Course time: 10 min
Currently, the following attribute types aren’t available to be mapped: Table, File & Image. In addition, the following system properties aren't available to be mapped: Parent, Family variant, Groups & Associations. Finally, please note we don't currently support media files' import for now.
Create a Tailored Import profile
To create a new import profile:
- Go to Imports
- Click on Create import profile
- Type a unique import code and a label, then select the job Tailored product import
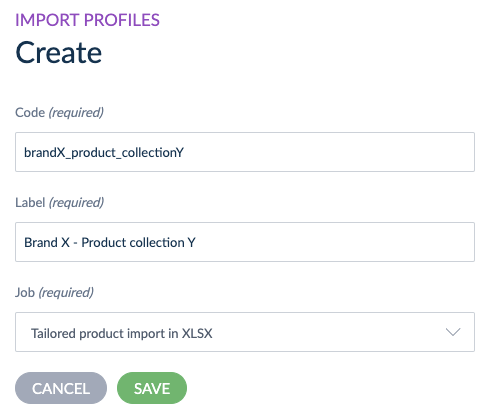
- Save your new import profile
Edit a Tailored Import profile
Once you've created your Tailored Import profile, or if you want to edit an existing one:
- Go to Imports
- Click on the Tailored Import profile that you want to edit
- Click on Edit located in the top right corner of the screen
To modify your profile structure (e.g., add or rename columns):
- Navigate to the Import Structure tab and click Update structure.
- Upload a new file containing your desired structural changes.
- Apply the structure updates, which will incorporate the changes from the new file.
Note: Columns with the same name will remain mapped; only their column letter might change. If a column name has changed, you will need to map it to the relevant PIM property. Importantly, your existing configurations for both re-mapped columns and all other columns will be preserved.
Discover the different tabs of this profile
A Tailored Import profile displays the following tabs:
- Properties: To name your import profile.
- Permissions: To set permissions to allow specific user groups to execute or edit your import profile (Enterprise Edition only).
- Global settings: To define the behavior in case an error occurs, you can skip the products (the rows won't be imported) or skip the values only (the faulty cells won't be imported). Please note that in case the issue is not caused by Tailored Import (due to a wrong regex, for instance), whole rows could be skipped, even though "Skip values" is selected.
- Import structure: To create your import structure (read how to define your import structure).
- History: To display the modifications made by any user on your export profile.
Define your import structure
In the Import structure tab, you can define the structure of your file so that it matches all the future files you will import. To do that, on the one hand, you will need to import a file to define the structure and then create your mappings and operations by adding PIM attributes and linking them to your file columns. On the other hand, after this initial configuration, you can directly import all the product files that share the same structure.
Please note that once you define and confirm the structure of your import profile, you won't be able to change it. For instance, if the next file you want to import has a different column order or an extra column, you won't be able to use this import profile and will have to create another one.
To do this, please follow the steps below:
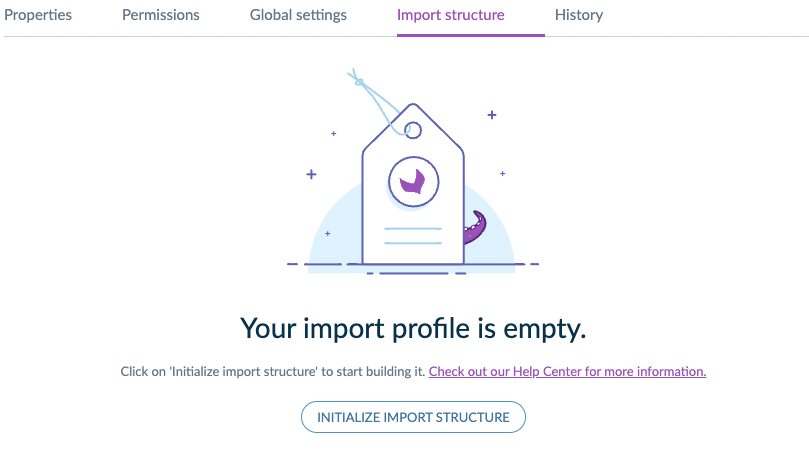
- Under Import structure tab, click on Initialize import structure
- Now, upload the file you need to import. This step will help the PIM to assess the structure of your file. Note that the products in the uploaded file won't be imported at this step.
Please note that an error message will be displayed if your file contains an incorrect function in a cell, and you won't be able to initialize its structure.
- Once uploaded, you'll have to set different fields:
For XLSX files:
The appropriate sheet in your spreadsheet.
The row where the header is located.
The row where the first product is displayed.
The column where the first product data is displayed.
For CSV files:
The format of the field delimiter.
The format of the field enclosure.
- Click on Confirm
- Select an identifier as an Import ID
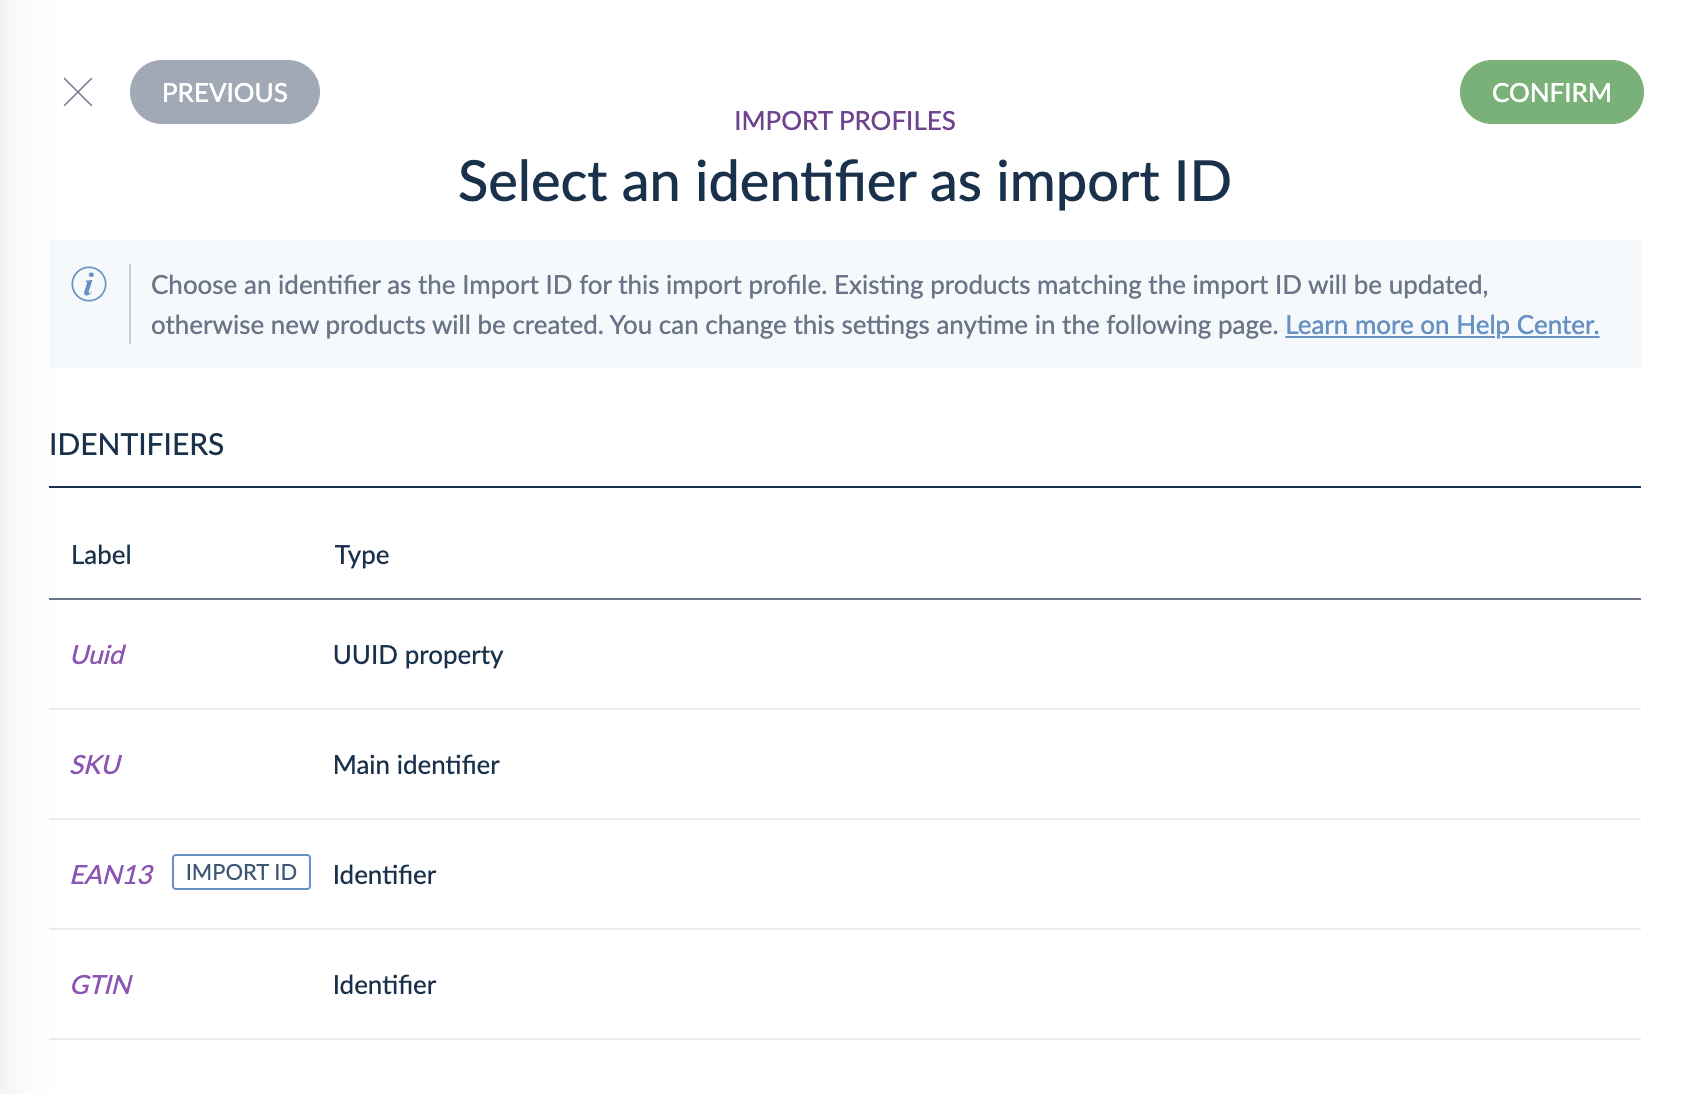
You can define which identifier attribute will be used as the mapping key for Tailored Import profiles. If the products in your PIM match those from your file, they will be updated; if they don't, they will be created.
For example, suppose you set the EAN13 as a main identifier in your PIM. However, your supplier, Zaro, sends you new products with GTIN identifiers. You decide to map the GTIN column to your GTIN identifier attribute, and then you set the GTIN as the Import ID. This way, when the GTIN identifiers in the file match the GTIN identifiers in your PIM, the products will be updated, and when they don't match, the products will be created. All this even though you set the EAN13 as a main identifier in your PIM.
- Click on Confirm
Start mapping your columns to your attributes
NEW - Additional mapping capability using AI
Save time with our new AI-powered mapping! Just click ‘Generate Mapping’ and let the AI match your file columns to PIM attributes for you.
The AI intelligently fills in the gaps: it only creates mappings for unassigned attributes, ensuring your existing manual selections remain untouched.
Please note that this action can take a few minutes depending on the size of the file and the number of attributes in your PIM.

Mapping your columns manually is still possible with the process explained below:
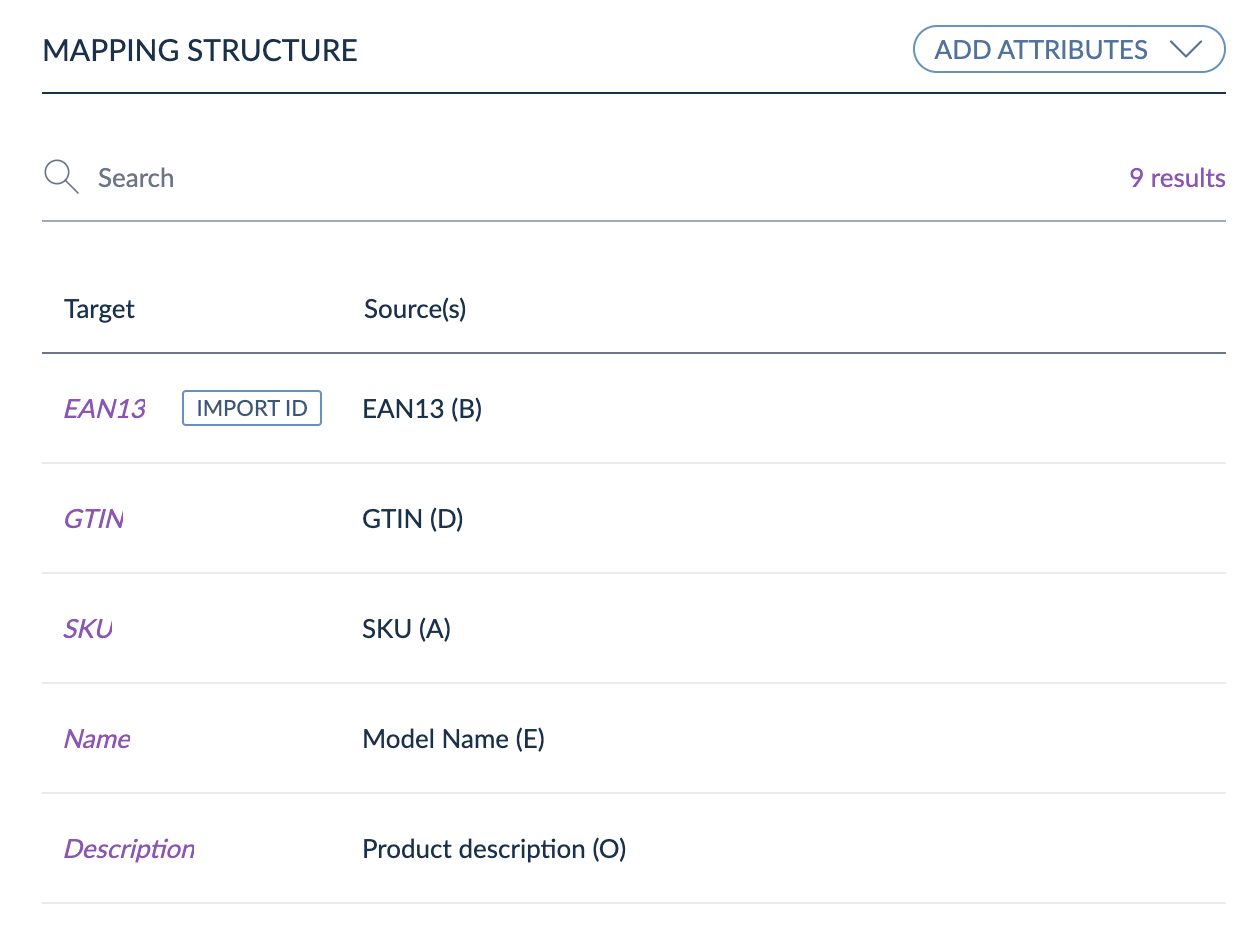
- Now it's time to map your file's relevant information to the PIM. To do that, click on Add attribute and select an attribute from the PIM you would like to use, for instance, the "Name" attribute.
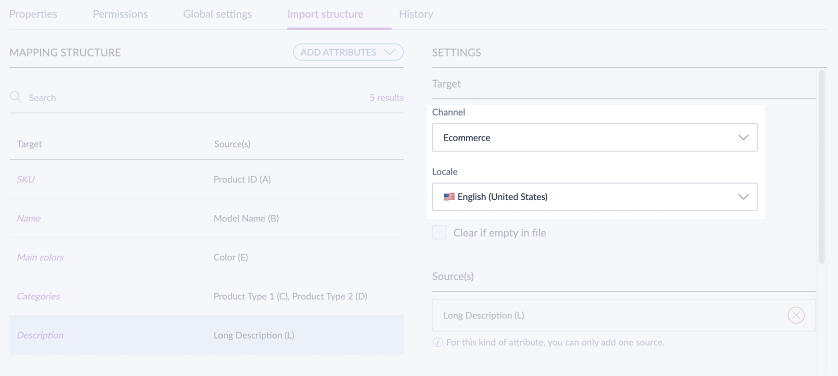
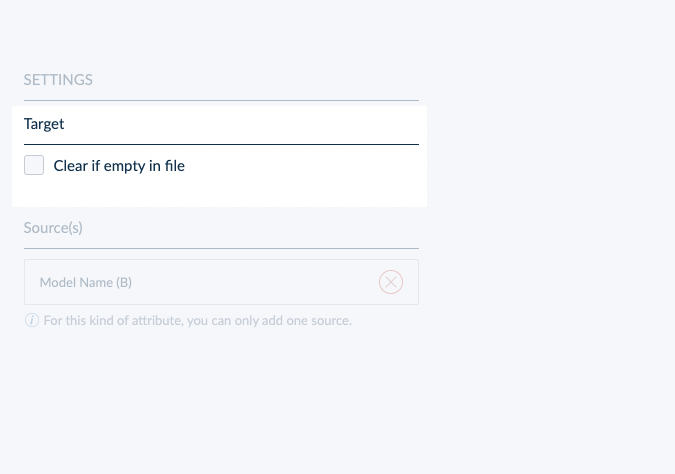
- Then, you'll see the right panel of this attribute displays three different sections: Target, Source(s), and Operation(s).
- The target section will display different settings depending on the attribute you selected in the step above. Read more about conditional settings.
- The Source(s) section displays all the columns in your uploaded spreadsheet.
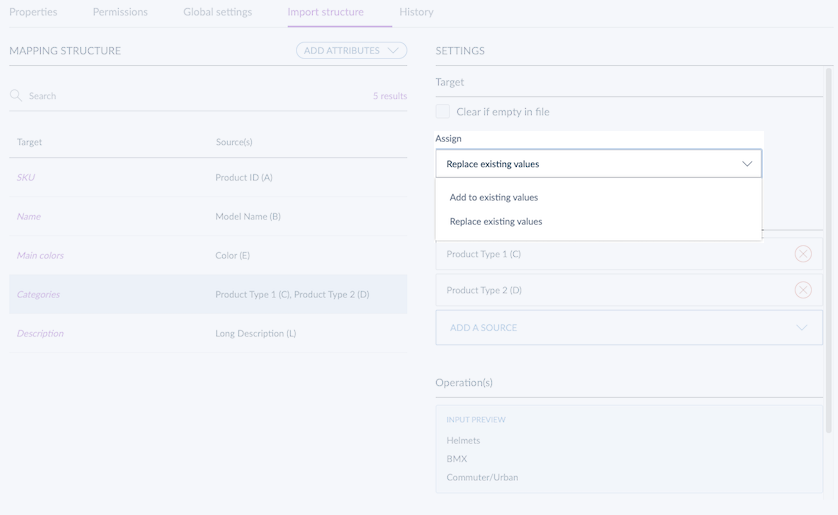
- The Operation(s) section will display one or more operation(s) to transform your data, depending on your selected target.
- Click on Add a source and select a source listed from your file. The letter between brackets indicates the column in your spreadsheet where this source is located. For instance, choose the one that matches the name of your product, e.g., "Web title".
- Look at the "Operation(s)" section, where the first data samples are displayed as a preview. This preview will display random data samples from the uploaded file enabling you to ensure confirmation of the sources that you've added to this target.
- If required, you can add operations under the data samples. Click on Add operation and select the one you'd like. Please note that the operations are available depending on the attribute selected as a target but also depending on previously added operations.
- At the end of the operations, an output preview of the sample data will be shown, with changes based on the operations you've added.
- Once you're done, click on Save in the top right corner. You're now ready to import your products.
Asset mapping capability
From now on, you are able to map assets in addition to product attributes. If your uploaded file contained media links, you can use our powerful new Asset Mapping to convert those entities into PIM 'Assets'. This new addition is divided into two panels.

-
Asset Mapping Structure (Left panel):
- In the left panel, the ‘Asset mapping structure’ selects the Asset Attribute (the target) that will link the product to the corresponding assets.
- You can select the same Asset Attribute multiple times, enabling a single product attribute to link to various assets.
Scopable and localized attributes are fully supported in the Asset Mapping structure.
-
Asset Configuration (Right panel):
-
Asset code configuration: Define the strategy for how the final asset code will be generated. You can choose between two strategies.
- Product identifier + suffix : The asset code will use the product’s main identifier, or the import ID if the main identifier is empty. A suffix is optional.
- Column value : The asset code will be the value of the column selected.
-
Attribute mappings: Map the asset family's codes to specific columns in your source file. If you already have a column with the asset code in your uploaded file(s), this will ensure that assets are created with the necessary information.
-
Asset code configuration: Define the strategy for how the final asset code will be generated. You can choose between two strategies.
If you need to map several URLs from your input files in a single asset family, you can create different mappings for the same asset family.
Reference Entities Records Mapping capability
You can now define how new Reference Entities records will be created and linked to your products during the import process.
First, select the relevant Reference Entity attribute, then specify how the source file data should populate each record field.

-
Record Mapping Structure (Left panel):
- In the left panel, the ‘Record mapping structure’ selects the Reference Entity Attribute (the target) that will link the product to the corresponding records.
- You can select the same Reference Entity Attribute multiple times, enabling a single product attribute to link to various records.
Scopable and localized attributes are fully supported in the Reference Entities Records Mapping structure.
-
Record Configuration (Right panel):
-
Record code configuration: Define the strategy for how the final record code will be generated. You can choose between two strategies.
- Product identifier + suffix : The record code will use the product’s main identifier, or the import ID if the main identifier is empty. A suffix is optional.
- Column value : The record code will be the value of the column selected.
- Attribute mappings: Map the record attribute's codes to specific columns in your source file. If you already have a column with the record code in your uploaded file(s), this will ensure that records are created with the necessary information.
-
Record code configuration: Define the strategy for how the final record code will be generated. You can choose between two strategies.
If you didn't set an Import ID in the previous steps, you can do it on this screen as well.
Limitations have been set for each Tailored Import profile:
- You can add up to 4 sources in a single column.
- Text fields are limited to 255 characters.
Conditional settings
Depending on the target you selected, some other parameters can be displayed:
- For scopable and/or localizable attributes, you must select to which channel and/or locale you want to import your data.
- For collection attributes (multi-select, categories), in case the products in your PIM already exist with a few values, you can choose if you want to add the data from your file to the existing data or if you want to replace the data in the PIM by the one from the file.
- For each target, the checkbox "Clear if empty in file" helps you decide if you want to clear the product value in your PIM when the cell in your file to import is empty.
Import your products
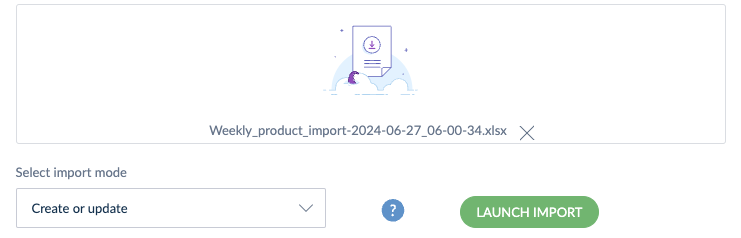
To launch your import:
- Click the ‘Quick Import’ button (top right).
- Choose to keep your current file or upload a new one.
- The system will then create and update products according to your mapping.

Additionally, you can also launch your import profile, by clicking on its name in the breadcrumb, drag and drop your file in the area, select your desired import mode, and click on Launch import.
Limitations have been set for each uploaded file:
- Maximum of 2000 columns.
- Maximum 5GB file size.
Discover operations
You can use operations to transform the data in order to make the import process easier.
Adding the operations in the correct order is essential. For instance, if you want to import the column "Main color" that contains multiple values in each cell (e.g. "Black, Crow, Charcoal, Obsidian") from your Excel spreadsheet into one multi-select attribute "Color" in our PIM, you need to add the operations in that order: first Split, then Replacement.
Depending on the targets that you define, here are the different types of operations that you can add:
Family Categorization - with AI
If the uploaded file lacks a dedicated column for the PIM Family assignment, users can use this operation to let the AI determine the correct family. The AI will analyze the entire row of data to decide where the product belongs.

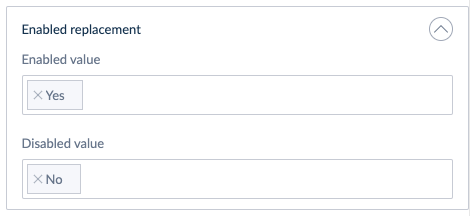
Yes/No replacement
This operation is available for Yes/No and Enabled attributes used as a target. It will help you to replace the default values with your own value.
Replacement
This operation is available for Simple select, Multi select, Reference entity single link, or Reference entity multiple link attributes used as a target. It will help you to replace the values with your own.
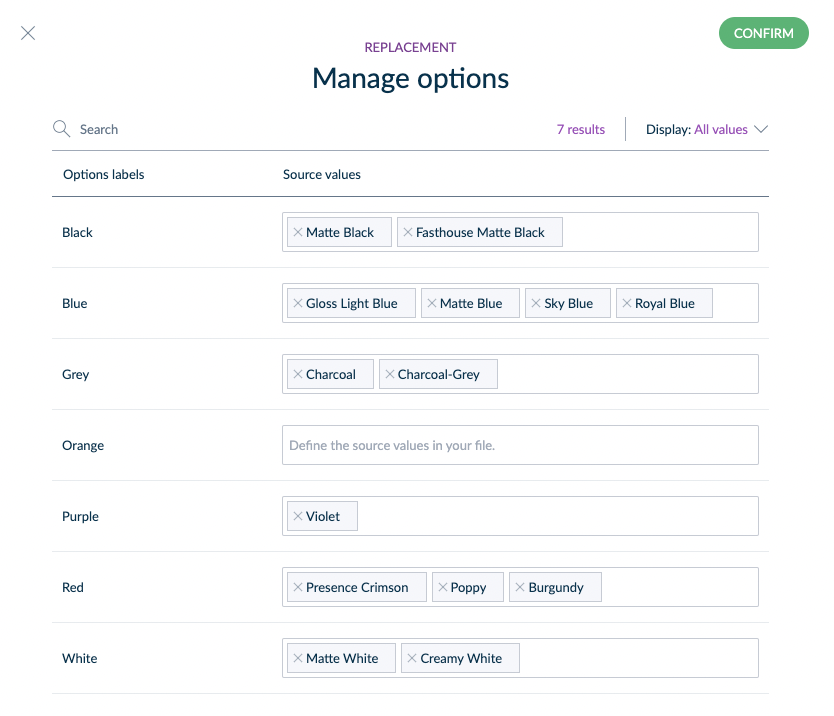
Replacement values are case-insensitive.
When importing a file that contains attribute labels instead of codes, you can automatically map the attribute options to their corresponding labels by following these steps:
- Click on “Prefill.”
- Select the locale corresponding to the attribute options in the file you plan to import.
This capability is available for Simple select & Multi select.
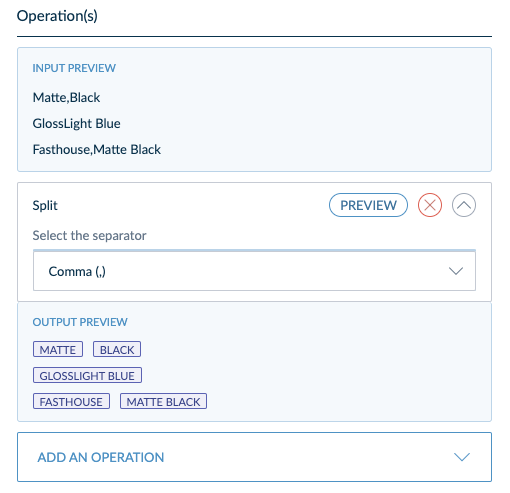
Split
This operation is available for collection attributes used as a target. It will help you to import different values that are located into the same cell of your spreadsheet by splitting these values thanks to a separator: comma (,), semicolon (; ), or pipe (|).
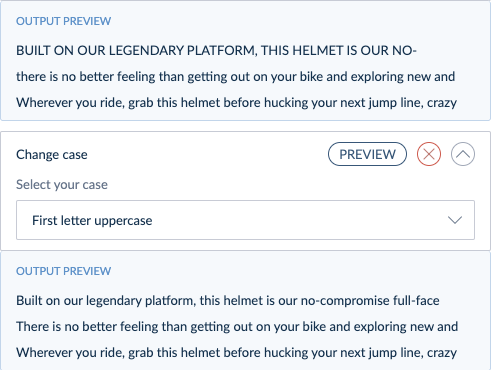
Change case
This operation is available for Text and Text Area attributes used as a target. It will help you to change the case by choosing from:
- Lowercase
- Uppercase
- First letter uppercase
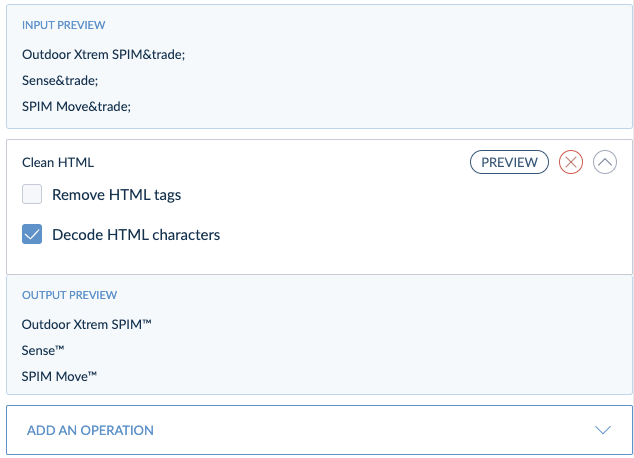
Clean HTML
This operation is available for Text and Text Area attributes used as a target. It will help you to clean your HTML values with two options:
- Remove HTML tags
- Decode HTML characters
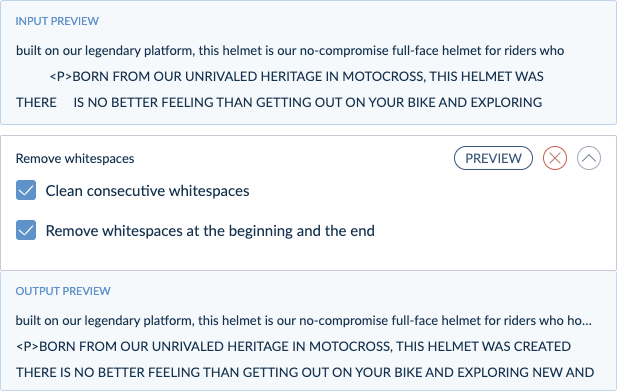
Remove whitespaces
This operation is available for Text and Text Area attributes used as a target. It will help you to clean the unnecessary whitespaces values with two options:
- Clean consecutive whitespaces
- Remove whitespaces at the beginning and the end
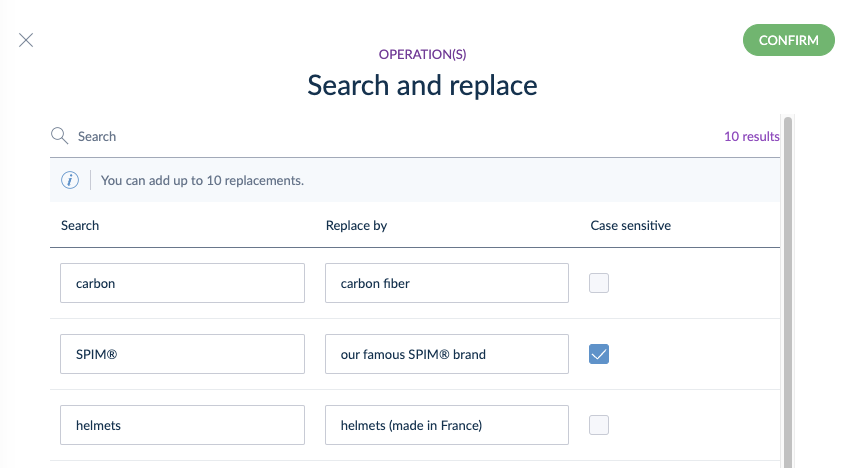
Search and replace
This operation is available for Text and Text Area attributes used as a target. It will help you to search for a term and replace it with another one. Note that you can add up to 10 replaced values per operation.
Extract with regular expression
This operation is available for Text and Text Area attributes used as a target. It will help you extract a value based on a regular expression of your choice.
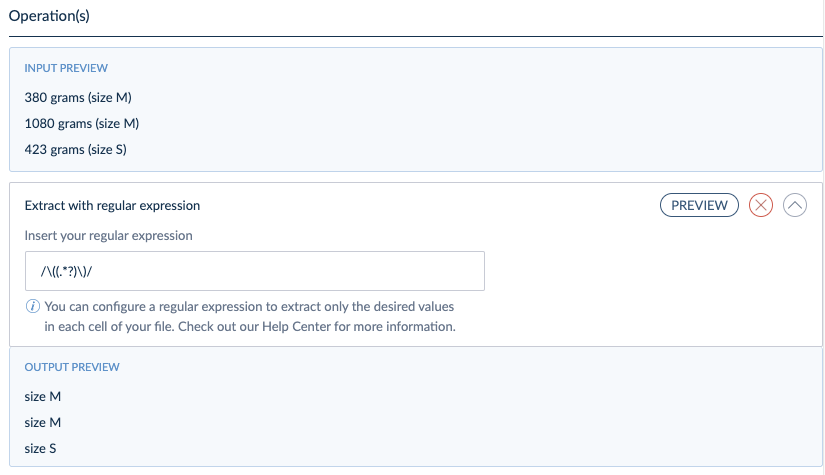
Regular expressions mostly start and end with a slash (/) or a tilde (~).
If you're new to regular expressions, you can use the Autoregex service to generate a regular expression based on a sentence describing your need.
Duplicate a Tailored Import profile
If you want to create another import profile based on an existing one, you can duplicate it. Please note that the structure of this import profile will remain unmodifiable. You can only add or remove operations, targets, and sources.
To do this, please follow the steps below:
- Select the import profile you would like to duplicate
- Click on Edit
- In the top right corner, click on the three dots "..." and select Duplicate
- Write a label and a code, then click on Save