

The basics
Once you've created your user groups and put some users in them, you can begin to define for each of these users groups which parts of the catalog they will be able to see/edit.
Access rights on product information
Access rights enable you to configure the scope of role and visibility of users to the product catalog in the PIM.
You can define access rights on 3 axes:
- Locales: If a product catalog is available in several locales, it is possible to define for each user which locale can be viewed and/or edited.
- Categories: If a product catalog uses the classification tree in the PIM, it is possible to define for each user, which products can be viewed and/or edited, depending on the classification of products in the different categories.
- Attribute groups: If a product catalog uses the attribute group in the PIM system, it is possible to define for each user, which attributes can be viewed and/or edited, depending on the attribute group in which they are positioned.
Hierarchy of access rights for product information
For each axis, there are 3 levels of access:
- Permission to edit information
- Permission to view information
- No rights: the information is hidden to the user
As rights are subject to 3 axes, hierarchy prevents any conflicts defining permissions for each user. The axes of the hierarchy is the following:
- Locale
- Category
- Attributes Group
- Category
How to apply the rule of hierarchy? It requires at least one access right to view on the parent axis to apply the rule to the child axis.
Sounds complex? Don't be afraid! You will find below a couple of examples to illustrate how the rule of hierarchy applies to each user.
EXAMPLE 1
A user has been granted with the following rights:
- de_DE locale: no right
- Shoes category: view & edit permissions
- General attribute group: view & edit permissions
This user will never see the products in the Shoes category, nor edit the attributes in the General group in the de_DE locale because the user does not have access on this locale, and he will never be able to see it.
EXAMPLE 2
Now, let’s give the same user the permission to view the locale en_US:
- de_DE locale: no rights
- en_US locale: view permission
- Shoes category: view permission
- General attribute group: view & edit permissions
The user can see the products in the Shoes category and can see the attributes in the General group in the en_US locale, but cannot edit them because he has only a view permission for en_US locale.
EXAMPLE 3
Finally, let’s give the same user the permission to edit the locale fr_FR:
- de_DE locale: no rights
- en_US locale: view permission
- fr_FR locale: edit permission
- Shoes category: view & edit permissions
- General attribute group: view & edit permissions
On the fr_FR locale, the user can edit the products in the Shoes category and can edit the attributes in the General group. He can only see products and their attributes in en_US locale and he can’t see de_DE product information.
Rights depending on the locale
It is possible to define for each user group, on which locale the product information can be viewed and/or edited.
Three levels of access
There are three levels of access based on the locales. Each one is described in the sections below.
THE EDITION RIGHT
If a user has rights to edit product information for a specific locale (ie one of his user groups has at least the Allowed to edit product information permission), the specific locale will be displayed in the dropdown menu for the available locales:
- In the product grid
- In the published product grid (Enterprise Edition only)
- In the product form
- When translating product information in the product form
He will also be able to import product data on this specific locale.
THE VIEW RIGHT
If a user has rights to only view product information for a specific locale (ie his user groups only have the Allowed to view product information permission), the specific locale will be displayed in the dropdown menu for the available locales:
- In the product grid
- In the published product grid (Enterprise Edition only)
- In the product form
- When translating product information (product form)
But he won't be able to edit product data in the product form, nor import product data on this specific locale.
NO RIGHT
If a user has no rights to see nor edit product information for a specific locale, this locale will not be displayed in the dropdown menu of available locales:
- In the product grid
- In the published product grid (Enterprise Edition only)
- In the product form
- To translate product information (product form)
He won't be able to edit product data in the product form, nor import product data on this specific locale.
Set rights to user groups
So now you better understand how the rights depending on the locales work, let's configure it in the interface:
- Go to Settings and select the Locales entry
- Select the locale from the grid or using the grid filters
- Click on the Permissions tab
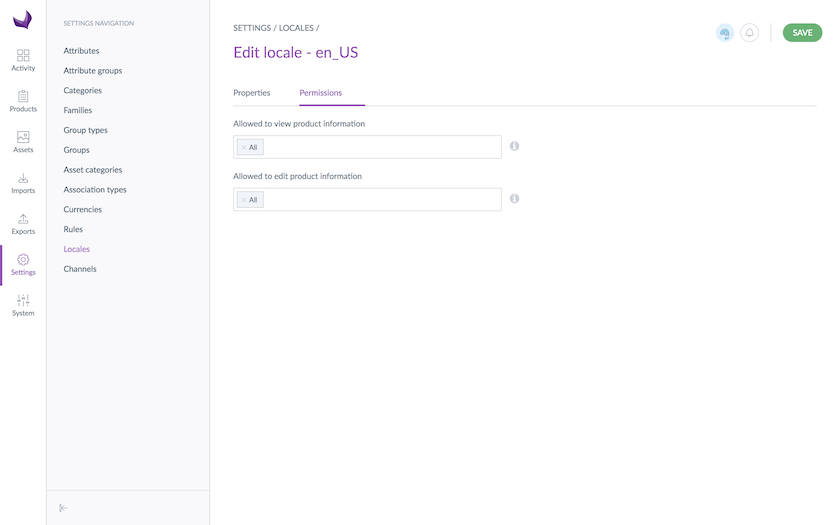
- Click in the fields to add users groups to grant them permissions
- Click on the Save button
Permissions are immediately applied to users.
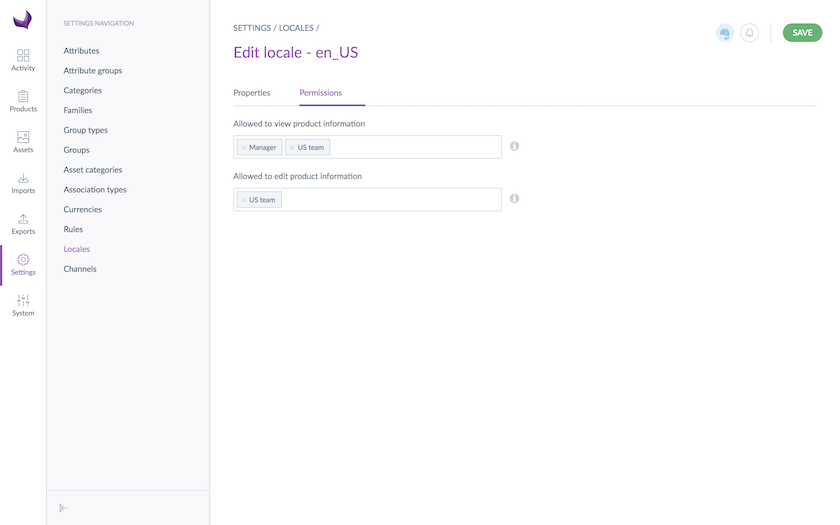
An example
Julia is in the US team user group that has the rights to edit product information regarding the en_US locale.
Robert is in the Manager user group that only has the rights to view product information regarding the en_US locale.
Mary is in the German team user group that has no rights on product information regarding the en_US locale.
Rights depending on the categories
It is possible to define for each user group, which products can be viewed and/or edited and/or owned, depending on their classification in the categories.
Four levels of access
They are four levels of access you can grant for your user groups on each of your category.
THE OWNER RIGHT
If a user is owner of the product information for the products that are in a given category (ie his user groups have at least the Allowed to own products permission), he will be able to:
- View and edit the product information directly; rather than going through the proposal’s workflow
- View/review the current proposals of product values
- Approve/reject or partially approve proposals of values that needs to be reviewed
- Publish/unpublish a product version
- View/Change the product associations and categories
THE EDITION RIGHT
If a user has rights to only edit product information for the products that are in a given category (ie his user groups have at least the Allowed to edit products permission), he will be able to:
- View the product information
- Create a product draft that will need to be approved by the product manager
- Generate/send a proposal that will be processed by the product manager
To be able to access the Categories tab of the products that are in this given category, the user must be granted with the Consult the categories of a product role permission (System > Roles > Products > Consult the categories of a product). The user will be able to consult the categories but not edit them. Without this permission, the Categories tab won't appear.
THE VIEW RIGHT
If a user has rights to only view product information for the products that are in a given category (ie his user groups only have the Allowed to view products permission), he will only be able to view the product information and that's all. No possibility to edit it.
To be able to access the Categories tab of the products that are in this given category, the user must be granted with the Consult the categories of a product role permission (System > Roles > Products > Consult the categories of a product). The user will be able to consult the categories but not edit them. Without this permission, the Categories tab won't appear.
NO RIGHT
If a user has no rights to see nor edit product information for the products that are in a given category, he won't be able to neither view nor edit the product information, whatever the screen in the PIM.
In the case a user has no rights to see nor edit product information for a given category, we hide this category in order to make the user interface even more simple.
If you remove the right to view the products on one given category, the PIM will automatically also remove its rights to edit and own the products on this category.
Same thing if you remove the right to edit the products on one given category, the PIM will automatically also remove its right to own the products on this category.
An example
Let's take several examples to make it clearer.
Julia is the product manager in her company. She is in the Audio manager user group.
Mary is an intern so she is in the Redactor user group.
Then we have Marco, the supplier. He is in the Supplier user group.
To finish, Elise is in the Clothes manager user group.
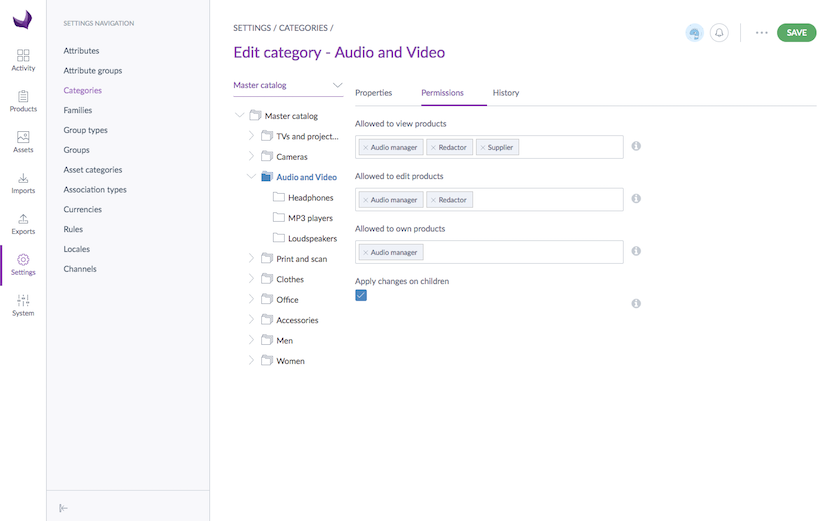
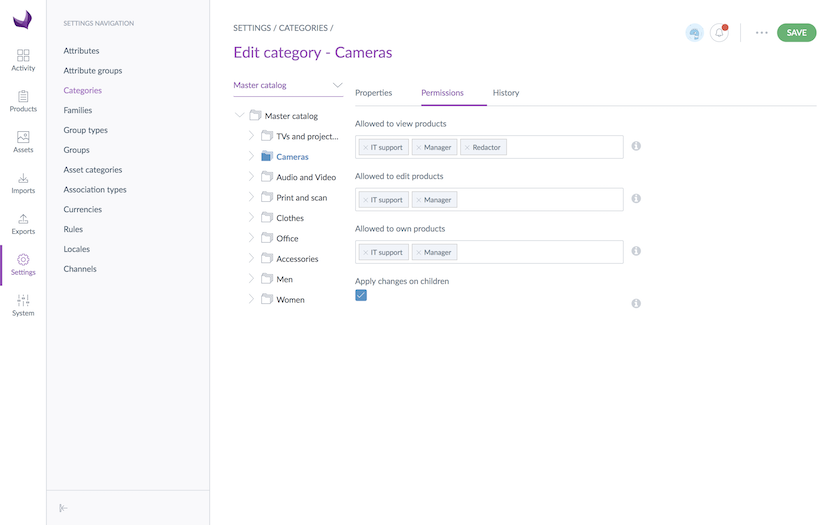
As you can see in the screenshot below, the Audio manager user group is owner of the products in the Audio and Video category, whereas the Redactor user group only has edit rights and the Supplier user group only has view rights. As it appears nowhere, the Clothes manager has no rights on the products of the Audio and Video category.
Now, let's imagine that the Sony SS-SP32FWB product is only categorized in the Audio and Video category. As a result of the application of these rights:
Julia will get the following product form for the Sony SS-SP32FWB product
- Mary will get the following product form for the Sony SS-SP32FWB product. You can notice that the Categories, Associations and Proposals menu entries are hidden, in this case.
- Marco will get the following product form for the Sony SS-SP32FWB product. You can notice that the attributes values are greyed out because their edition is not allowed in this case.
- Elis won't be able to access the product form of the Sony SS-SP32FWB product. She won't even be able to view the Audio and Video category in the category tree.
Set rights to user groups
So now you better understand how the rights depending on the categories work, let's configure it in the interface:
- Go to Settings and select the Categories entry
- Select the category to set permissions on
- Go under the Permissions tab
- Click in the fields to add users groups to grant them permissions
- Click on the Save button
Permissions are immediately applied to users.
By default, all users are entitled to all the rights on the created asset categories through the All user group, which is the user group by default. If you define permissions to specific groups, remove the All user group.
Some crucial tips
ONE PRODUCT, SEVERAL CATEGORIES
If a product is in multiple categories of one tree or more, the most permissive right is applied on the product.
Example
The product A is categorized in:
- the Divided brand category, on which the Divided supplier user group has an owner right
- the Tshirt category, on which the Divided supplier user group only has a edit right
- the Yellow category, on which the Divided supplier user group only has a view right Now, imagine Mary is in the Divider supplier user group. She will have the owner right on the product A.
ONE PRODUCT, NO CATEGORY
If a product is not categorized at all, by default, all the users in the PIM will have a owner right on this product.
ONE USER, SEVERAL USER GROUPS
If a user is in several user groups, the most permissive right is applied on the product.
The product A is categorized in the Tshirt category, on which:
- the Divided supplier user group has an owner right
- the Manager user group only has a view right Now, imagine Mary is both in the Divider supplier and the Manager user groups. She will have the owner right on the product A.
THE APPLY CHANGES ON CHILDREN OPTION
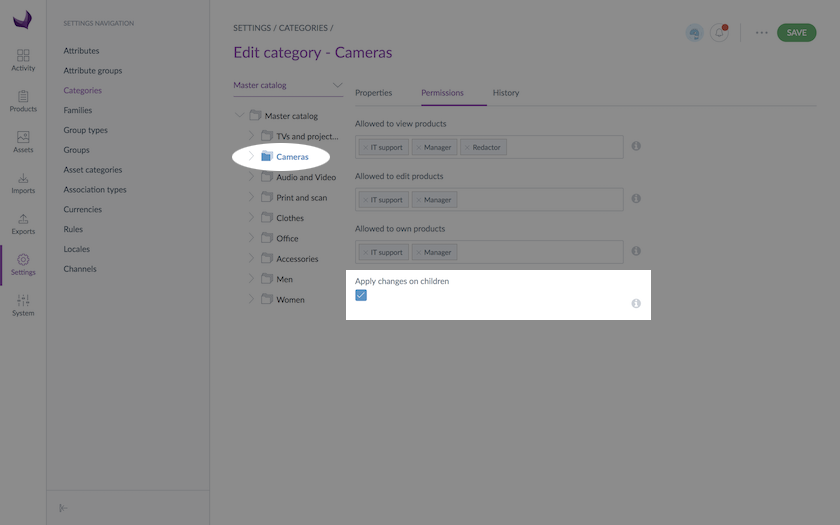
In the Permissions tab, there is an option called Apply changes on children. This option is checked by default. It means that the permissions you have granted to your current category will be apply to all its sub-categories.
As you can see in the example below, the Apply changes on children is checked for the parent category. So all its sub-categories will get exactly the same user groups configuration for the view and edit rights.
Rights depending on the attribute groups
It is possible to define for each user group, which attribute values of products can be viewed and/or edited, depending on their attribute groups.
Three levels of access
They are three levels of access based on the attribute groups. Each one is described in the sections below.
THE EDITION RIGHT
If a user has rights to edit product information for a specific attribute group (ie his user groups have at least the Allowed to edit attribute permission):
- In the product form, the values of all the attributes of the group are enabled and they can be edited
- When using a product import, the values of all the attributes of the group can be updated
- When exporting products, the values of all attributes of the group will be exported
THE VIEW RIGHT
If a user has rights to only view product information for a specific attribute group (ie his user groups only have the Allowed to view attribute permission):
- In the product form, the values of all the attributes of the group are disabled and they can't be edited
- When using a product import, the values of all attributes of the group cannot be updated
- When exporting products, the values of all attributes of the group will be exported
NO RIGHT
If a user has no rights to see nor edit product information for a specific attribute group:
- In the product form, the values of all the attributes of the group are not shown so they can't be edited
- When using a product import, the values of all attributes of the group cannot be updated
- When exporting products, the values of all attributes of the group won't be exported
- The views using the attribute groups (columns or filter) are not displayed in the list of views.
An example
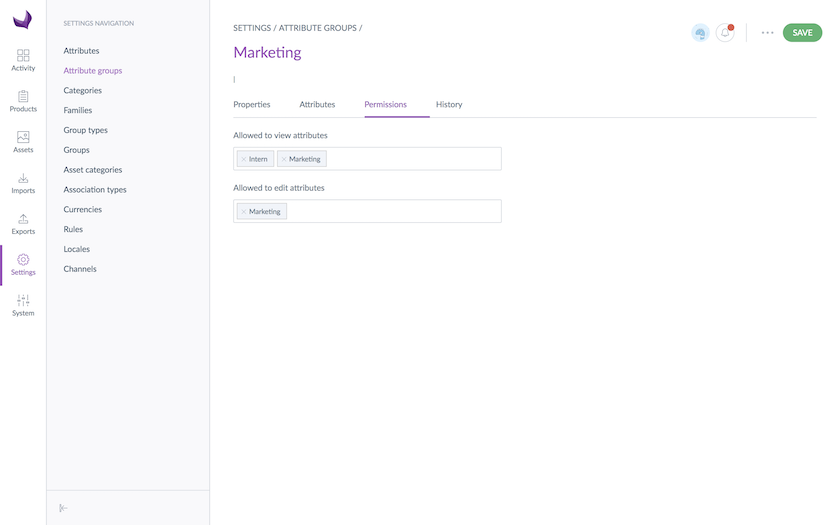
Let's take an example with the following user groups permissions configuration, regarding the Marketing attribute group
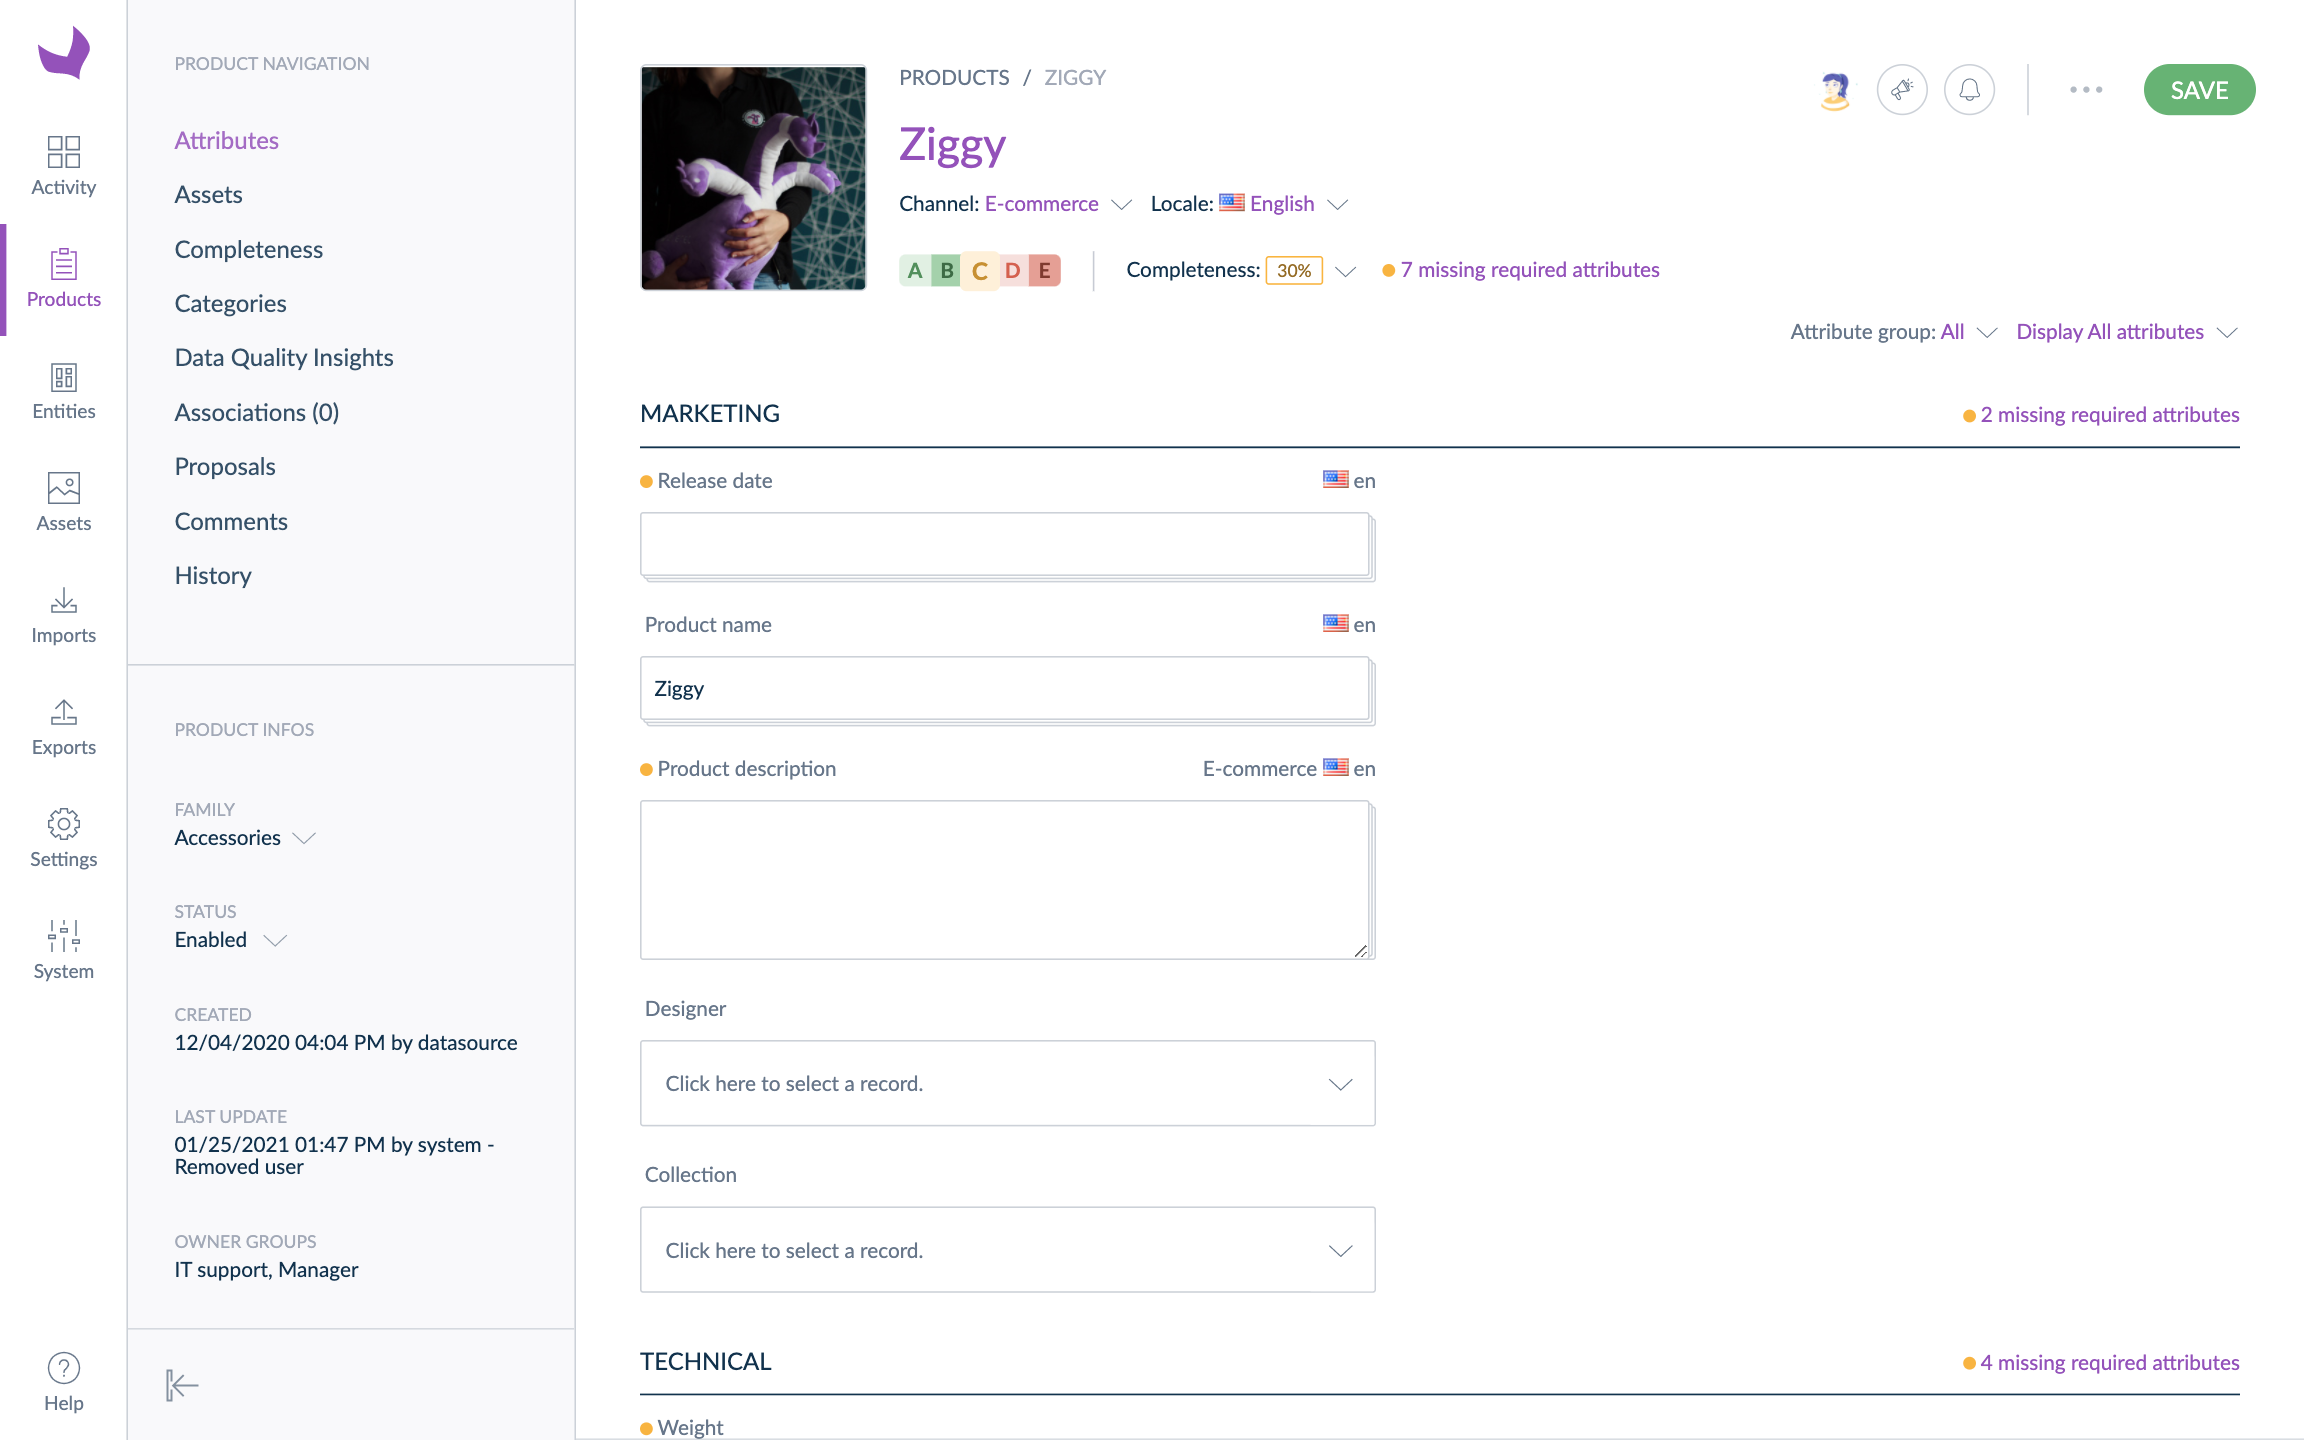
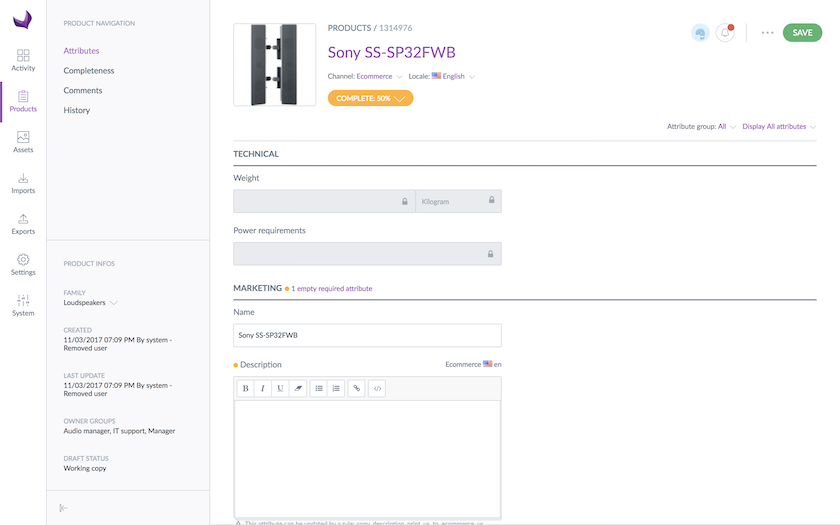
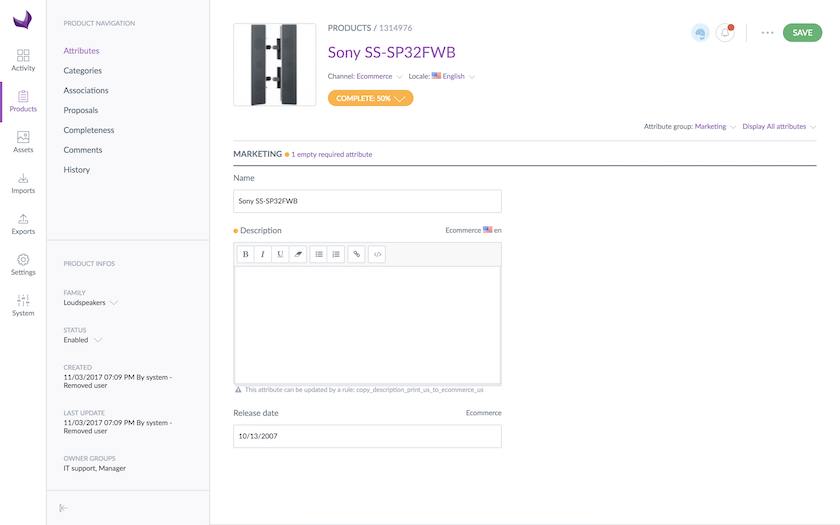
Julia is in the Marketing user group that has the right to edit product information regarding the Marketing attribute group. As a result, in the product form, she can view/edit the product information in this attribute group as you can see in the screenshot below.
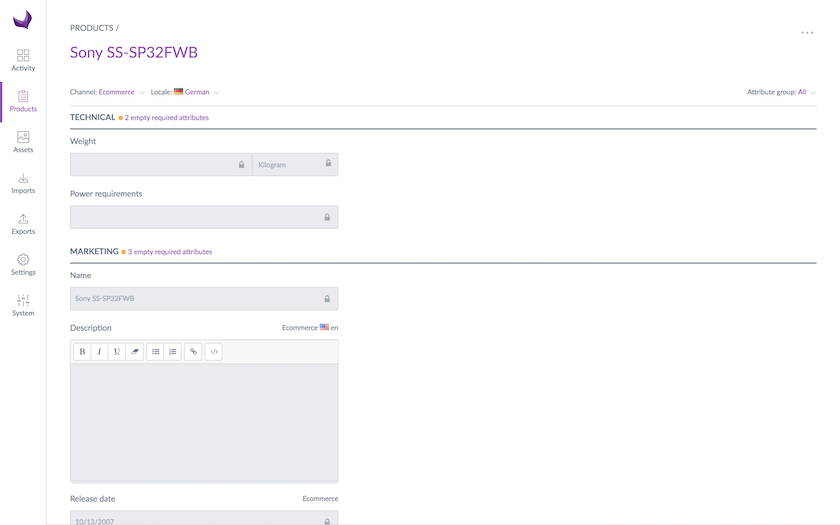
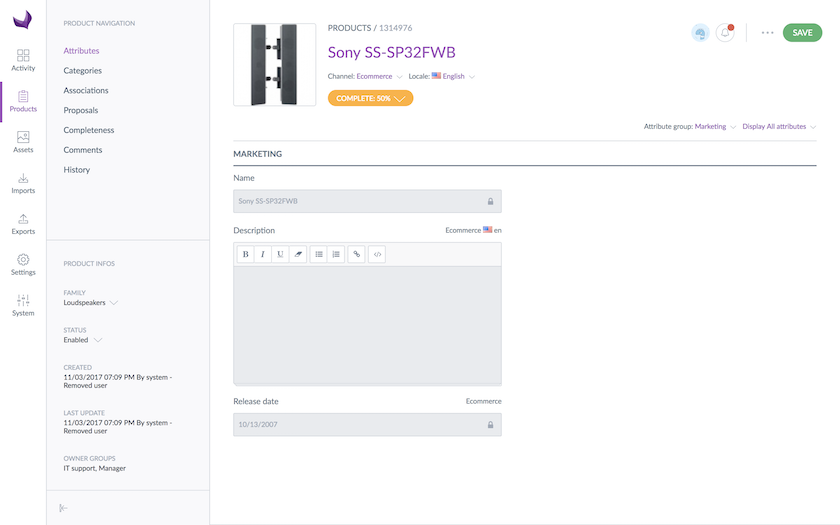
Robert is in the Intern user group that only has the right to view product information regarding the Marketing attribute group. As a result, in the product form, he can only view the product information in this attribute group as you can see in the screenshot below. The attributes in this attribute group are greyed out.
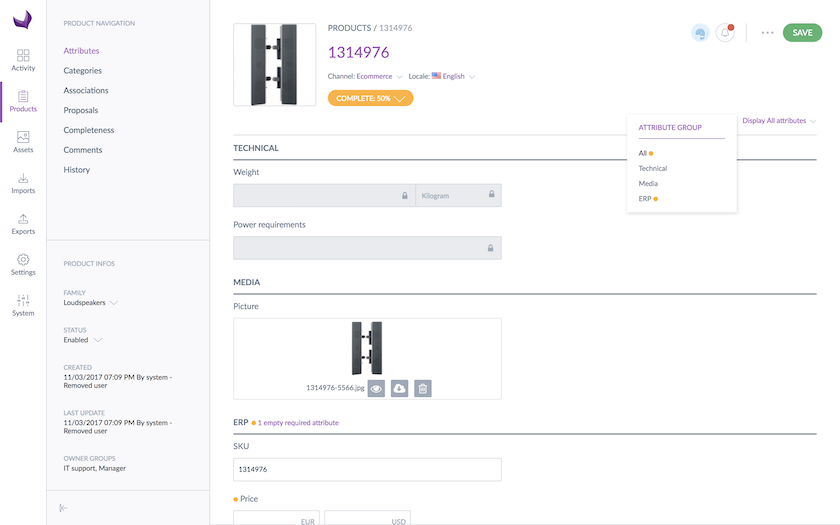
Mary is in the Purchase team user group that has no right on product information regarding the Marketing attribute group. As a result, in the product form, she cannot see at all neither the Marketing attribute group, nor its attributes, as you can see in the screenshot below.
Set rights to user groups
So now you better understand how the rights depending on the attribute groups work, let's configure it in the interface:
- Go to Settings and click on the Attribute groups entry
- Select the attribute group in the grid
- Click on the Permissions tab
- Click on the fields to select the user groups entitled to the appropriate rights
- Click on the Save button
The rights are immediately applied to the users.