

Manage your families
See all your families
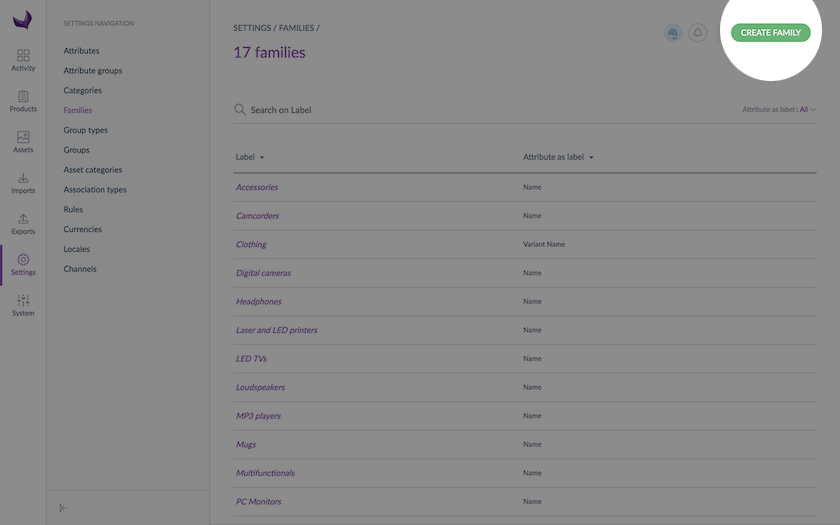
To see your families, edit them or create a new family go to Settings/Families.

How to create a family?
Families are used to gather attributes that are common to several products. The completeness of your products is also defined at the family level.
To create a new family, follow these steps:
- Go to Settings/Families
- Click on Create family
- The creation of a family popin is prompted
- Enter a new family code (this code must be unique)
- Click on Save
Your new family is now created. The family's Properties tab is displayed.
You can give additional properties to your family:
- Set an attribute used as label (required): a text or identifier attribute that will be used as the default name for products belonging to this family. The attribute selected as label will appear in the product grid (as the "Label" column) and in the product form's header.
- Set an attribute used as the main picture: an image or assets collection attribute that will be used as "the main picture" for products belonging to this family. This attribute used as main image will be displayed in the product grid (as the "image" column) and in the product form's header. Localizable and/or scopable attributes cannot be used as main product pictures.
- Translate the family's label with Labels translations: allow you to translate your family name into the locales enabled in the PIM.
These information can be edited afterwards.
Once a family is created, you can configure your family:
- Add/remove attributes from the family
- Edit these attributes’ completeness
Supported extensions for thumbnails for image or assets collection attributes are the following: jpg, jpeg, png and gif.
You must be granted a specific role permission to be able to create a family. Please refer to Manage your user roles.
Manage attributes in a family
Attributes can be used in one or several families, but an attribute can only be added once to a family.
You can easily add attributes to or remove them from a family using the user interface or through imports.
ADD AN ATTRIBUTE TO A FAMILY
Once you are on your family edit form, go under the Attributes tab:
- Click on Add Attributes on the right side of the screen
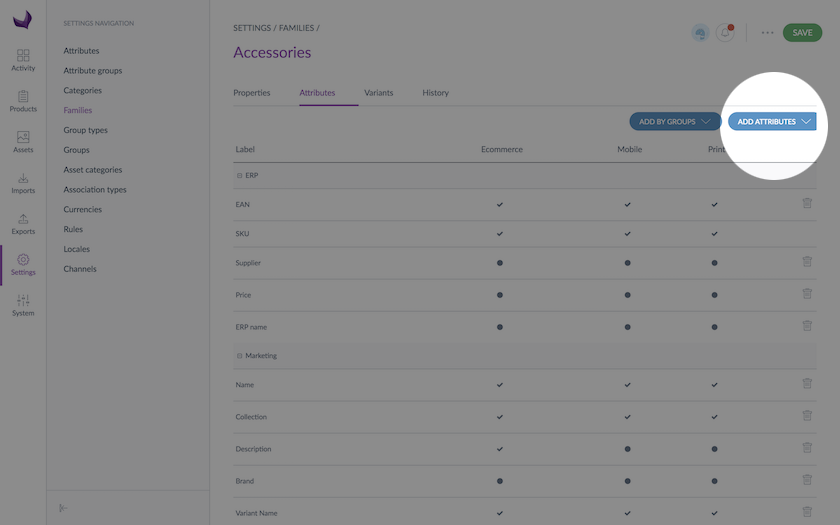
- Select the attributes to add by clicking on their labels
- Click on Add
- Click on Save
- You can also add a group of attributes, to do so click on Add by groups on the right side of the screen
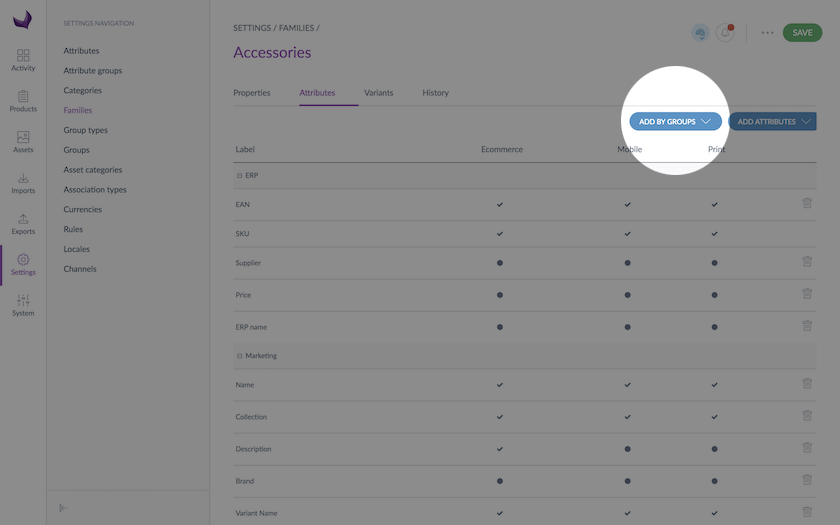
Select the attribute groups to add by clicking on their labels and click on Add and then Save.
The attributes will be added to the current family.
If you do not see the Add Attributes or Add by groups button, it might be because you do not have the relevant rights. Please refer to Manage your user roles.
REMOVE AN ATTRIBUTE
You can also remove attributes from a family:
- Go under the Attributes tab
- Click on the Delete icon to remove the relevant attribute(s)
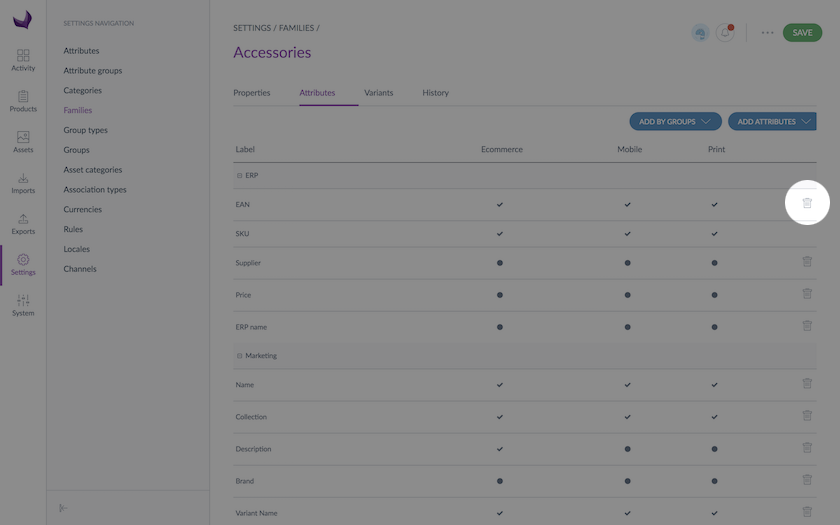
- Save your update
The attribute(s) will be back under the Add attributes list. If you need it later, you will be able to add it again.
Manage your family’s completenesses
The completeness represents the percentage of completion of a product, it is displayed as a progress bar or as a percentage in the PIM. It is calculated for each product and for each channel/locale combination. A product is considered as complete (or 100% completeness) when its required attributes (defined at the family level) have values. For more details about the completeness, please refer to Understand product completeness.
When an attribute is added to a family, it is not set as required for any channel by default. Only your product identifier attribute is automatically added and set as required for all families.
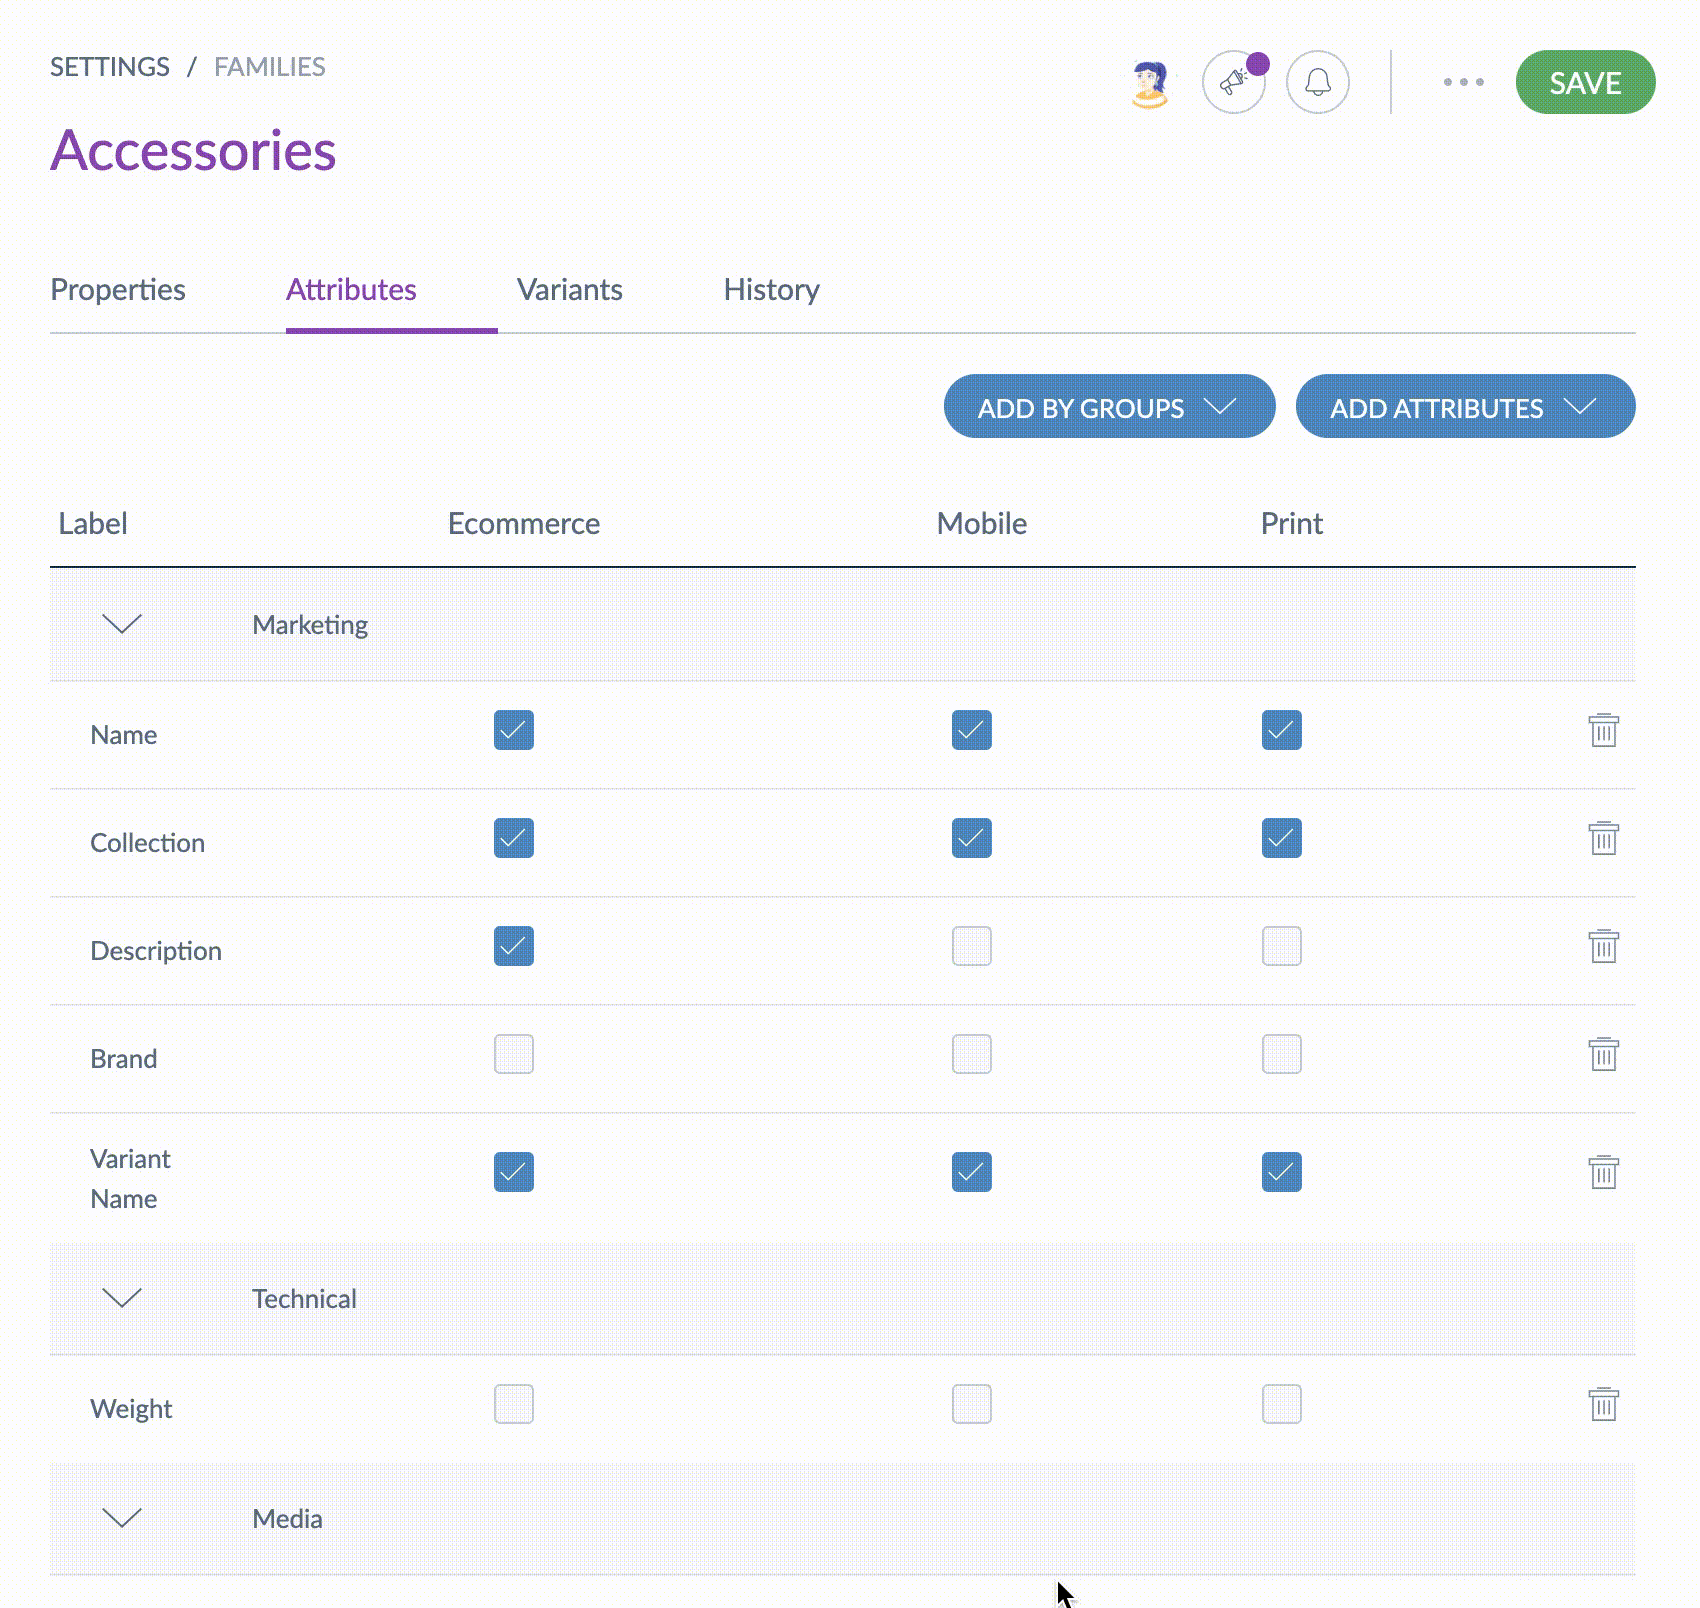
Under the attribute’s family tab, you will see
- Circles meaning that the attribute is not required in the channel’s completeness
- Checks meaning that the attribute is already set as required for this channel
SET AN ATTRIBUTE AS REQUIRED FOR A CHANNEL
- Go under the Attributes tab
- Select the attributes to be required for your family
- Click on the circles to make them required for the channel’s completeness
- Circles are automatically converted into a “check”
- Click on Save
Once changes are saved, the PIM will automatically run a completeness calculation to update your product information.
Save time by using the Family Mass action (available from the families grid)! You will be be able to add one or several attributes (or attribute groups) to a selection of families, and also manage their completeness at the same time, read our section Mass edit your families available below.
REMOVE AN ATTRIBUTE AS REQUIRED FROM A CHANNEL
- Go under the Attributes tab
- Select the attributes required for your family
- Click on the checks to remove them from being required for the channel’s completeness
- Checks are automatically converted into circles
- Click on Save
Once changes are saved, the PIM will automatically run a completeness calculation to update your product information.
Mass edit families
Like for products you can mass edit families and add several attributes at once for several families, and through the same action define if they are required or not for the selected channels.
To add attributes (or a group of attributes) to several families:
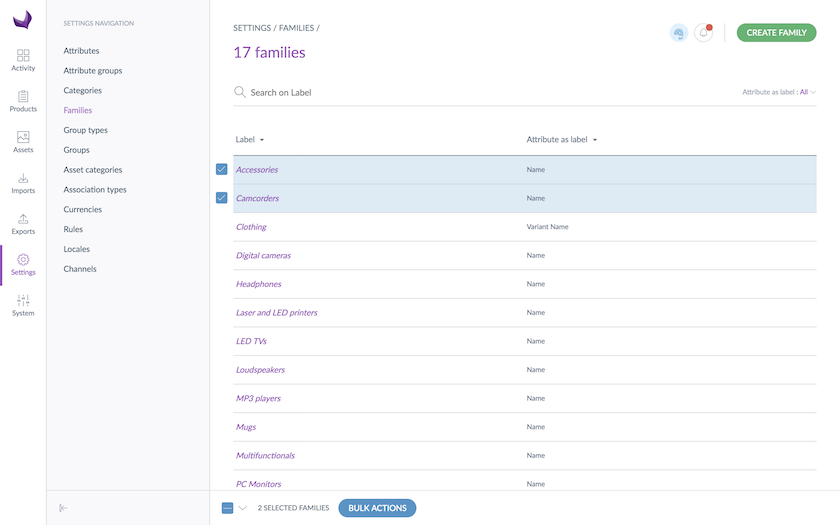
- Go to Settings/Families
- Check the families on which you want to add the same attributes
- A toolbar will be displayed at the bottom of the page: choose All to select all existing families, All visible to only select the families displayed on the current page or None to unselect all the families)
- Click on the Bulk actions button in the toolbar
- The mass edit window will be displayed
- Select the operation Set attributes requirements
- Click on Next
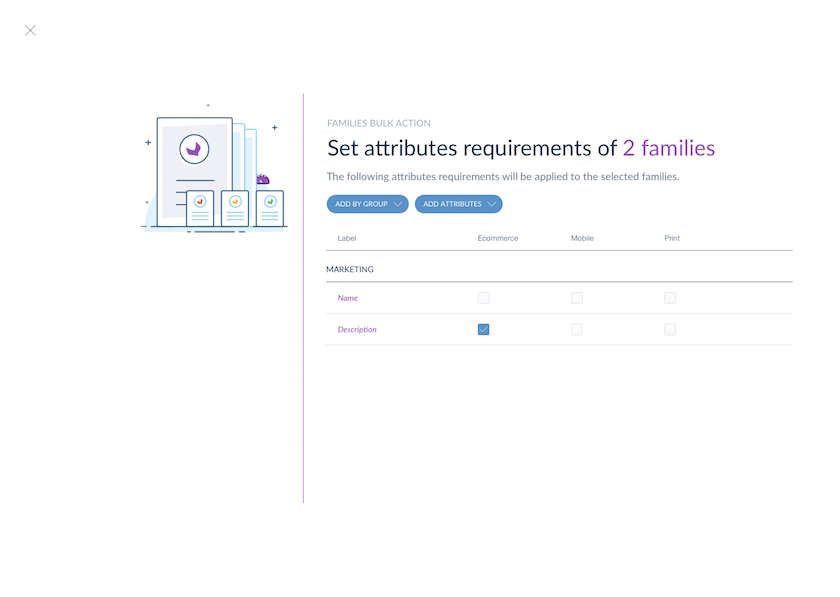
- Add the relevant attributes by attributes or by attribute groups
- Set the attributes required for the product completeness of the channels
- Click on Next
- Confirm the action with the Confirm button to add attributes to the selected families
The attributes have been added to the families.
Check the family history
Changes made on a family are recorded and visible under the History tab.
For each change, a version of the family is created. The following information is tracked down for each version:
- The person or system that made the changes
- The date and time (down to seconds) at which the changes took place
- The old value and the new value of each modified field
To view the family versions:
- Open and edit the family tab.
- Click on the History tab. The list of versions is displayed
Delete a family
Deleting a family does not remove the attributes from the PIM and does not delete the products associated to it.
Attributes that had values will remain visible in the product form to keep the product information. These attributes will become “optional”.
Products without a family will no longer have a completeness.
You have two ways of removing a family. Through the family form:
- Go to Settings/Families to list the families
- Click on the family to delete
- Click on ... for other actions and then Delete on the top right corner
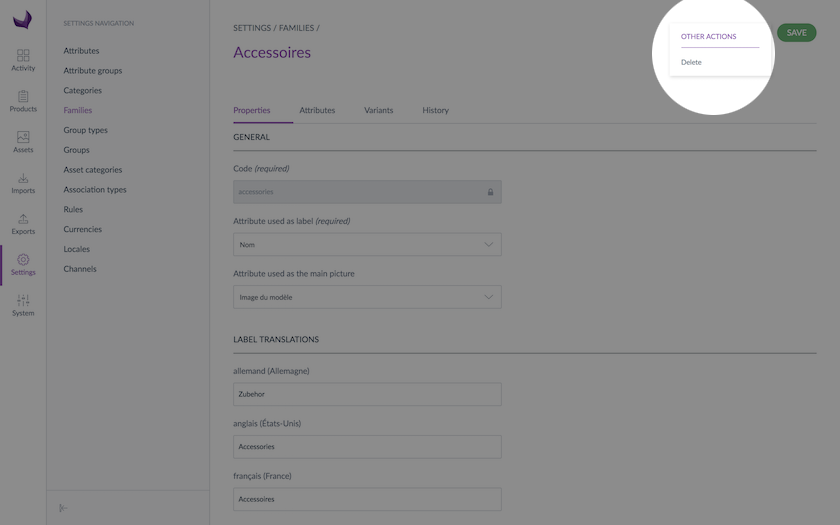
- Confirm the action via the validation message
Through the Delete shortcut in the grid:
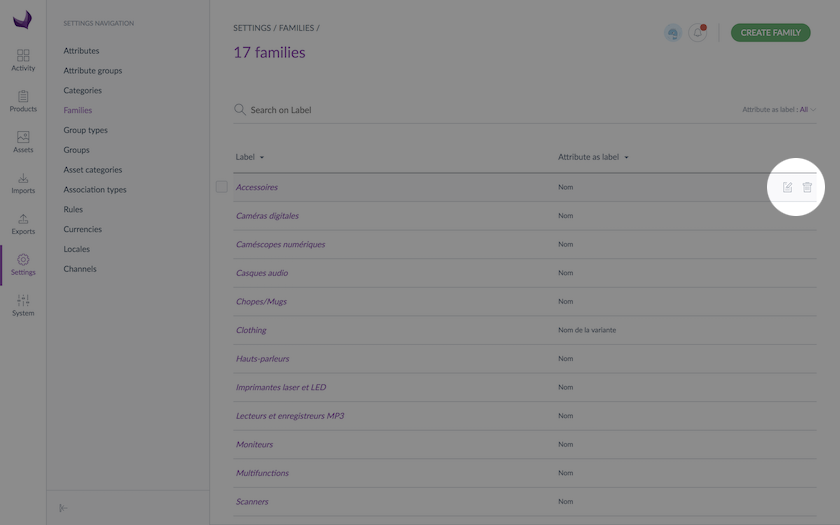
- Select the family you want to remove from the family datagrid
- Place your mouse over the line of family in the grid, the button delete is prompted (trash can icon)
- Click on the trash can icon
- Confirm the action in the validation message
A family with family variants cannot be deleted. You first need to delete its family variants.
A family cannot be deleted if there are some products within this family, you first need to remove the products from this family (refer to the bulk action change family of products).
A family used by a published product cannot be deleted. You first need to unpublish your products to delete the family.
Manage family variants
A family variant allows you to define the global structure of your products with variants and will enable you to create product models.
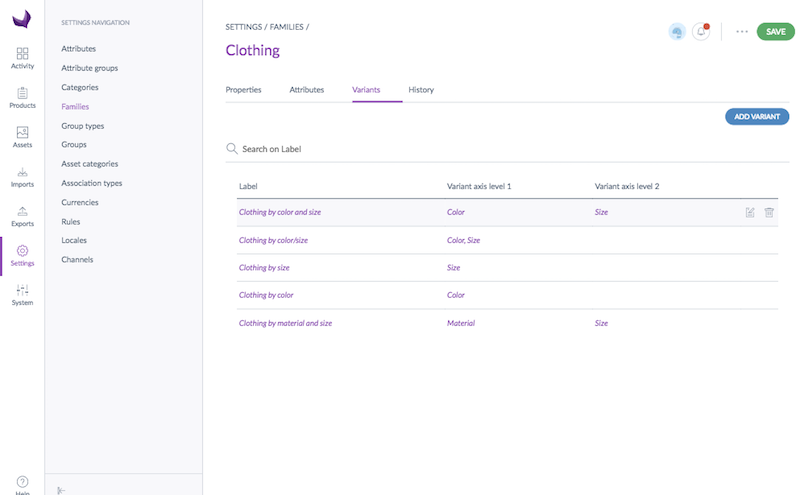
The family variants are managed in a dedicated tab called Variants in Settings/Families.
See your family variants
To see the existing family variants or create a new one:
- Go to Settings/Families
- Select the family to edit in the grid and click on it
- Open the Variants tab for the family
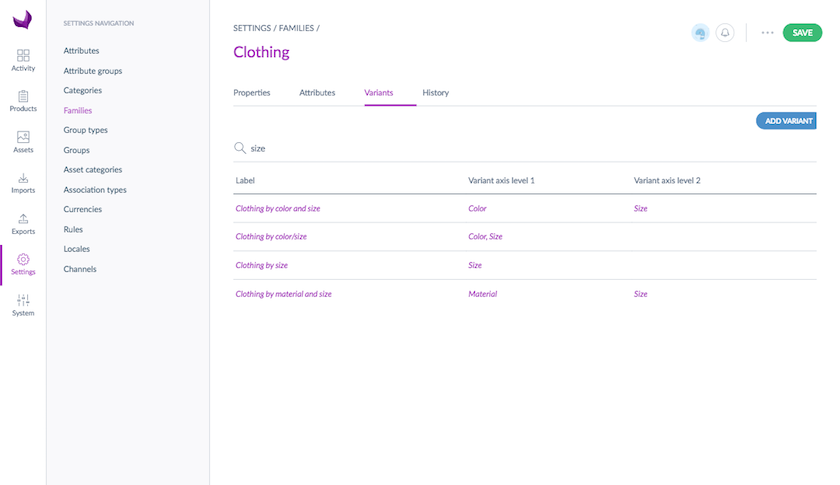
Display a family variant
- In Settings/Families, choose a family and open the Variants tab
- Click on a family variant to display it
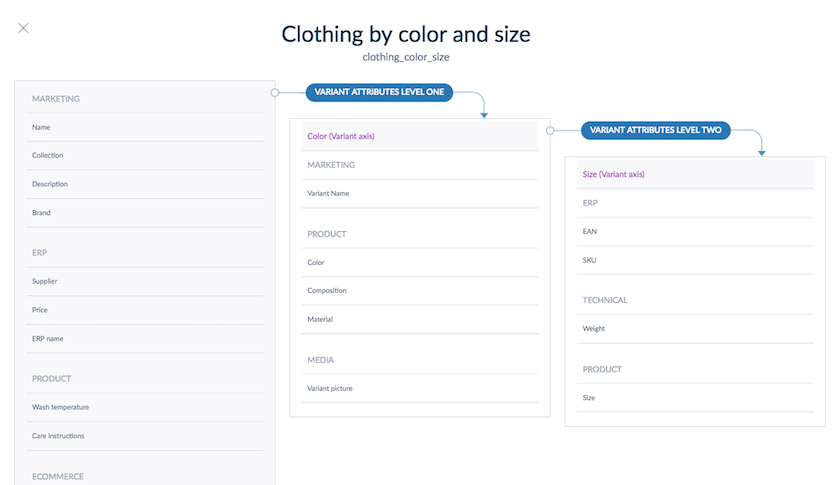
- The family variant details are displayed

You can see how the attributes are distributed between the different levels:
- The common attributes in the 1st column for all the products in a product model
- The variant attributes for the level 1 in the 2nd column are the attributes which will vary according to the variant axes of the level 1
- If the family variant has 2 variant levels, the variant attributes for the level 2 in the 3rd column are the attributes which vary according to the variant axes of the level 2 (and level 1)
In our clothing example which varies on 2 levels by color and then by size, the common attributes are: the name, the collection, the description, the brand, etc. The attributes that vary by color (variant level 1) are the composition, the pictures and the attributes that differ by color and size (variant level 2) are the EAN, the SKU and the weight.
Create a new family variant
You can create one or more family variants in each family.
- In Settings/Families, choose a family and select the Variants tab
- Click on Add variant to create a new variant for the family
- The creation of a family variant popin is prompted
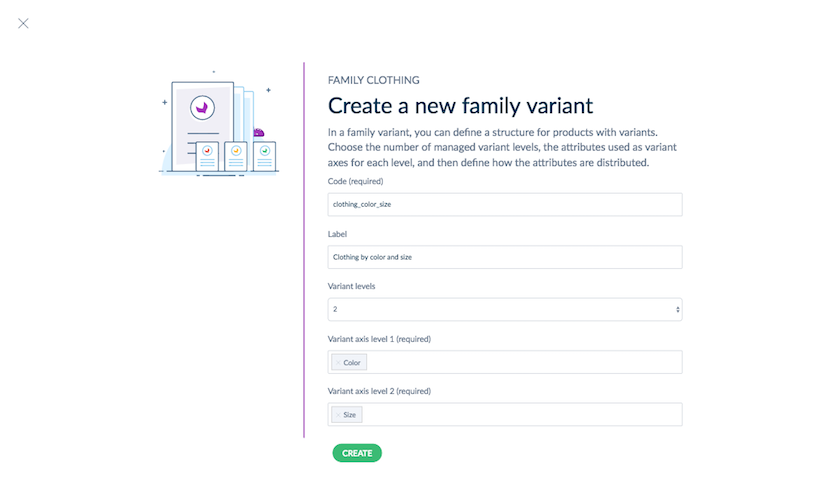
- The following properties are required to create a family variant:
- A code to identify the family variant
- A label
- A number of variant levels: 1 or 2
- The variant axes for each level: the variant axes are attributes of the family which identify the variant product in the product model. Their values must differ from a variant product to another in the product model (unicity). For examples, the color and size for a clothing model (there is only one product with the color blue and the size S and one product with the color blue and the size M for a t-shirt model), the color for a chair model, the dimensions for a mattress model.
- Click on Create, the family variant is created.
An attribute of the family could be a variant axis only if its attribute type is structured:
- Simple select
- Simple reference data
- Reference entity single link (EE only)
- Metric
- Boolean (Yes/No)
You cannot use scopable and/or localizable or locale specific attributes as variant axis.
A family variant cannot have more than 5 attributes used as a variant axis.
Then, a screen to distribute the attributes between the different levels (common attributes, variant attributes level 1 and variant attributes level 2) for the family variant will be displayed.
- Drag and drop attributes or attribute groups from the common attributes to the selected variant level to have these attributes managed at each variant level
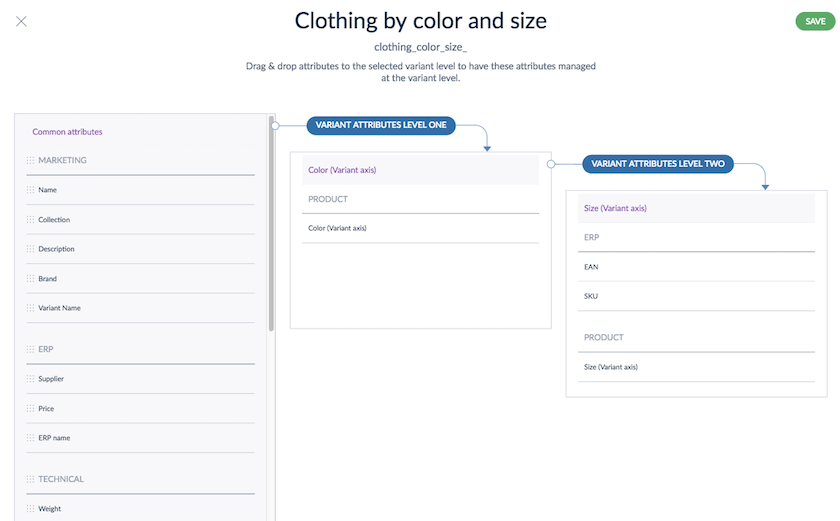
- Click on Save, the family variant will be updated
By default, the common attributes are all the attributes of the family, except the variant axes attributes (available for each variant level) and the attributes with the property unique value at Yes which are at the last variant level = product level (for example the SKU and EAN).
Edit a family variant
- In Settings/Families, choose a family and open the Variants tab
- Click on a family variant
- The family variant edit page is displayed
- You can move attributes or attribute groups by a drag and drop from the common attributes to the selected variant level or from the variant attributes level 1 to the variant attributes level 2
- You can remove an attribute from a variant level by clicking on the cross
- A confirmation opens
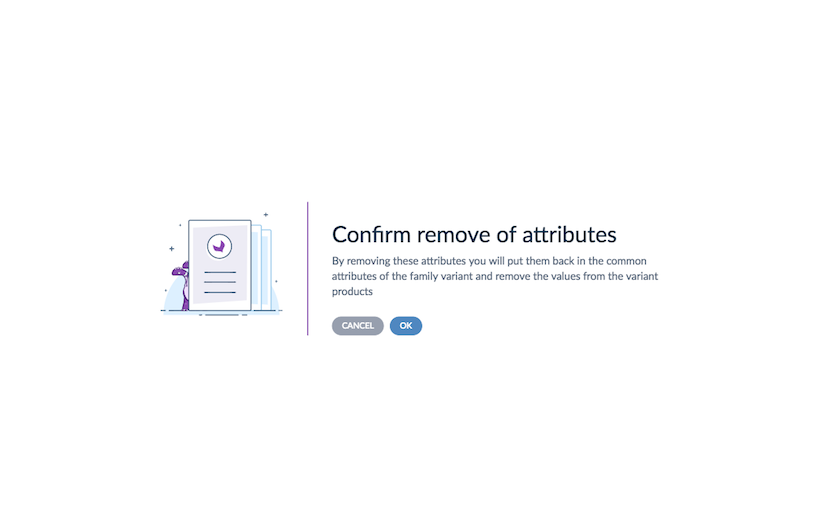
- Click on OK to confirm the remove
- When you have made all your updates on the family variant attributes, click on Save

Moving attributes from common attributes to a variant level or from the variant attributes level 1 to the variant attributes level 2 means that the selected attributes will be managed at another level. If these attributes were already filled in, those values will be kept and visible in the new level. For instance, to keep our Clothing example, if you move the Description attribute from the common attributes to the variant attributes level 1, the description previously filled in will be kept for all variant products, but you will be able to change it at the product variant level 1. Basically, you will have the possibility to fill in a description for each color.
You cannot move a variant axis or an attribute with the property unique value at Yes.
Translate a family variant label
- In Settings/Families, choose a family and open the Variants tab
- Click on a family variant
- The family variant edit page is displayed
- Select the Label translations tab
- Translate the family variant label in the different enabled locales
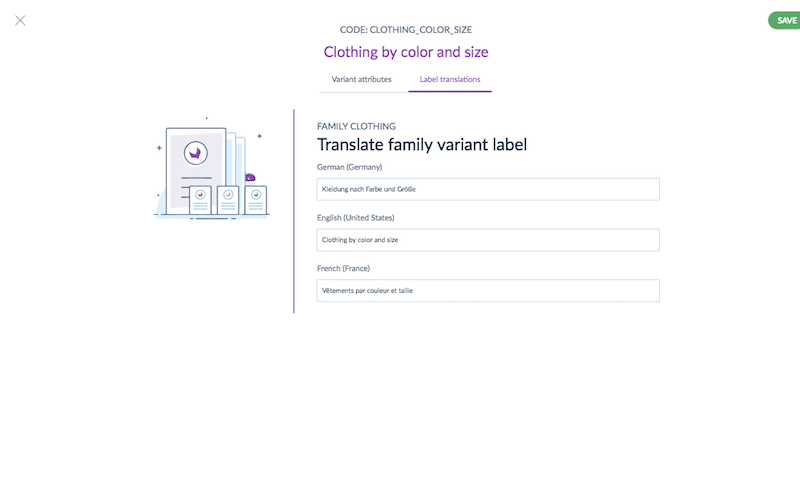
- Click on Save
Delete a family variant
A family variant can be deleted if it does not contain any product model. If it has product models, an error message will be displayed. You will have to delete those products to be able to delete your family variant.
- In Settings/Families, choose a family and open the Variants tab
- Place your mouse over the line of the family variant you want to remove in the grid, the button delete is prompted (trash can icon)
- Click on the trash can icon, a confirmation opens
- Click on Delete to confirm the action in the confirmation message