
Overview
Assets mass upload is pretty convenient especially if you want to update your asset catalog with external sources: photo shooting, new collection, etc...
The PIM uses the filename to know for which asset the file have to be used and if this asset is localized or not. To check if the asset already exists, the PIM compares the existing assets codes with the file's name.
Only letters, numbers and underscores are allowed in an asset code, the other characters will be replaced by an underscore " _ ". i.e: if the file's name contains a minus sign character "-", it will be changed into an underscore sign " _ ", so the "picture-1.jpg" and "picture_1.jpg" will be linked to the same asset code "picture_1".
Example 1 with a non-localized asset
If the filename is main_picture_S1263547.jpg, then the PIM will check:
- If the asset with the main_picture_S1263547 code already exists, the PIM will update the asset with the main_picture_S1263547 code by importing the main_picture_S1263547.jpg file as its new reference file (and will regenerate the variation files accordingly).
- If the asset doesn’t already exist, the PIM will create a new asset with the main_picture_S1263547 code and with the file as the reference file, so that the variation files can be generated.
Example 2 with a localized asset
Another example, if the filename is akene-en_US.pdf, then the PIM will check:
- If the asset with the akene code already exists and if it is localized, the PIM will update the asset with the akene code by importing the akene-en_US.pdf file as the reference file for the given locale code at the end of the filename (en_US).
- If the asset with the akene code already exists and if it is not localized, the PIM will display an error message in red.
- If the asset with the akene code doesn't already exist, the PIM will create a new localized asset with the akene code and with the file as the reference file for the given locale code at the end of the filename (en_US).
If the locale is disabled or doesn't exist in the PIM, the PIM will display an error message in red.
How to?
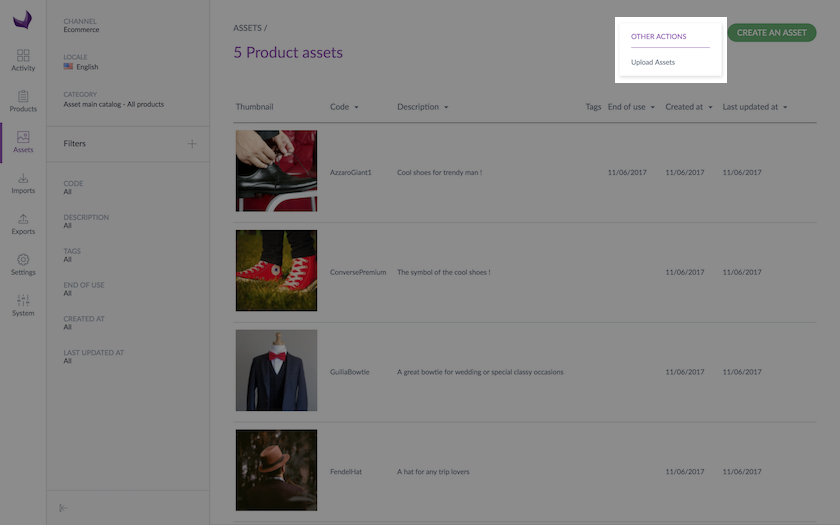
- Go to the Assets menu
- Click on the ... button in the top right corner, and select Upload assets in the dropdown
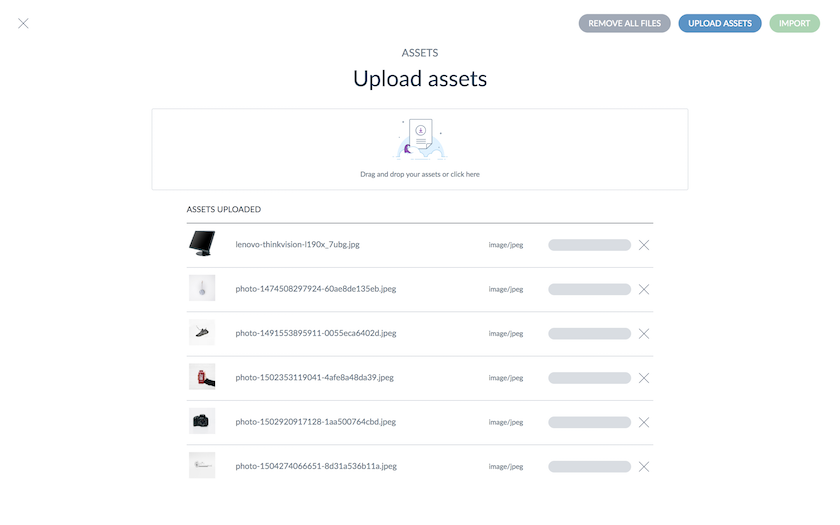
- Drag and drop your asset files in the page or click on Drag and drop your assets or click here to open the dialog box and select the asset files you want to upload
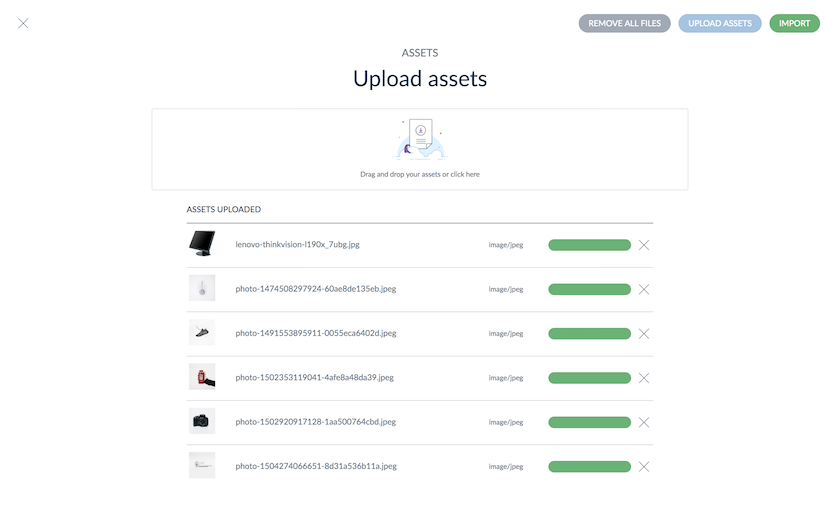
- Click on the Upload assets button to upload assets
- Then, when it's done, click on the Import button to create the assets in the PIM
The report of the import is displayed.
When files are added to the list, you can remove them whatever their status.
To remove the file from the list, click on the X button at the end of the row. The file will be removed and will not be imported.
If you want to remove all the files you chose at once, click on the Remove all files button at the top of the screen. 😉