
Enrich your assets
Enrich a single asset
Once you have created your asset, you can enrich it. It's pretty straightforward, you just have to go to an asset and add/change the values you want.
Let's take an example.
You are in your images asset family, in the Trent packshot 1 asset. You want to add the image file, a short description, and some tags. To do that, the only prerequisite is to create those 3 attributes in your images asset family. Then, you can add all the content you want in these attributes
If you don't remember how to add attributes to your asset family, you can read this article.
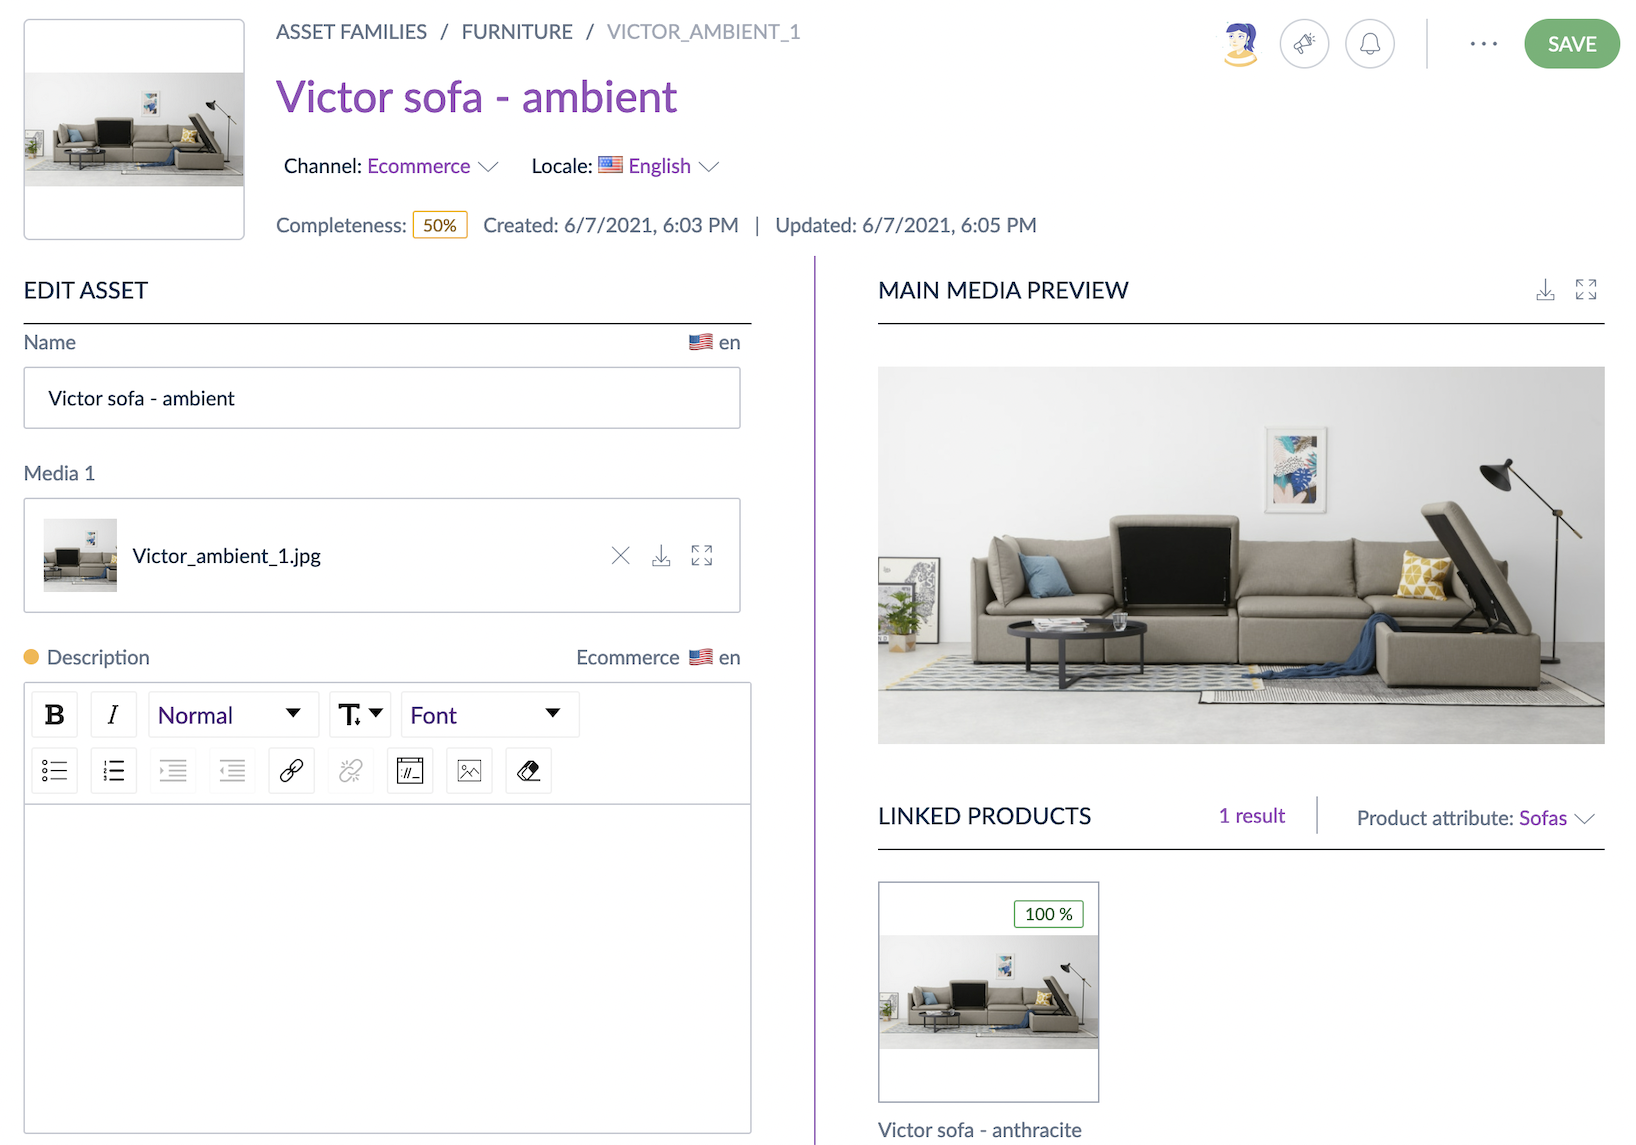
As you can see, the screen is divided into 2 parts. On the left, you retrieve all your asset attributes, that you can easily enrich. On the right, we display the main media of your asset and the product(s) linked to this asset.
You can easily download and display in full screen the main media thanks to the two buttons on the top right of the main media preview section.
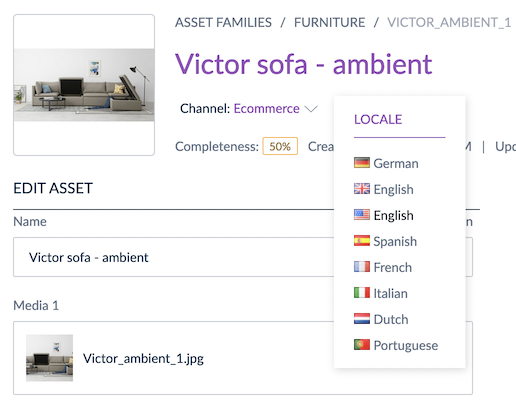
As for a product, you can define if you want a different content according to channels, and the same applies on locales. You can find a locale and channel switcher on each asset, meaning that if you need to translate values for example, you can do it simply switching from a locale to another.
Manage asset status

Each asset has a system status that defines whether it is enabled or disabled.
- Enabled: The asset is available for use and distribution.
- Disabled: The asset remains in the Asset Manager but is considered unavailable for distribution.
You can change the status of an asset from the asset edit form.
Disabling an asset is different from removing it from a product’s asset collection.
- Removing an asset from an asset collection deletes its association with that specific product.
- Disabling an asset changes the availability of the asset itself without deleting the asset or its existing product associations.
Distribute enabled assets only
Disabling an asset does not automatically remove it from the product asset collections in which it is already present.
To prevent disabled assets from being distributed, enable the dedicated option in your product exports or use the corresponding Product REST API parameter:
- Product exports: Enable With enabled assets only.
- Product REST API: Use
with_enabled_assets_only=true.
When this option is enabled, disabled assets are excluded from the exported or returned values of asset collection attributes. Only assets whose current status is Enabled are included.
This option is particularly important when several assets are linked to the same asset collection, for example when a standard asset and a promotional asset have different availability periods.
If the option is not enabled, asset collection values may contain both enabled and disabled assets.
Schedule asset availability
You can schedule when an asset becomes enabled or disabled by defining its availability dates:
- Enabled from: The date from which the asset is enabled.
- Enabled until: The last date on which the asset remains enabled.
Status, Enabled from, and Enabled until are system properties. They are not custom attributes of the asset family.
Both availability dates are optional. You can define:
- Enabled from only;
- Enabled until only;
- both dates;
- neither date.
When at least one availability date is defined, the asset status is managed automatically according to the current date.
| Date configuration | Resulting status |
| The current date is before Enabled from | Disabled |
| The current date is on or after Enabled from and Enabled until is empty | Enabled |
| The current date is on or before Enabled until and Enabled from is empty | Enabled |
| The current date is after Enabled until | Disabled |
| The current date is between Enabled from and Enabled until, inclusive | Enabled |
Availability is managed at day-level granularity. Scheduling a specific time of day is not supported.
Enabled until must be equal to or later than Enabled from.
When the availability dates determine the asset status, the status cannot be changed manually to a conflicting value. To manage the status manually again, clear both availability dates.
Automatic daily status update
Every day at 00:00 UTC, an automated job evaluates all assets with an Enabled from or Enabled until date.
For each asset, the job compares the current date with the configured availability dates and updates the asset status when necessary:
- The asset is set to Disabled before Enabled from.
- The asset is set to Enabled from the Enabled from date.
- The asset remains Enabled through the Enabled until date.
- The asset is set to Disabled after Enabled until.
The automated job only updates assets whose calculated status differs from their current status. Assets without availability dates are not affected.
When you edit Enabled from or Enabled until, the asset status is also recalculated immediately. You do not need to wait for the next daily automated update.
The Enabled from and Enabled until dates are inclusive.
For example, if an asset is Enabled until September 22, it remains enabled on September 22 and is disabled by the automated job at 00:00 UTC on September 23.
Bulk edit multiple assets
If you have the Edit permission on an asset family, you can bulk edit attributes from one or more assets from the same asset family.
Let's imagine you need to add a tag to several assets from the same family, this tag will give information on the main color of the image, and this color is the same for all your selected assets. Instead of manually adding the tag for each of these assets, you can easily do it in one action for your selection of assets, thanks to a bulk edition. Here's how to do so:
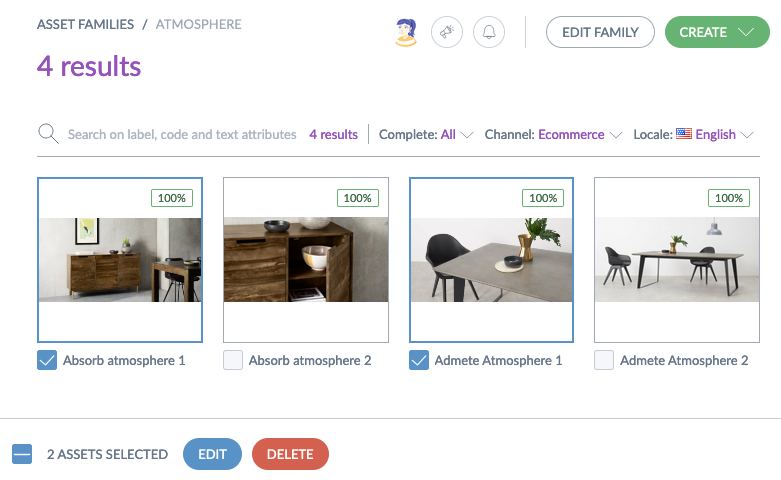
- Check the box under each asset you want to bulk edit
- In the bottom bar, click on Edit
- In the bulk edit pop-in, click on Add attributes in the top-right menu
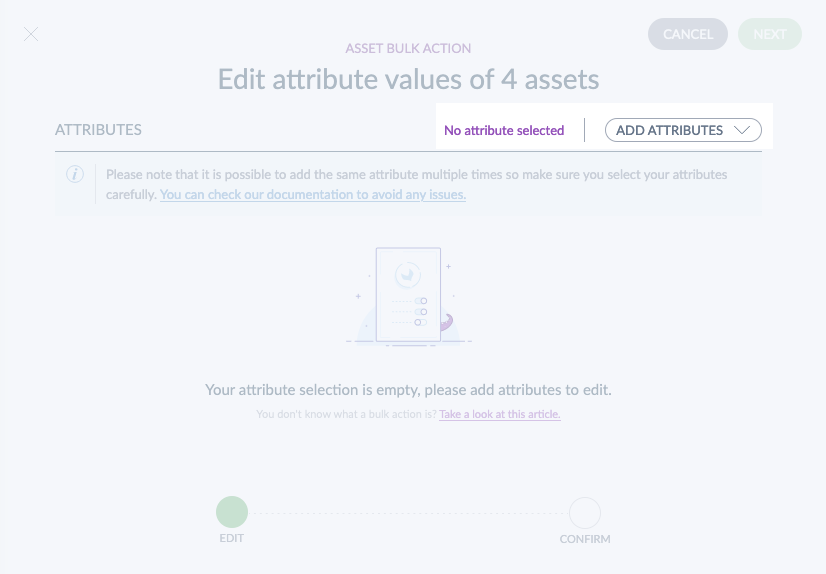
- Select the attributes you want to bulk edit
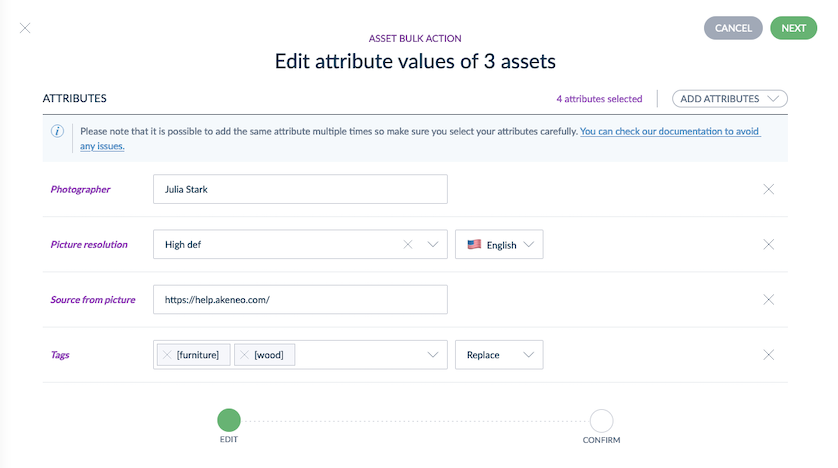
- Fill in the values you want for each selected attribute
- Once you are done, click on Next in the top-right corner
- You can then review the changes that will be made. If you want to continue, click on Confirm
Please note that it is possible to add the same attribute multiple times. For instance, if you want to edit an attribute that has a different value per channel and/or per locale, you have the possibility to do so by adding the attribute as many times as you want. However, you have to carefully select a different locale and/or channel for each of them, so that you will avoid setting different values for the same attribute with the same locale and/or channel.
The attributes configured as "read-only in the UI" and those used as target attributes for an asset transformation cannot be edited in bulk. Read our article to learn more about transformations and target attributes.
- Status
- Availability dates: Enabled from and Enabled until
These system properties are available in the System section of the selection menu.
When you bulk edit Status without changing the availability dates, assets whose existing dates conflict with the requested status are skipped. You can review the corresponding warnings in the Process Tracker. When you bulk edit Enabled from or Enabled until, the status of each asset is automatically calculated from the new availability dates.
Leaving an availability date empty clears that date for all selected assets.
Display the products linked to an asset
You can see at a glance the products that are linked to an asset, directly in the asset edit form, in the Linked products section.
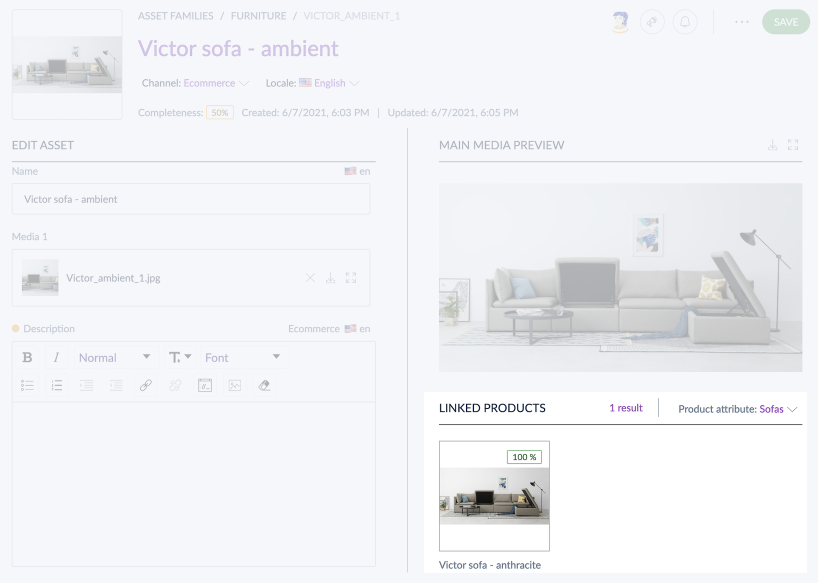
In our example, the asset named Trent packshot 1 is linked to only one product named Trent thanks to the asset collection Images. You can click on the product thumbnail to open the product edit form.
In the Linked products section, the first 10 products linked to the asset (for the selected product attribute) are displayed as well as the total number of products linked ("xx results").
If more than 10 products are linked to the asset, a message is displayed after the last products:
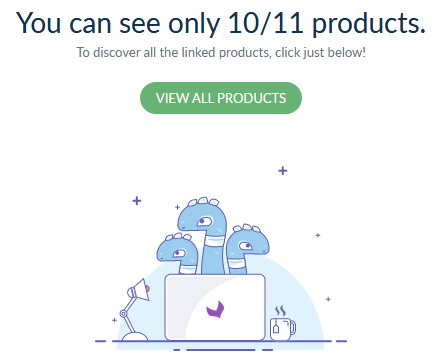
If you want to display all the products linked to an asset, you just have to click on the View all products button, it will open the product grid with a filter on the product attribute linked and the asset value (for example Trent packshot 1) Then, from the product grid, you can search and launch enrichment actions on these products.
If no products are displayed in the Linked products section, there are two possible reasons:
- Your asset family is not linked to a product attribute, so you first have to create a new product attribute linked to the asset family.
- The selected product attribute doesn't have any product linked to the asset. You first have to link products to the asset.
If the View all products button is not displayed, check that the product attribute is set as usable in grid.
Follow the assets completeness
Like for products, we calculate completeness on assets.
In the assets, several indicators show you the status of your completeness and which attributes are missing.
- Yellow bullet points in front of each missing required attribute, showing that you have to complete this attribute to improve the completeness.
- The completeness percentage in the header of the asset informs you of the completeness level.
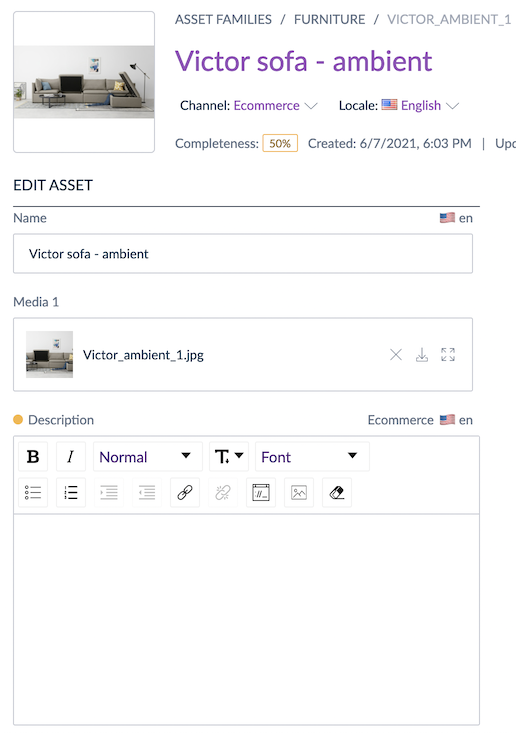
You also have the completeness indicator directly on the asset thumbnail in the library.
The completeness is automatically calculated as soon as we enrich a required attribute. It means that the bullet point will disappear as soon as the required attribute is filled, and same for the completeness percentage evolution.
Delete assets
Delete an asset
You can delete an asset or all the assets of an asset family.
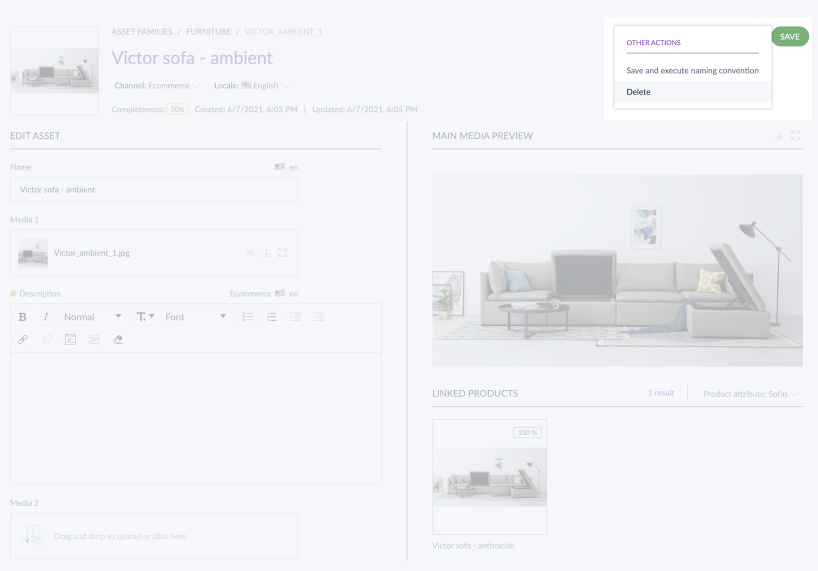
To delete an asset, click on the asset, then on the ... button at the top right corner of the header, and delete.
Delete a selection of assets
It is possible to delete your own selection of assets.
- Check the box under each asset you would like to delete
- In the bar at the bottom, click on delete
- In the confirmation popin, type in the name of the asset family and click on delete
Please note that if you change any filter afterward, this asset selection will be reset.
In the bottom bar, checking the box allows you to select all assets or none in one click! This way, you are able to mass delete all the assets very easily 😉.
To delete all the assets of an asset family, you need to check that no asset of this family is linked to a product or a product model. Otherwise you will not be able to delete them.