Set up your Shared Catalogs instance
The Akeneo Shared Catalogs instance creation is managed from the Project console of the Akeneo Portal.
Following the purchase of a Shared Catalogs instance, an email is sent to the Shared Catalogs administrator inviting them to fill in the setup form to create the instance.
You can set up the instance from the link in the email or by accessing the instance configuration page on the Project console.
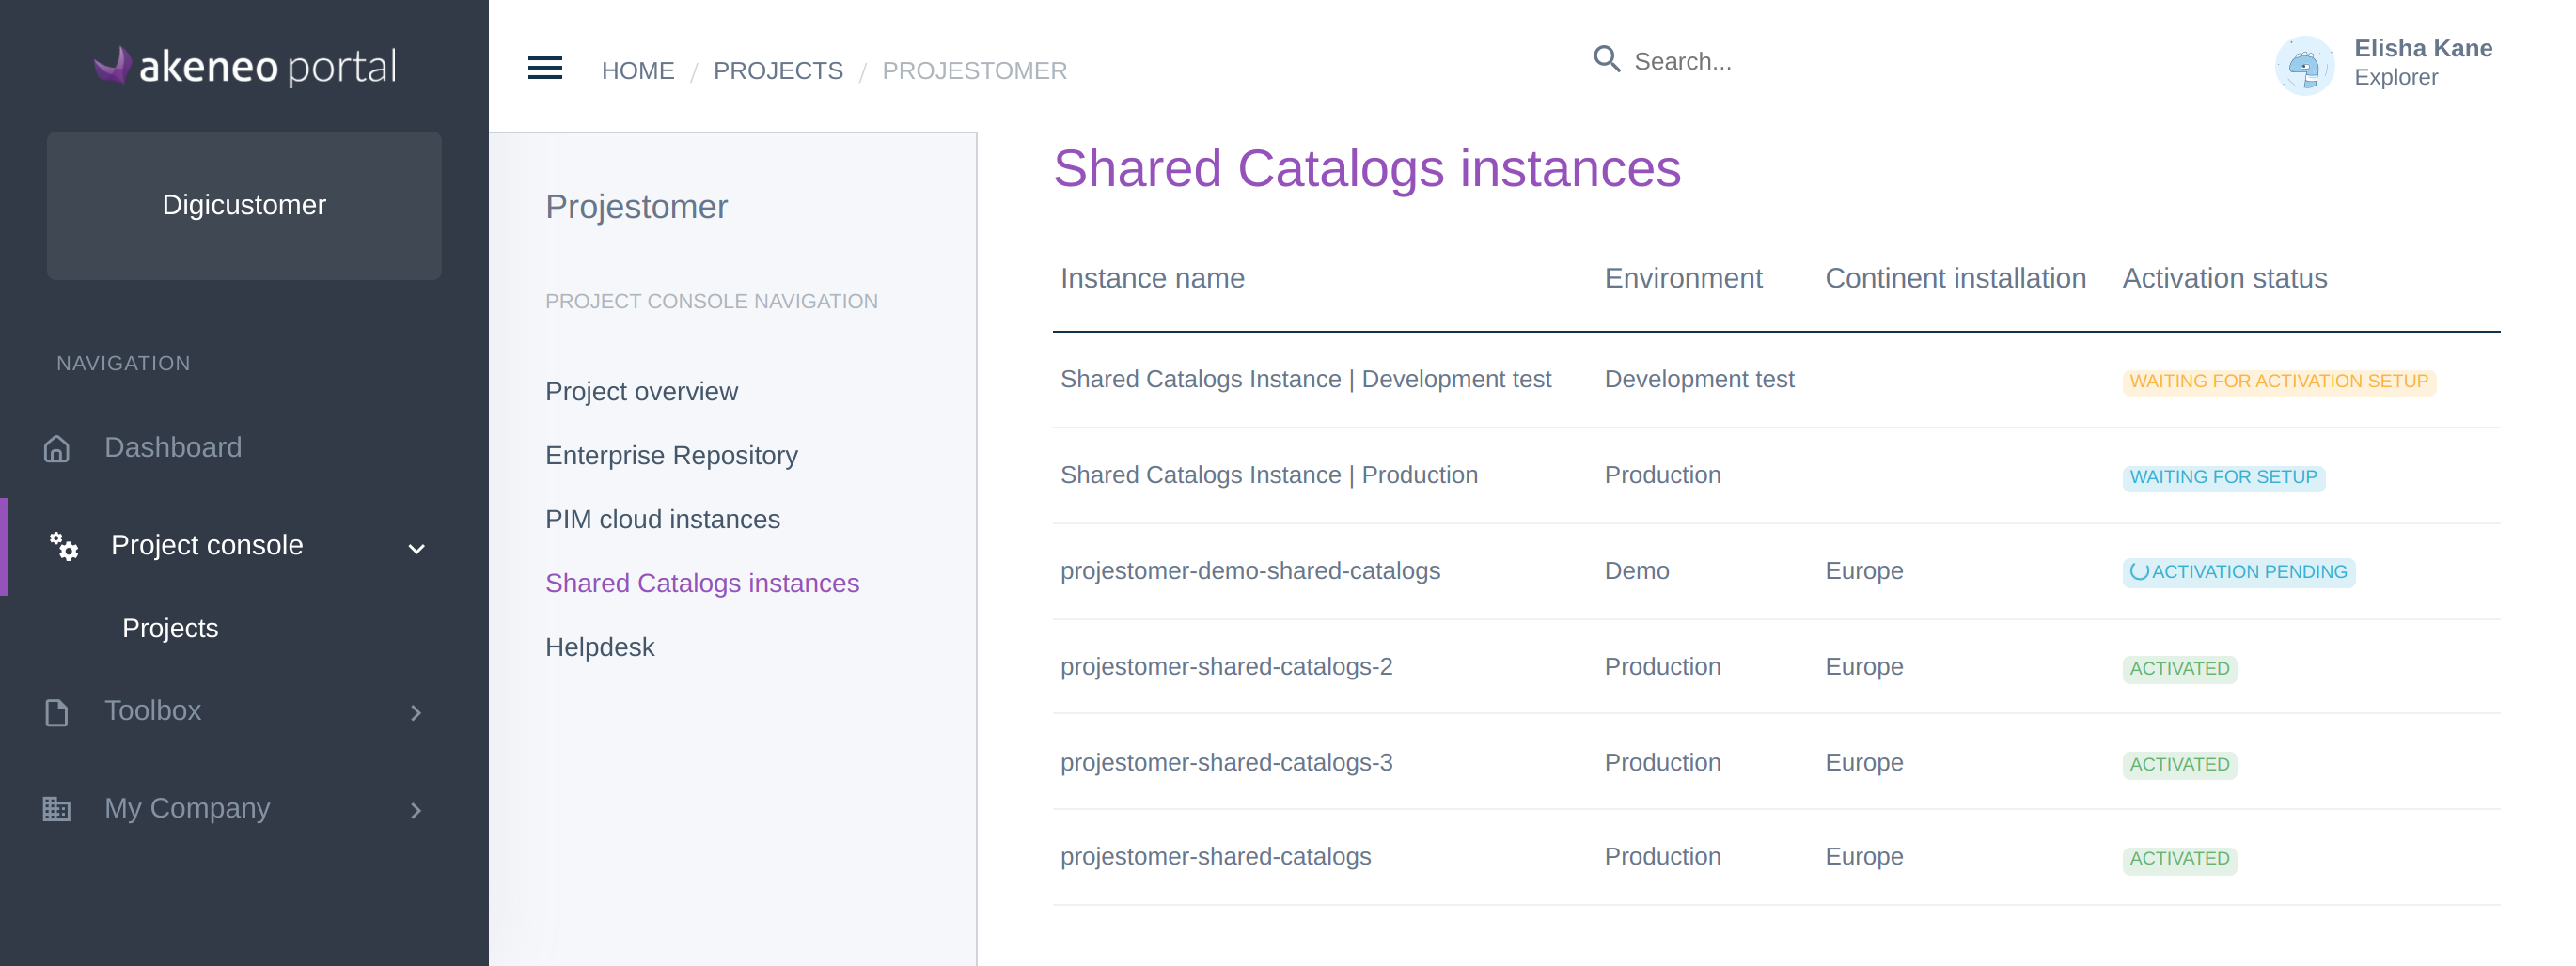
- First, from the menu, go to Project console / Projects and select your project.
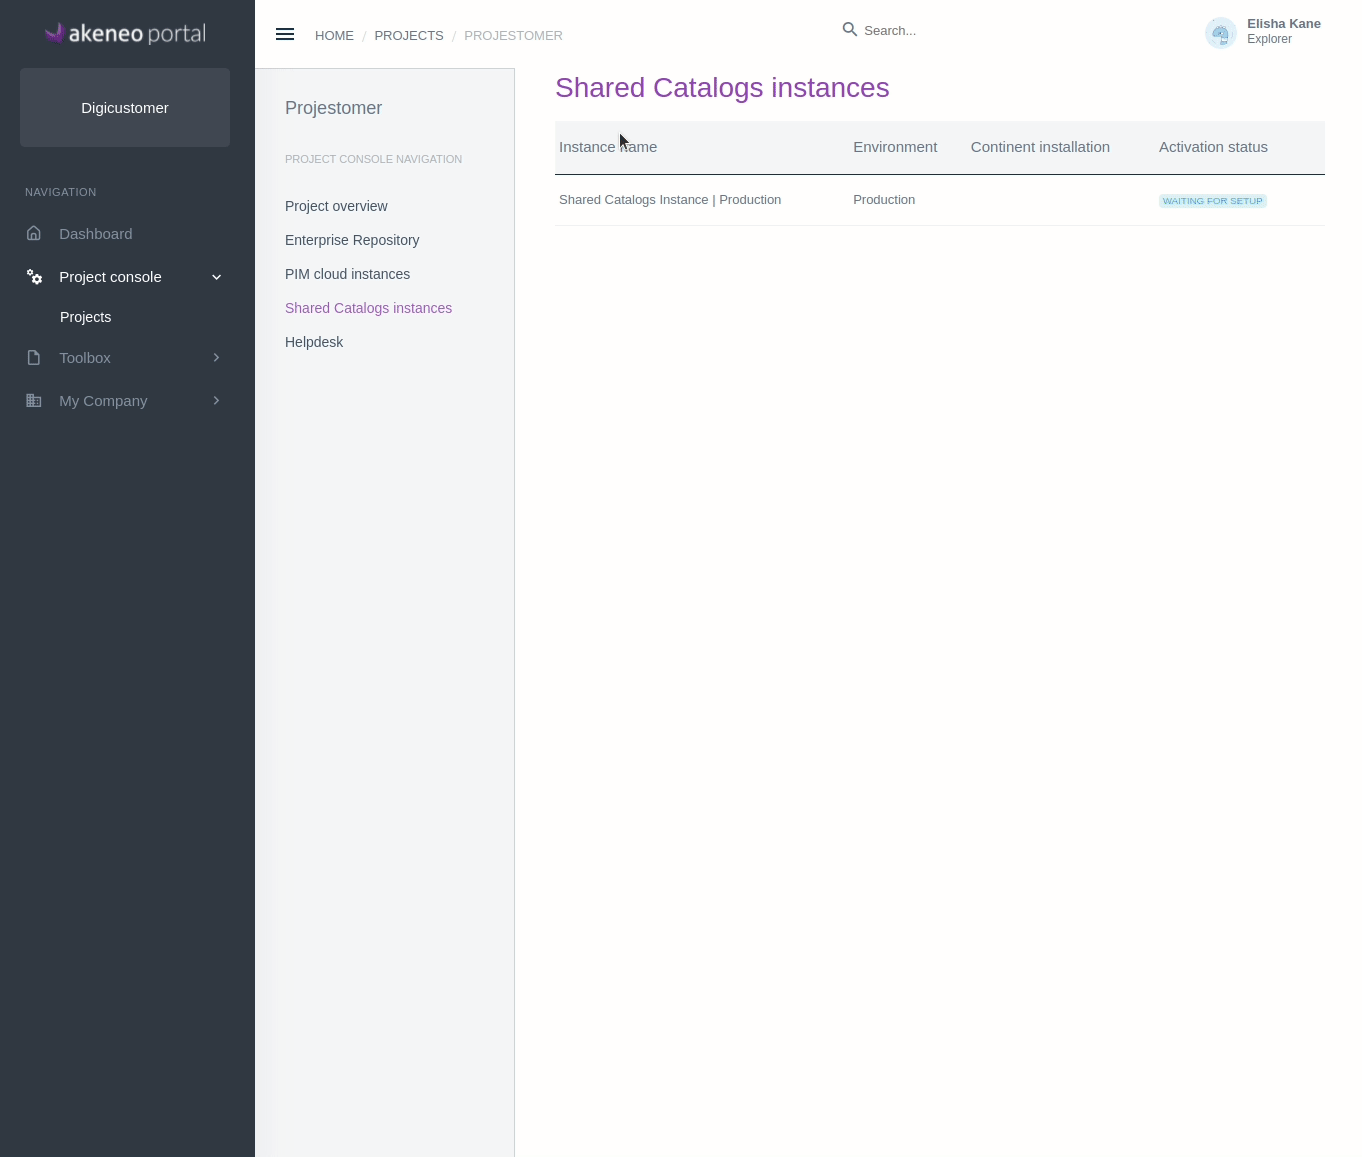
- Go to the Shared Catalogs instance tab, and open the instance with the status Waiting for setup, by clicking on the instance line.
- Then fill in the form with the missing prerequisites in order to create the Shared Catalogs instance.
Link your Shared Catalogs to an existing PIM Cloud instance
- Select a Linked PIM instance in the list.
- Choose an Instance name, it will not be a domain name.
- The Installation continent is pre-filled with your linked PIM instance location.
- Input your PIM API connection credentials, test the connection to validate.
- Once the form is filled in and connection successfully tested, click on Request an instance.
- On the confirmation modal, click Confirm the request
If the linked PIM is a Flexibility instance, the Shared catalogs are compatible only with PIM version 4.0 and above.
Once the request is submitted, it takes some time to process. During this time, you will see your instance status is Activation pending.
Once the instance is created, the Shared Catalogs administrator will be notified by email, and the instance status will change to Activated.
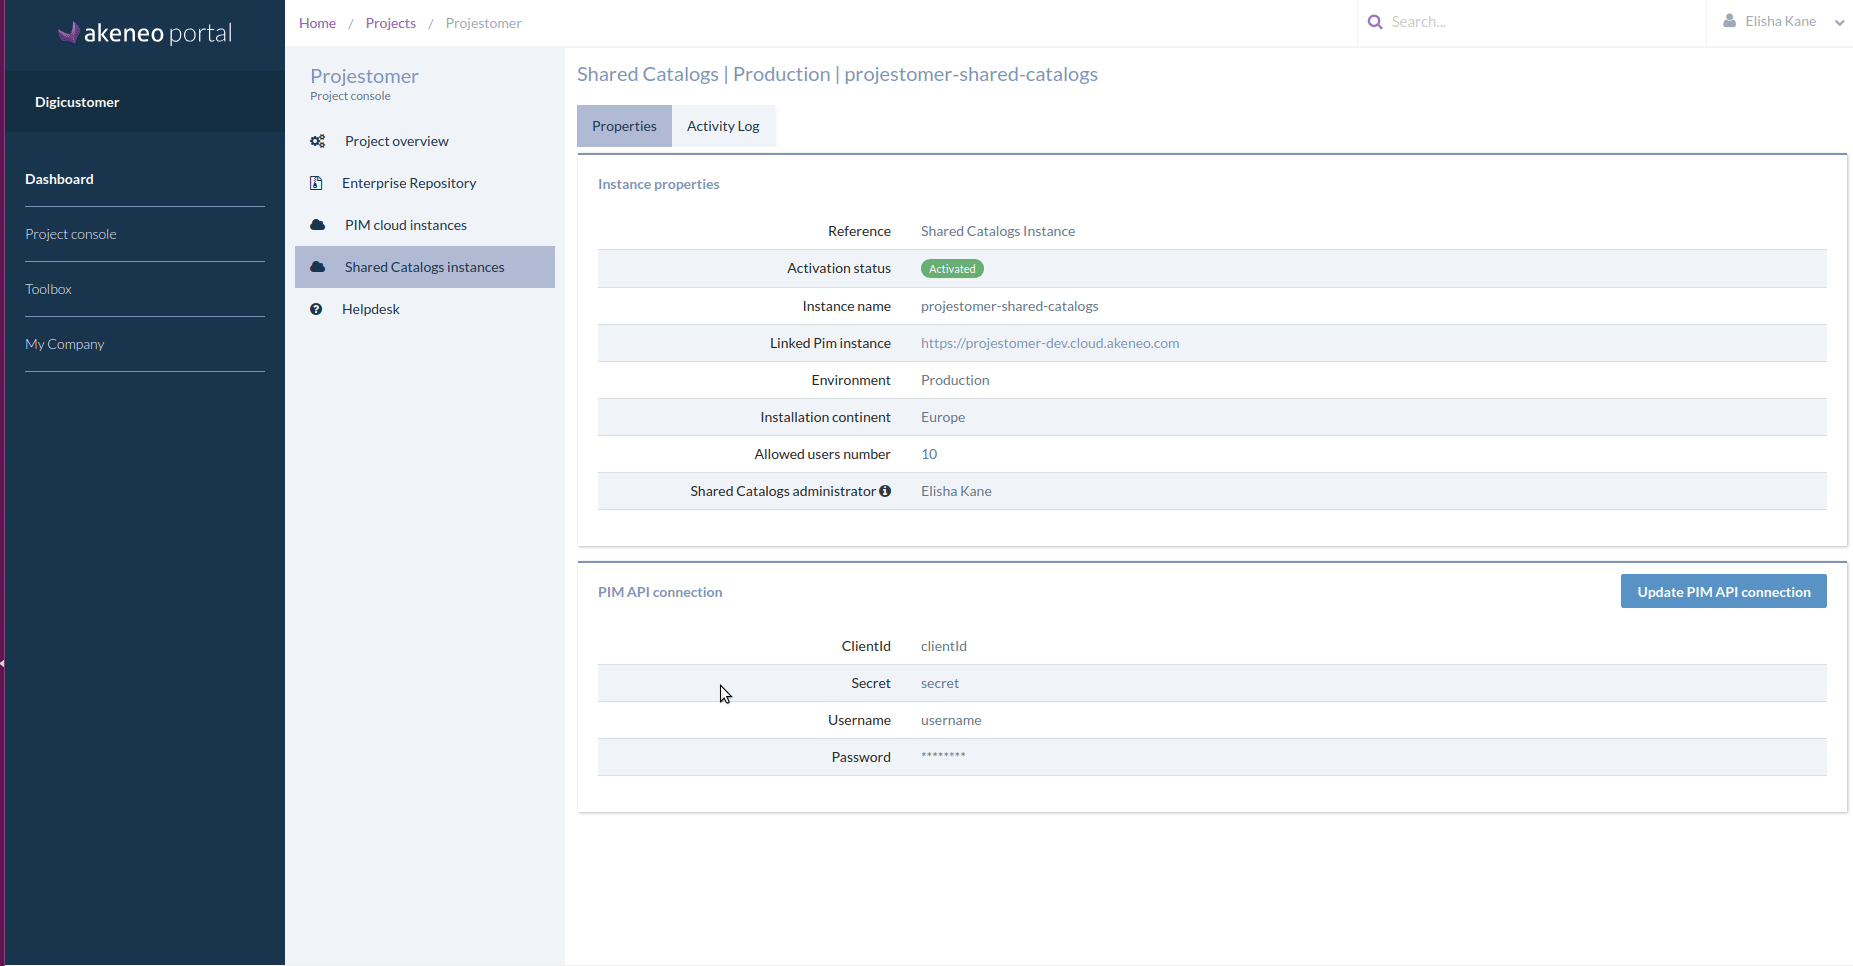
Update your PIM API connection credentials
To update your API connection, the Shared Catalogs needs to be activated.
From the Shared Catalogs instance Properties sub-tab
- Click the Update API connection button
- Input your PIM API connection credentials, test the connection to validate.
- You can change the Shared Catalogs administrator if needed
- Once the form is filled in, click on Update.
You can update API connection as long the status turned to Starting update, and you will be notified when the change is effective.
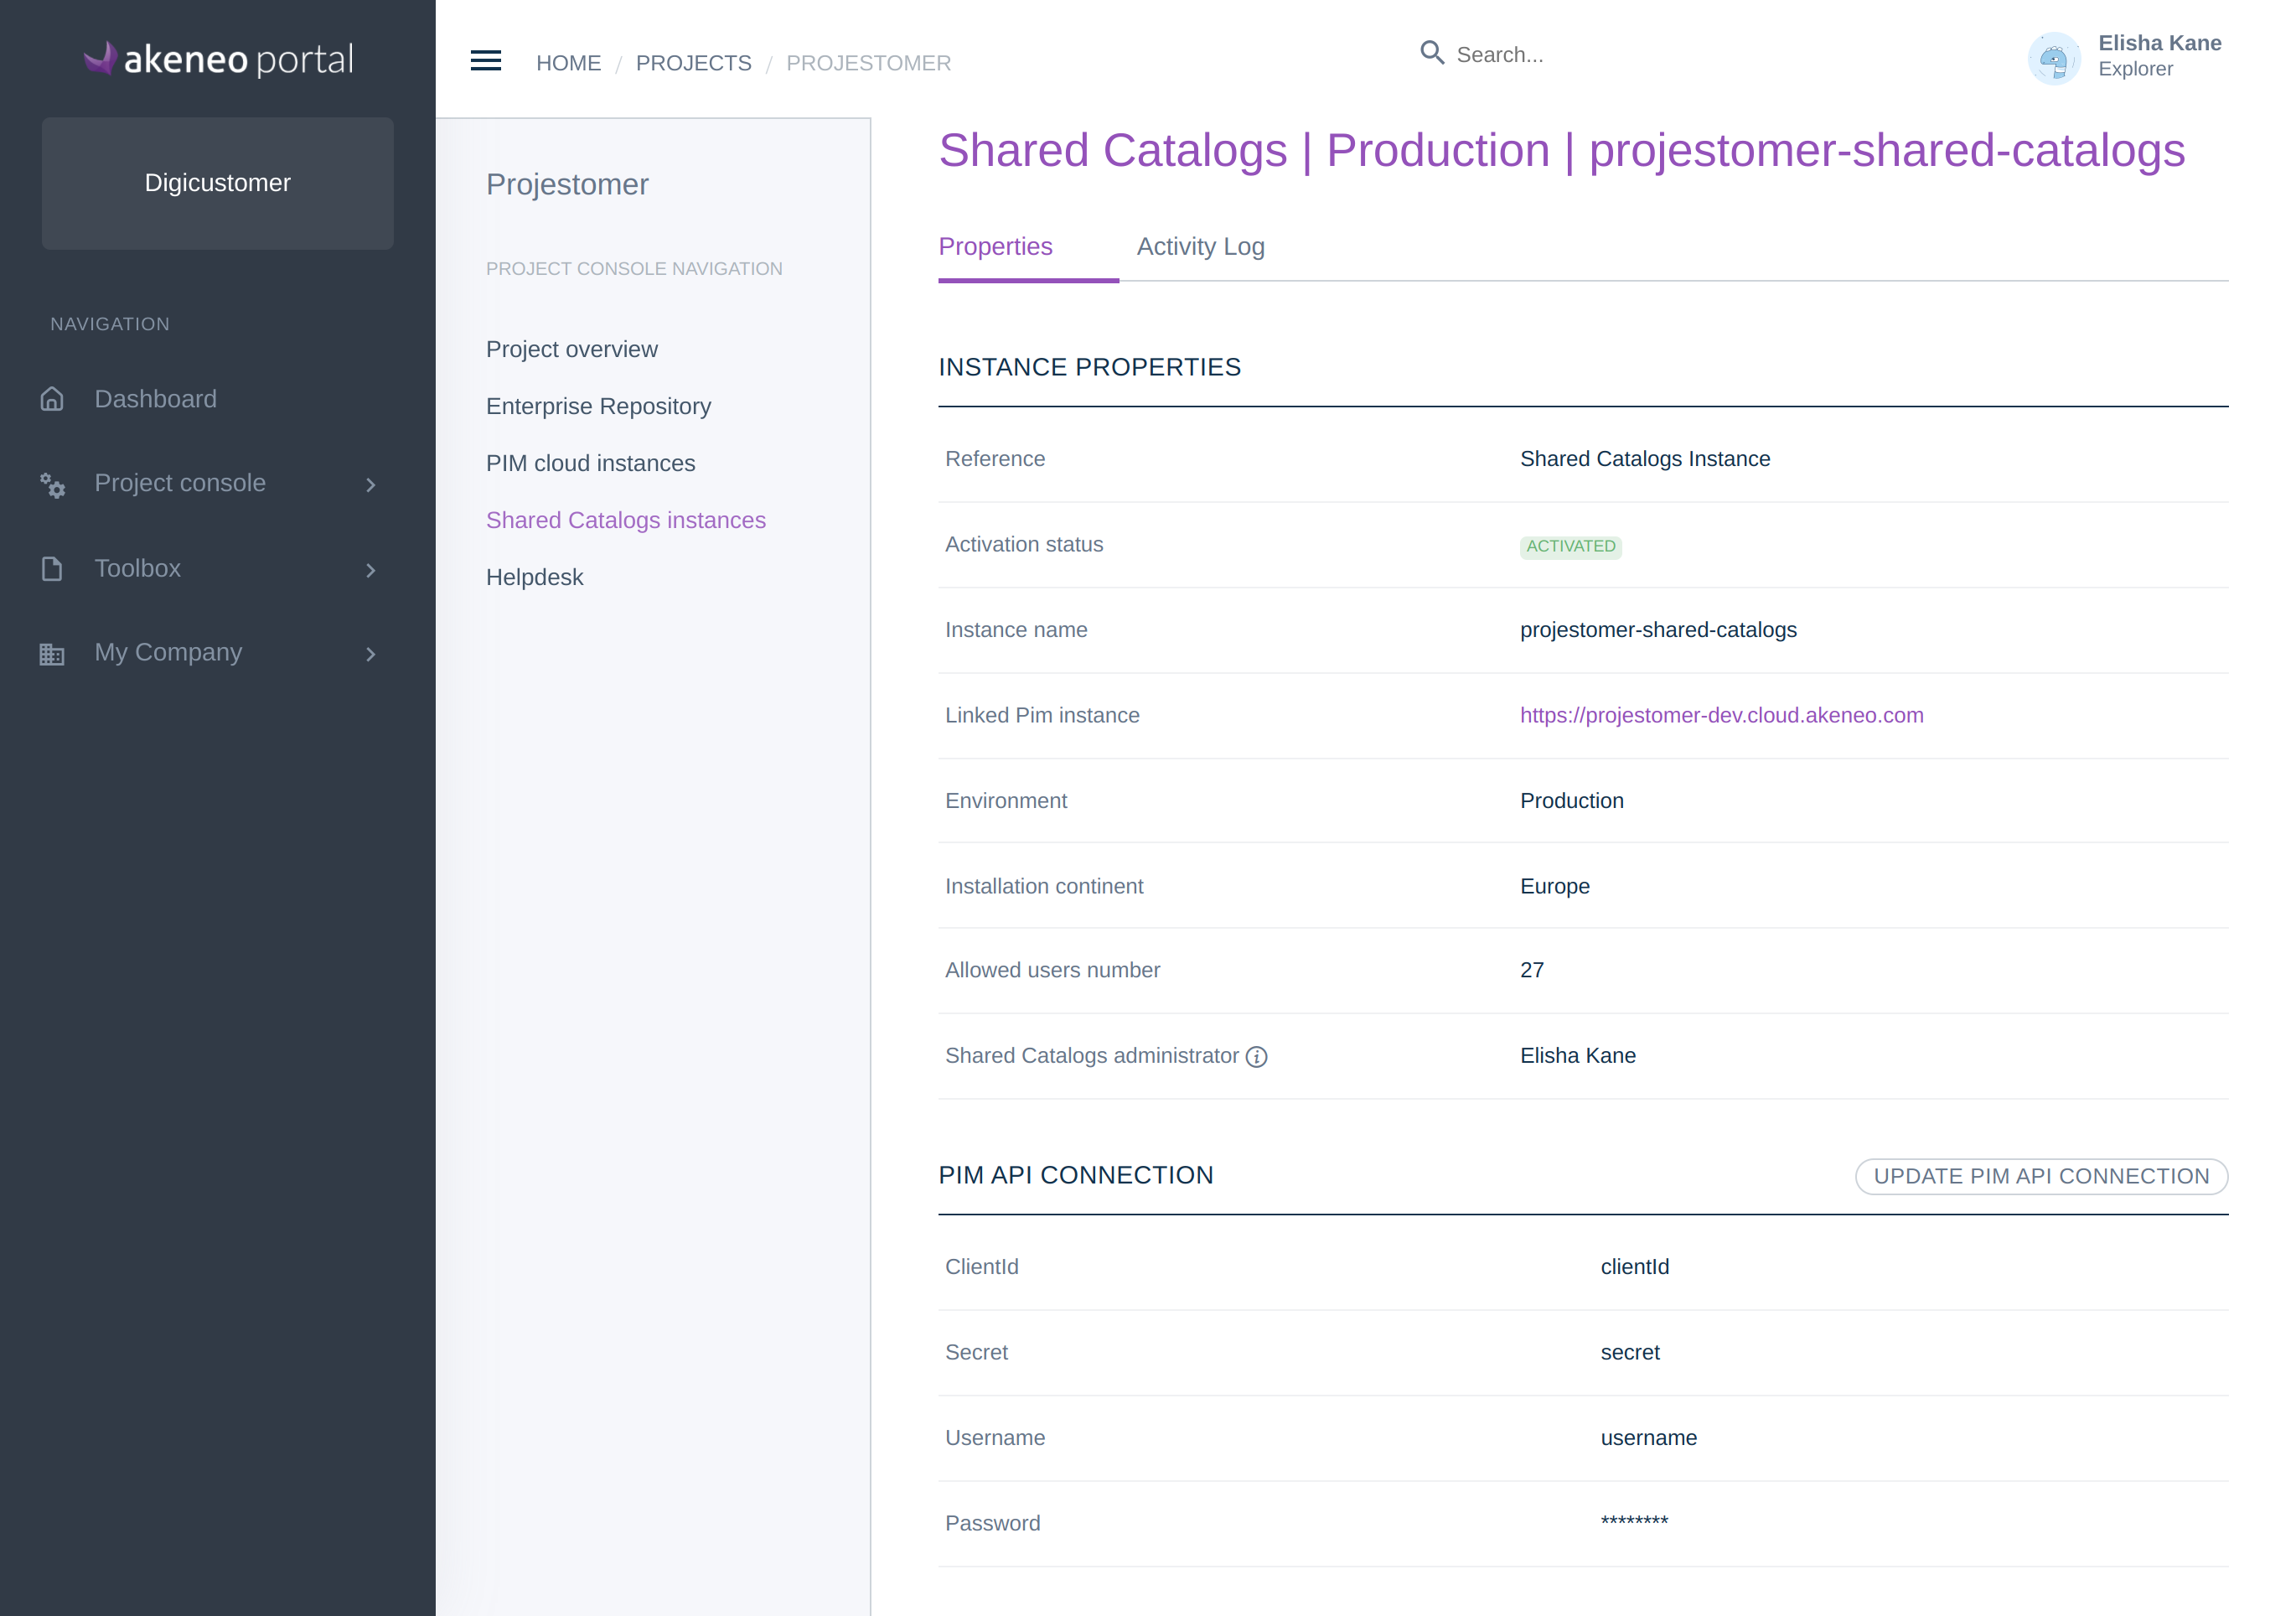
Access your Shared Catalogs instance properties
Once the instance is set up, you can access the instance properties.
- First, from the menu, go to Project console / Projects and select your project.
- Go to the Shared Catalogs instance tab, and open the instance by clicking on the corresponding line.
- On the Properties sub-tab, you can see the information filled during the setup and the name of the Shared Catalogs administrator who received the credentials.
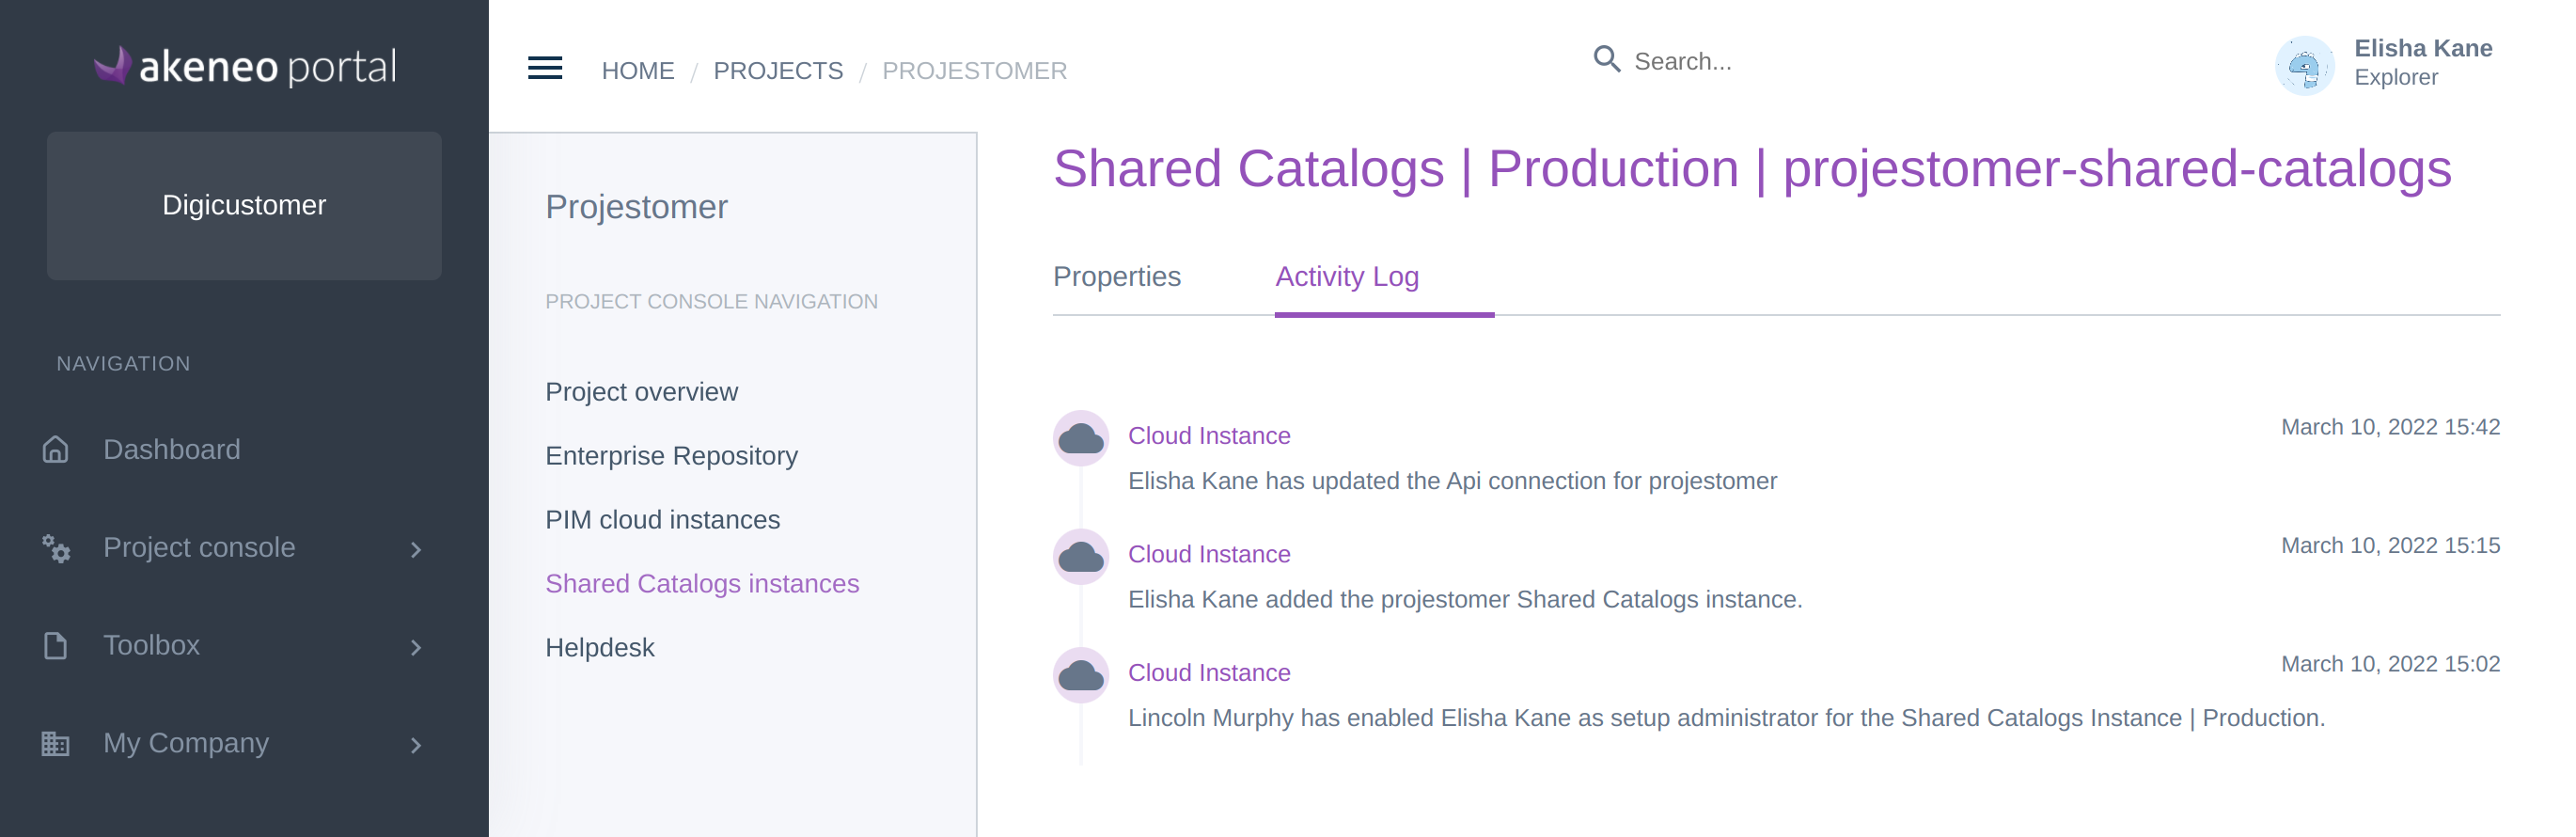
Get the activity log on the Shared Catalogs instance
In the Shared Catalogs instance, on the Activity Log sub-tab, you can see when the activation was done, and when the API connection was updated.