
This feature is in early access. Reach out to your SDM contact if you're interested in trying it out.
The File Format wizard lets you configure how an Excel file should be read directly from the job creation screen, without asking an administrator to write a Custom Input Format. It can prepare an AI configuration for you to review, or you can configure each sheet manually with a live preview of the data.
Before you start
- The wizard supports
.xlsx,.xlsm,.xls, and.xlsbfiles. - If a file matches an existing Custom Input Format, SDM uses that format by default. Select Configure with import wizard when creating the job to open the wizard instead.
- Depending on your organization's settings, SDM may open the wizard automatically for complex Excel files that do not match an existing format.
Start the wizard
- Go to a project's Jobs tab and click Create job.
- Upload an Excel file.
- Select Configure with import wizard, then create the job.

Leave and resume the configuration
If you click Cancel before importing the file, SDM keeps the job without starting its workflow. The job appears in the Jobs list with the Needs configuration status.
Hover over the job and click Configure to reopen the wizard. The wizard starts again from Sheets, so review or re-enter any choices you made before leaving.
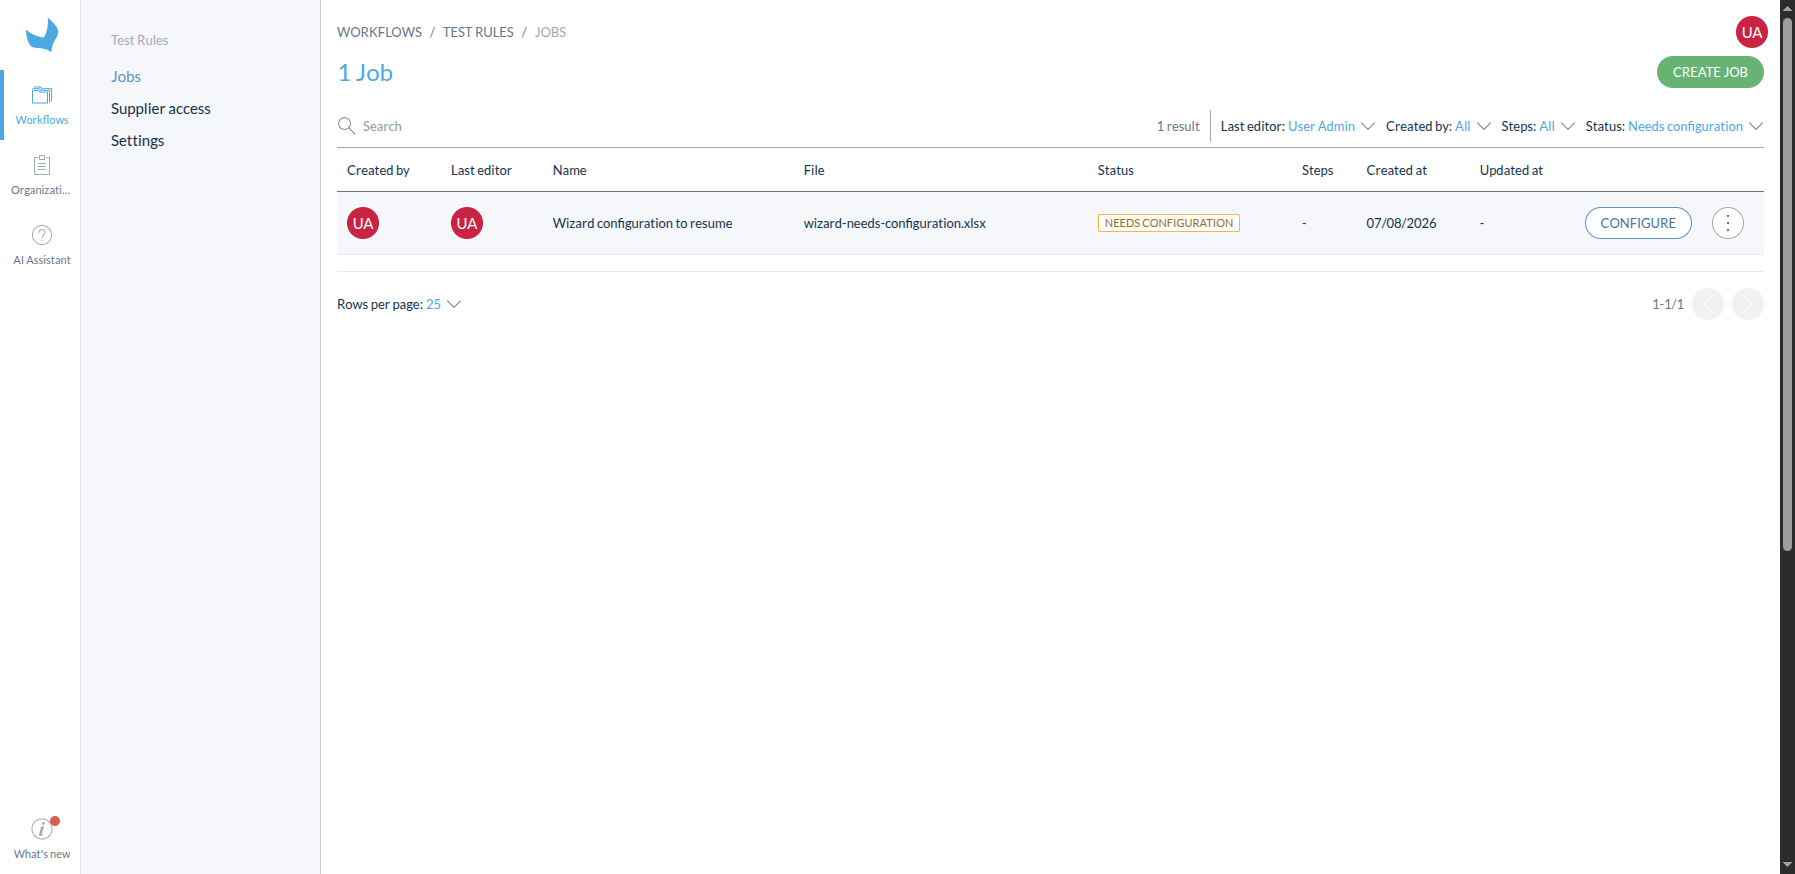
A file waiting for its Wizard configuration remains available from the Jobs list.
Review an AI configuration
When the wizard opens, SDM prepares an AI configuration in the background. You can start configuring the file manually while you wait.
- When An AI configuration is ready to review appears, click Apply AI suggestion.
- In Sheets, review which sheets the AI suggests loading or ignoring. You can change any checkbox before continuing.
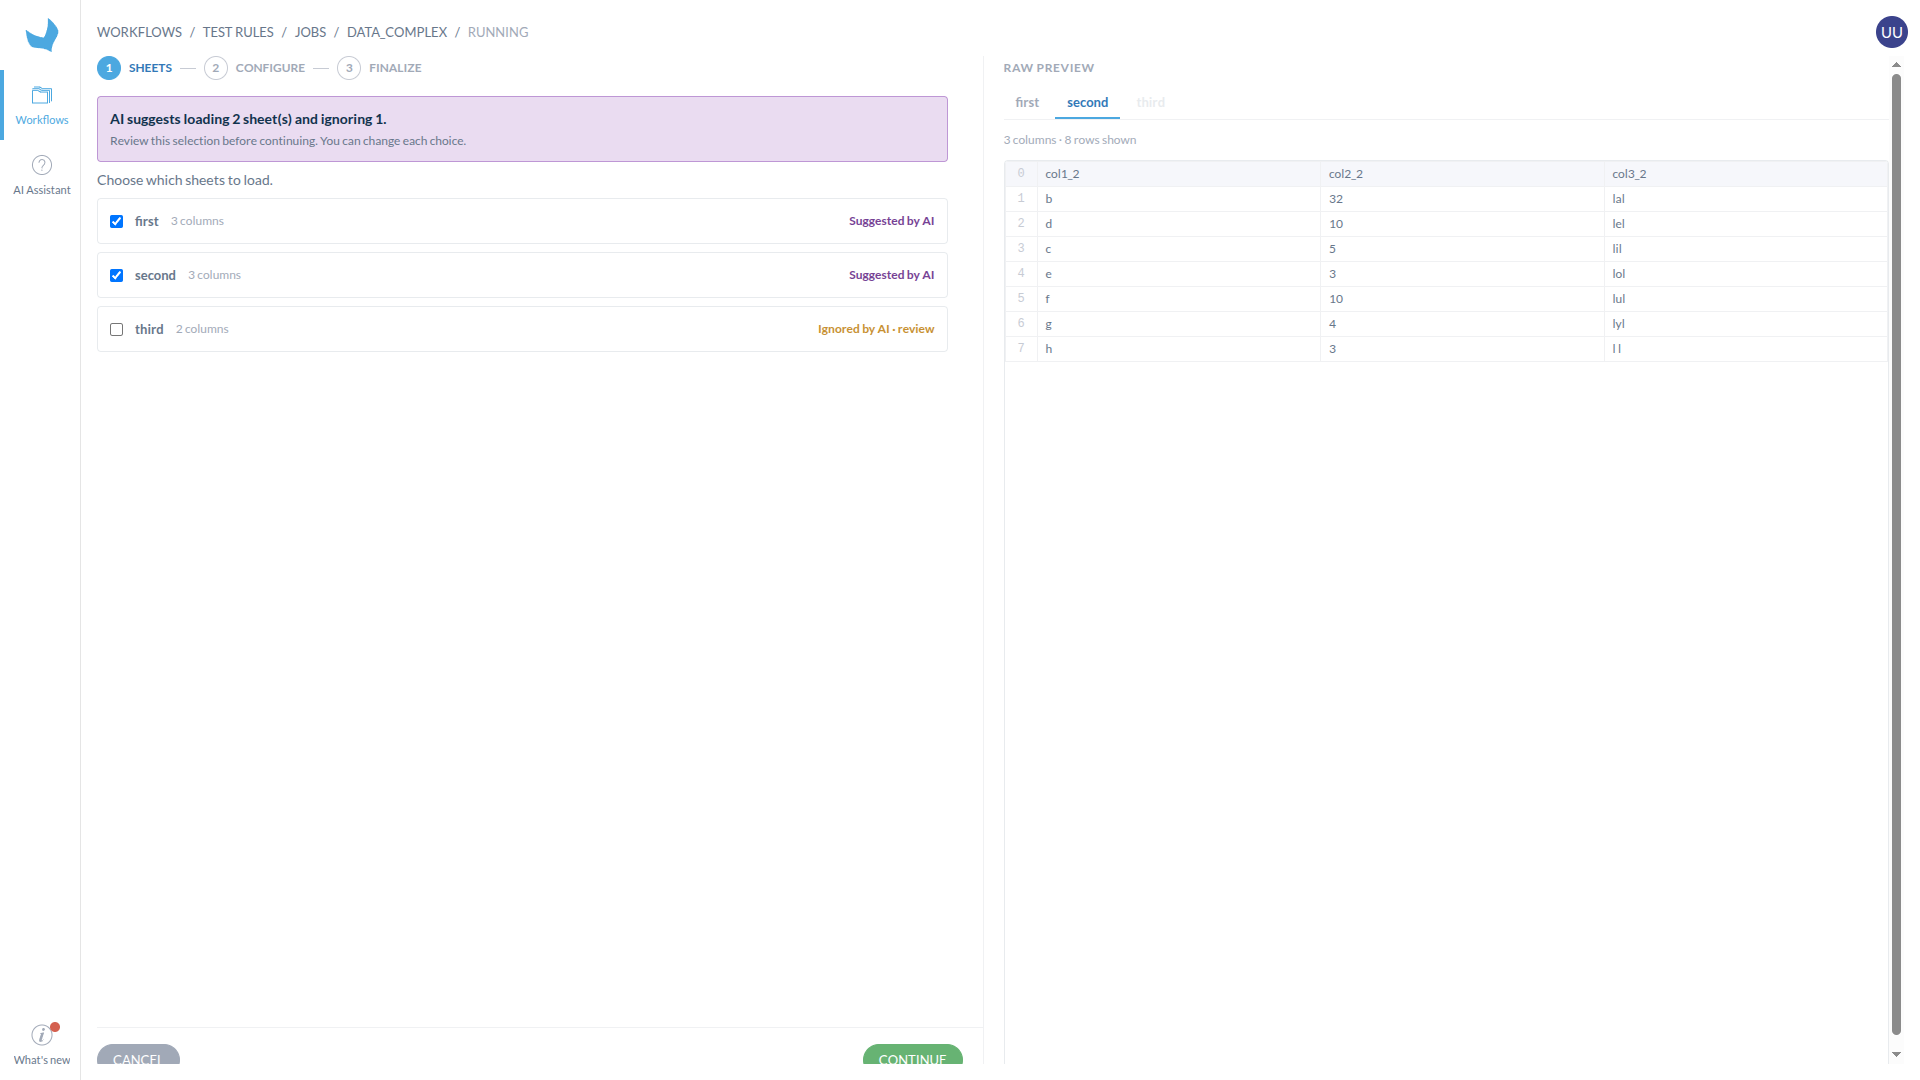
The AI suggests loading two sheets and ignoring one, while the raw file preview remains available on the right.
- Click Continue and review every loaded sheet in Configure. The sheet tabs use these statuses:
- AI — The suggested configuration is technically valid, but you must still review it.
- ! — The sheet needs review before you continue.
- ✓ — The sheet was reviewed manually.
- Check the suggested header rows, excluded rows, transposition, join or stack method, join keys, regrouping, and forward-fill columns. Change any setting that does not match the file's business meaning.
- If you change a sheet, click Validate. Repeat until every loaded sheet is ready.
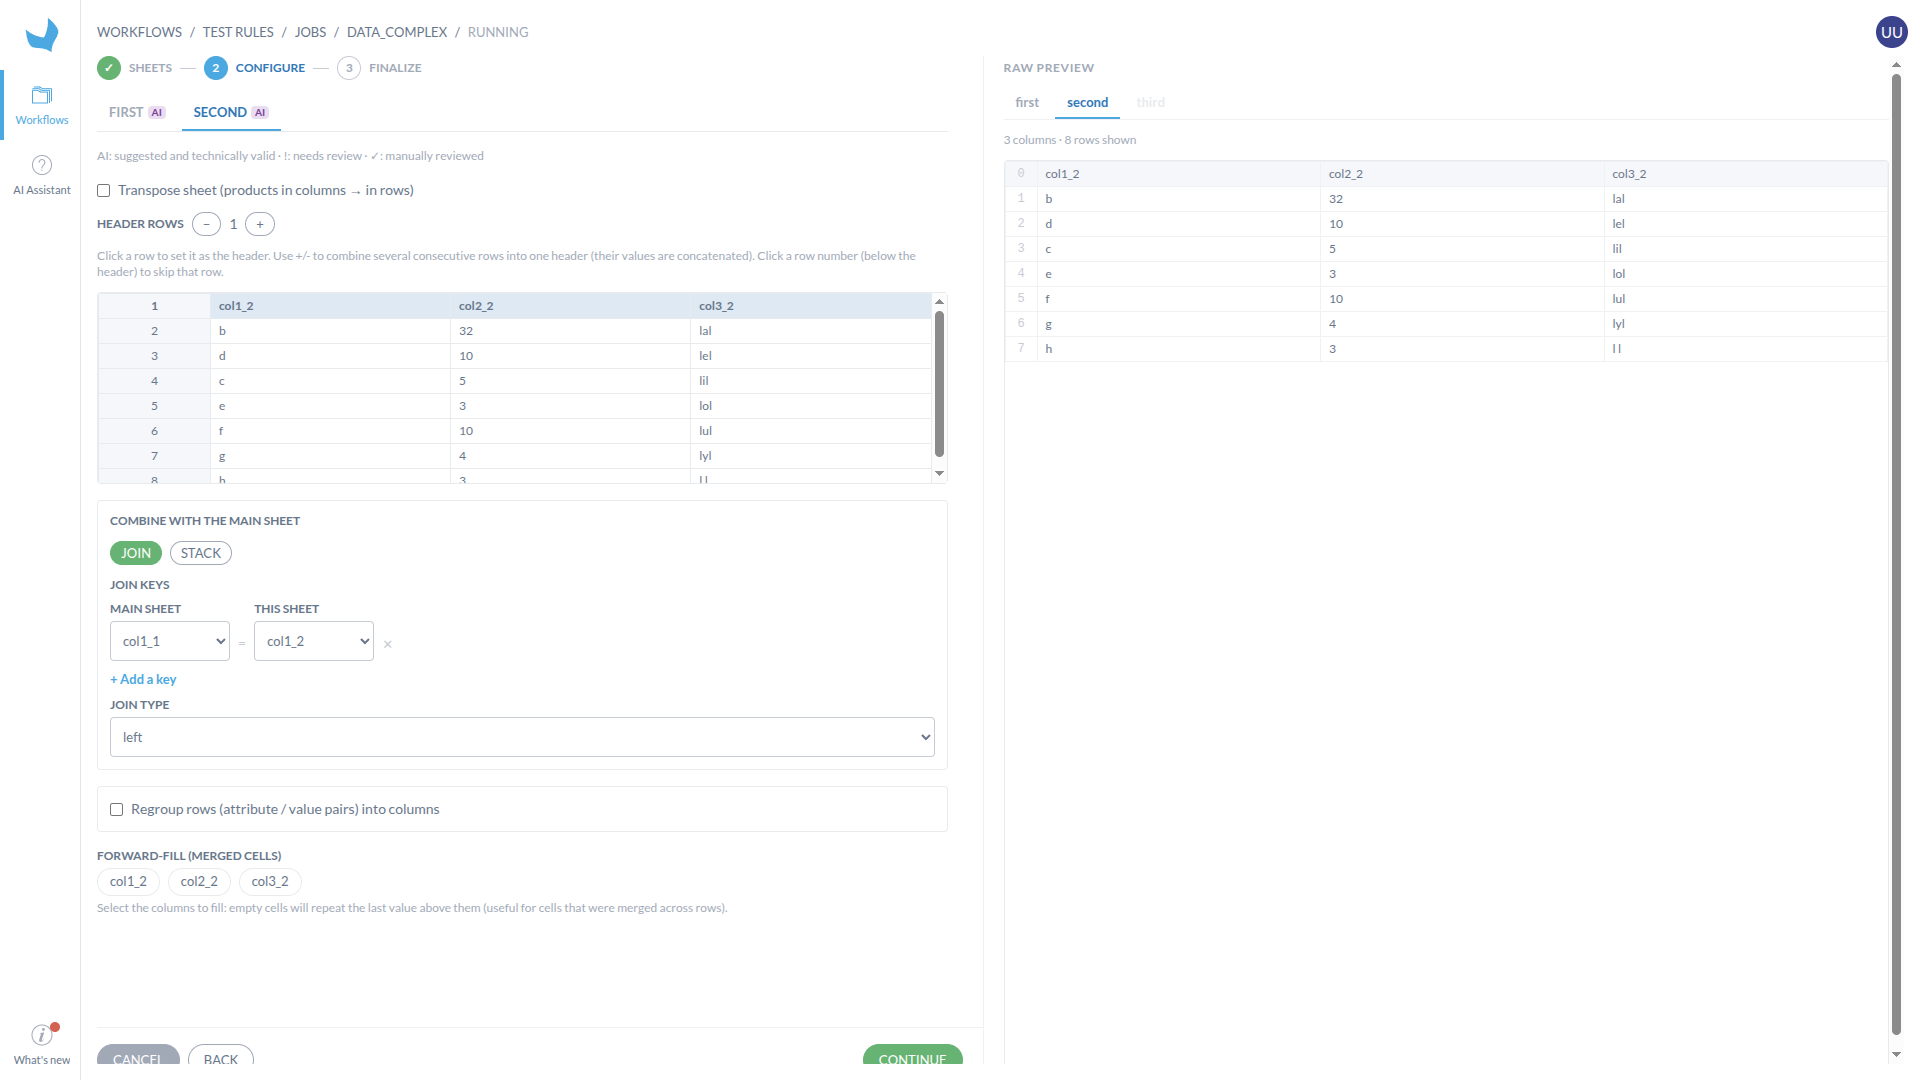
The Configure step shows an AI-suggested left join and matching columns for the second sheet.
An AI status means that the configuration can be processed, not that it is correct for your catalog. Review the selected sheets and every suggested transformation before importing the file.
If the suggestion is temporarily unavailable, click Retry or continue configuring the file manually. If you apply a suggestion after making manual changes, SDM asks for confirmation before replacing your choices.
Configure the file manually
You can complete the wizard without applying the AI suggestion:
- In Sheets, choose which sheets to load. Unselected sheets are ignored for the rest of the import.

- In Configure, select each loaded sheet and configure its structure:
- Click a row to use it as the header row.
- Use Header rows if the headers span more than one row.
- Click a row number below the header to exclude that row from the data.
- Select Transpose sheet if products are stored in columns instead of rows.

- For every sheet after the first, choose how to combine it with the main sheet:
- Join — Match rows between the sheets on one or more shared columns, such as a SKU, then choose a left, inner, right, or outer join.
- Stack — Append the sheet's rows below the main sheet's rows.
- Select Regroup rows into columns if the sheet stores attribute/value pairs that should become columns.
- Select the columns to forward-fill when a value should be carried through blank cells below it, which is common with merged cells in Excel exports.

- Click Validate once a sheet's configuration looks correct, then repeat for the remaining sheets.
Finalize the import
- In Finalize, review the combined result preview.
- Choose how to use the configuration:
- Continue for this file only — Use the configuration for this import and discard it afterward.
- Save as import format — Save the configuration as a reusable Custom Input Format. This option is available only to organization administrators.

- Click Import or Save & import.