
Introduction
To ensure a successful installation of the connector, we strongly recommend enlisting the expertise of a technical resource with a proven track record of SFCC B2C skills and Akeneo PIM knowledge. This individual or team should have a demonstrated proficiency in both SFCC Commerce and the specifics of the connector to carry out the installation effectively. Their experience and knowledge will be instrumental in setting up the connector correctly and maintaining its optimal performance. For added convenience and to streamline the installation process, Akeneo offers a Professional Service Assistance option. Please reach out to your Customer Success Manager (CSM) for further details and assistance.
Before getting access to the SFCC connector, please check the what you need to know before using the connector section.
Prerequisites and access
Akeneo Connector for SFCC (Enterprise Edition) is compatible with Akeneo PIM Enterprise Edition (please refer to the compatibility and pre-requisite article for more information). This version is officially supported and maintained by Akeneo.
To acquire the Enterprise Edition of the connector, please reach out to us through the app store or directly by contacting your dedicated CSM. We will provide you with access to our Private GitHub repository, where the supported version of the connector is hosted. Our Akeneo teams will guide you through the installation process via our Partner Portal and assist you in leveraging Akeneo Support for your enterprise needs.
Downloading the code from the Portal
The Akeneo Connector for SFCC B2C code access is hosted on the Project Console of the Akeneo portal. Before you can begin the installation, make sure you meet the following project management prerequisites:
- Ensure that you have access to the connector within the Akeneo Portal (if you have not already done so).
- Create a developer profile within your organization who will be responsible for the installation. Grant this developer access to the Project Console.
Your CSM has to activate the connector access for this project for you to be able to see the download link.
Once you click, you will have to select the archive version that you want to install.
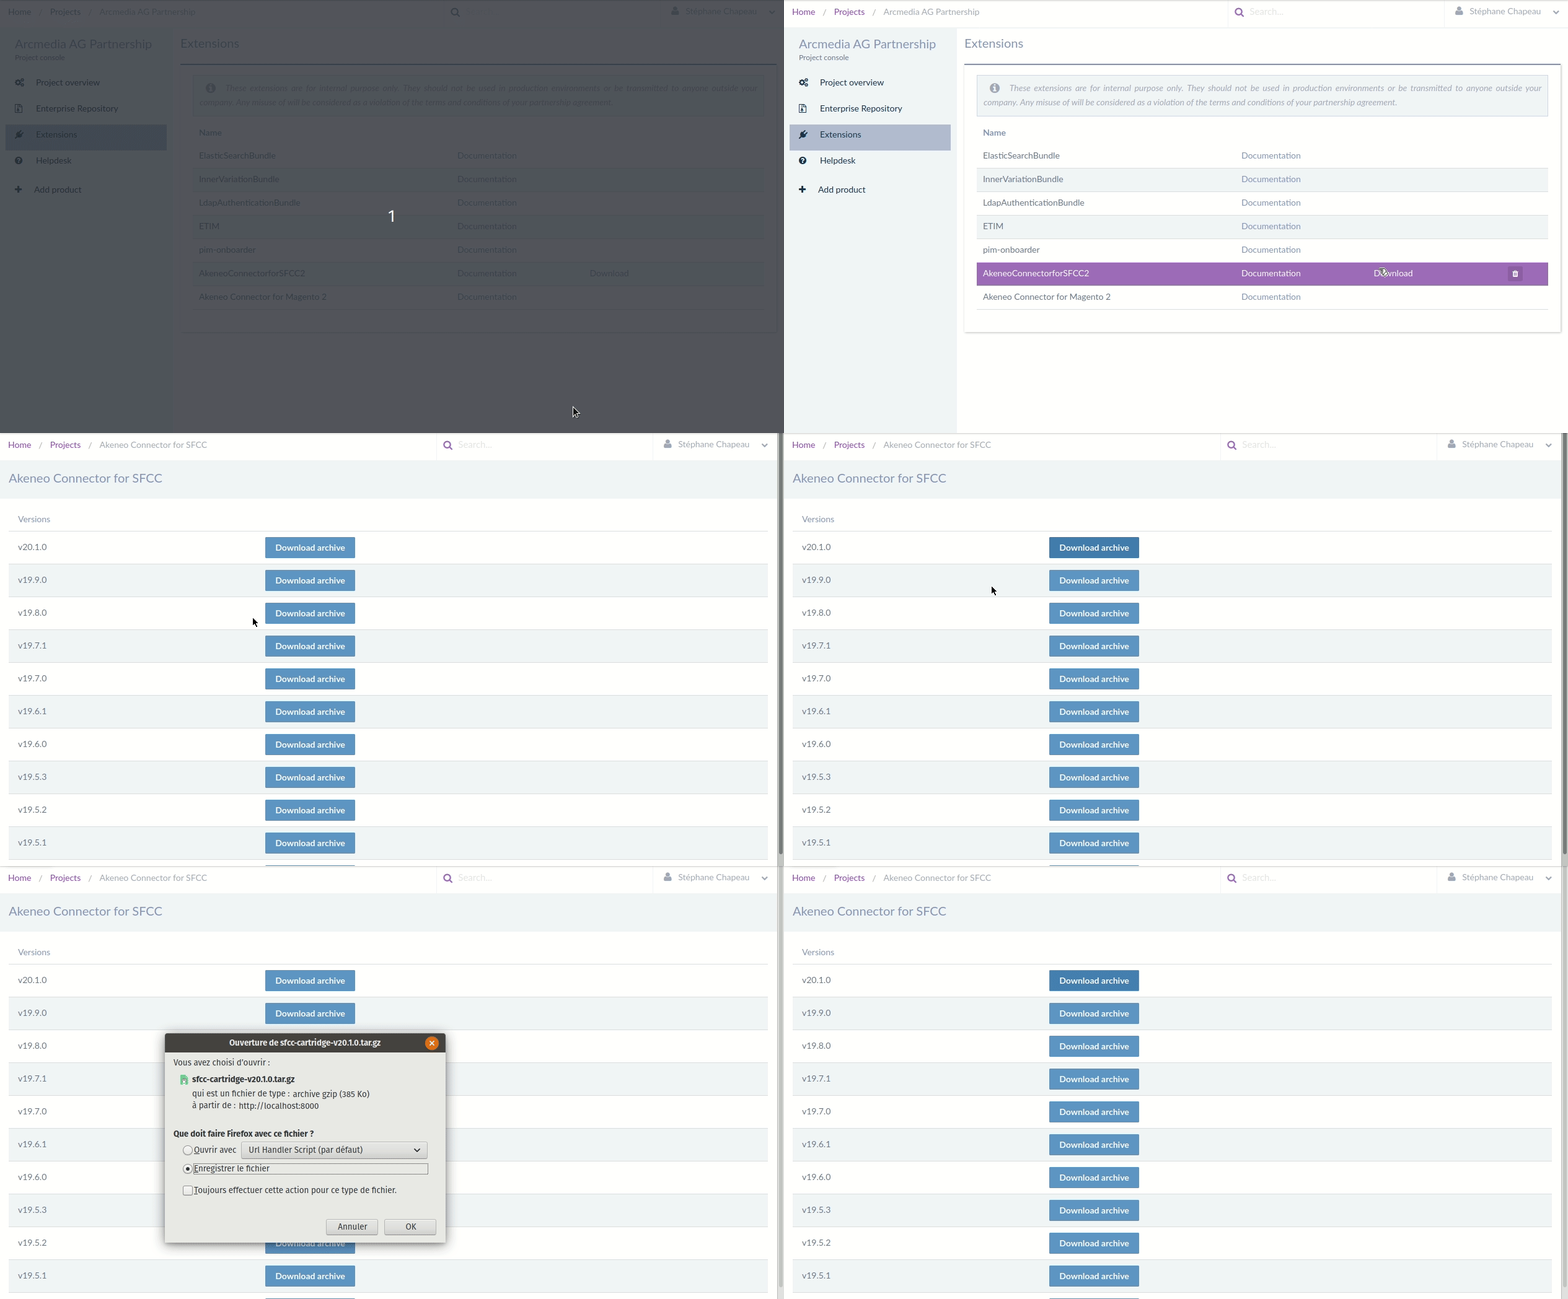
We strongly recommend that you get the latest version.
Configuring your PIM API in Akeneo
Before setting up the Akeneo Connector for SFCC, make sure the prerequisites are covered. For the API configuration, you first need to generate a "client ID" and “secret” in the PIM to enable the API connection.
Please refer to our specific documentation to do so.
You will be given the following items:
- Your PIM URL (ex: https://mypim.cloud.akeneo.com)
- Your PIM API Client ID and Secret
Your PIM user who will be dedicated to the use of the API (Username and Password). Make sure you save them, as you'll need them later.
The connector handles the API authentication itself: it requests and renews the access token from these credentials, and stores it in the AkeneoToken custom object. You do not need to generate a token manually.
Firewall requirements
There is one firewall requirement on the Akeneo instance. The merchant must provide their outgoing IP address to Akeneo, to be configured in the API environment so that the SFCC environment is whitelisted.
Installing the connector on SFCC B2C
Build the cartridges
As the first step of the installation, you need to install the dependencies and compile the front-end code of the cartridges.
The Akeneo Connector for SFCC is compatible with Node v18 and later. Make sure you have a compatible Node version installed; v18.17.0 is recommended.
In the folder containing the connector’s cartridges, run npm install, then npm run build.
Once both commands have completed, the cartridges are ready to be uploaded to the WebDAV code version of your Business Manager.
Upload the cartridge on SFCC
Upload both cartridges of the Akeneo Connector for SFCC, int_akeneo and bm_akeneo, to WebDAV using the upload method of your choice.

Set up the cartridge path
- Go to Business Manager Menu > Administration > Sites > Manage Sites
- Click on Business Manager in the Manage the Business Manager site text
- Under the Settings tab, add both cartridges to the cartridge path by prepending int_akeneo:bm_akeneo: to the Cartridges field
- Click on Apply button

- Go back to the list of sites (Administration > Sites > Manage Sites)
- Under the Storefront Sites section, click on the storefront site you want to synchronize with the Akeneo PIM
- Under the Settings tab, add only the int_akeneo cartridge to the beginning of the cartridge path, by prepending int_akeneo: to the Cartridges field
- Click on the Apply button

If you want to synchronize your Akeneo PIM with several storefront sites, repeat these four steps for each additional site.
Import the metadata
For the Akeneo integration to work, the following object structures (metadata) need to be imported and configured in the Business Manager.
- In the cartridge bundle, find the metadata folder and compress it to generate the metadata.zip file
- Go to Business Manager Menu > Administration > Site Development > Site Import & Export
- Under Import: Upload archive, make sure that the radio button labelled Local is enabled
- Click on the Choose File input field, select the metadata.zip file from the open dialog box, and click on Upload
- After finishing the upload, from the Archives list click on the radio button corresponding to metadata.zip and click on Import
- Click on the OK button of the confirmation box asking “Are you sure that you want to import the selected archive?


Known issue
If you encounter data errors related to job steps after importing metadata, we recommend switching to a different code version (under BM > Administration > Site Development > Code Deployment) and then switching back to the original code version that you are using to install the product. This workaround has been found to resolve the issue effectively.
Enable the Business Manager module
- Go to Business Manager > Administration > Organization > Roles & Permissions
- Choose the Administrator role
- Go to the Business Manager Modules tab
- Select your site or sites in the Select Context drop-down, then click Apply
- Tick the checkbox for Akeneo SFCC Connector and click the Update button at the bottom of the page


Configuring the connector
Before you start
To use the Akeneo jobs, the following requirements must be met:
- If you do not have an existing site, create a site for job association at the site scope.
- If you do not have an existing catalog assigned to your site, create a Storefront Catalog and associate it with your site. This catalog is the selection of products you choose to display on your site.
- Make sure the Master Catalog ID set in the custom site preferences is distinct from the Storefront Catalog ID. The Master Catalog, which contains all Akeneo products, is created automatically and must not share the same ID.
Service configuration
To use the Akeneo Business Manager module and for the connector jobs to run properly, the OCAPI Data Service credentials have to be configured.
- Go to Administration > Operations > Services, then click on AkeneoOCAPIAuthCredentials in the table.
- Enter your SFCC instance’s OCAPI Client ID in the User field and your OCAPI Client Secret in the Password field, then click Apply. Do not modify the Name and URL fields.


Configure OCAPI (Open Commerce API)
The Akeneo Connector for SFCC uses OCAPI (Open Commerce API) calls for its operations. For the connector to function properly, OCAPI settings have to be adjusted in Business Manager by following these instructions.
- Go to Administration > Site Development > Open Commerce API Settings
- Select the type as Data and the context as Global (organization-wide)
- Locate the text file Akeneo-OCAPI-Data-Config.txt in the documentation folder of the Akeneo SFCC Connector cartridge package. This file contains the OCAPI Data configuration for the connector.
- Copy the configuration from the Akeneo-OCAPI-Data-Config.txt file and paste it into the Open Commerce API Settings in Business Manager. If you plan to keep your existing OCAPI configuration, you may want to add the connector's OCAPI configuration at the end of your existing one instead of replacing it entirely.
- Replace "PLACEHOLDER_OCAPI_CLIENT_ID" with your OCAPI client ID
- Click on the Save button

Where to configure the connector
There are two ways to configure the connector’s custom site preferences:
- Using the Akeneo Business Manager module: Business Manager Menu > Merchant Tools > Akeneo SFCC Connector > Configuration. If you encounter an error after the page loads, check that the configurations described in the previous sections have been completed.
- Using the Business Manager native page for editing site custom preferences: Business Manager Menu > Merchant Tools > Site Preferences > Custom Preferences.
API credentials
In the API Credentials section of the connector configuration, fill in the parameters below with the PIM information collected above:
| Connector parameter | PIM information |
|---|---|
| Akeneo SFCC Connector's Cartridge Version | Code version of the cartridge in the Akeneo GitHub repository. This is for the merchant's reference when communicating with the Akeneo support team. This is not a configuration field. |
| PIM Edition (akeneoPIMEdition) | User’s Akeneo PIM edition |
| Akeneo Client ID (akeneoClientID) | Akeneo API Client ID. User's Client ID in the Akeneo PIM API, from the CONNECT / CONNECTION SETTINGS / SFCC page of the PIM Dashboard |
| Akeneo Secret (akeneoSecret) | API Secret. User's secret key in the Akeneo PIM API, from the CONNECT / CONNECTION SETTINGS / SFCC page of the PIM Dashboard |
| Akeneo Login (akeneoLogin) | PIM user username. User's login ID in the Akeneo PIM API |
| Akeneo Password (akeneoPassword) | PIM user password. User's login password in the Akeneo PIM API |
| Akeneo Service General URL (akeneoServiceGeneralUrl) | PIM URL. The URL of the Akeneo instance. Do not end the URL with a "/", the connection will not work. |
No automatic reconnection
In the case of Akeneo API unavailability, there is no automatic procedure to reconnect. However, the connector will try three times to reach the API before stopping.
Next steps
Fill in the remaining connector parameters in Site Preferences. See Configuration panels of the connector and the catalog configuration articles.
Schedule the import jobs and start the synchronization with your Akeneo instance. See Synchronization: load and transfer data.
To enable API communication logging, adjust log levels, or understand how the connector stores its data — including the AkeneoToken custom object — see Monitor data, logs and errors.
If you are installing the connector on an SFCC instance that already holds products or categories managed outside Akeneo, see Installing alongside an existing SFCC catalog.
Please also read the additional documents in the "documentation" folder of the GitHub repository for more technical information about the Akeneo Connector for SFCC.