Manage your projects
How to create a project? Any PIM user can create a project. You do not need any s
How to create a project?
Any PIM user can create a project. You do not need any specific rights or permissions.
You can create as many projects as you want, but keep in mind that a project is a combination of a channel and a locale. For each combination, you will have to create a new project.
For instance, you are launching a new product range in France in April, in May for your UK market and in July for Germany. For each launch, you will need to create one project, one for each locale.
A project needs the following information:
- one locale
- one channel
- a product’s category (or a subcategory)
- Optional: you can also customize your product grid: add/remove attribute filters and/or customize the grid’s columns
If you select a category, all its subcategories will also be added.
You only need the view permission on a category or subcategory to select it.
You first need to set up your project’s environment: select a locale, a scope, products...
Prepare your project
- Go to Products
- Click on the Views/Projects selector
- Select Projects
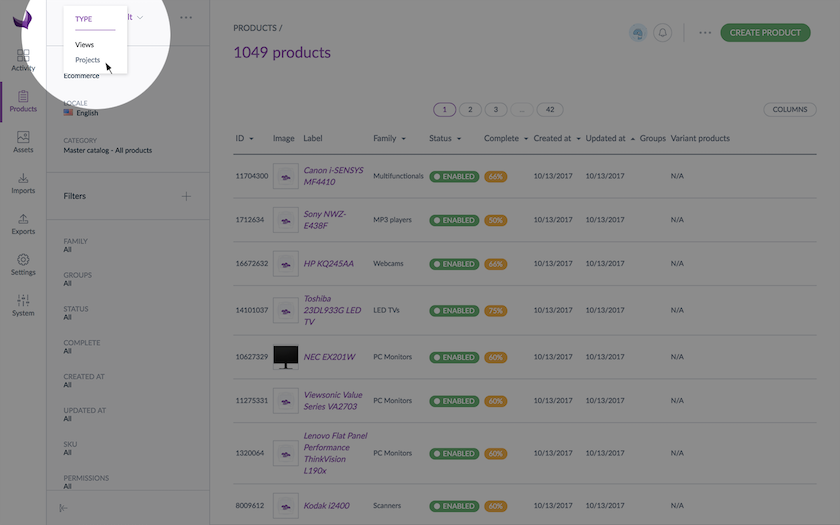
- Select a locale on the product grid using the locale dropdown menu (remember you only see the locales you have permissions on)
- Select a channel on the product grid using the channel dropdown menu
- Select your products’ category/ies or subcategory/ies
- And if you’d like to, add some filters and change the columns configuration
You are now ready to create a new project!
If you need to create a project including product models, then prepare your product selection ungrouped to add all related product variants to the project widget.
The project widget in the dashboard will always display the number of variant products, together with simple products. If you click on a project widget, the product grid will likewise display variant products which the user can enrich.
Create a project
- Click on the ... icon nearby the Views/Projects selector
- Select Create project
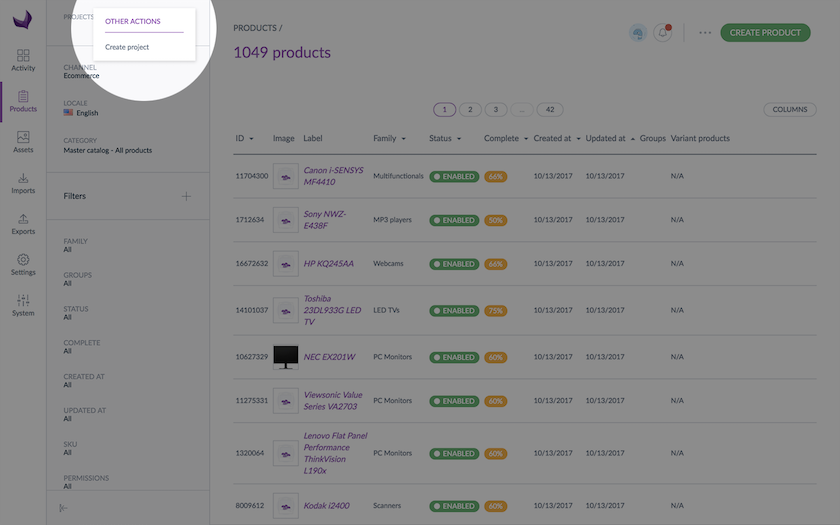
- The project creation window appears:
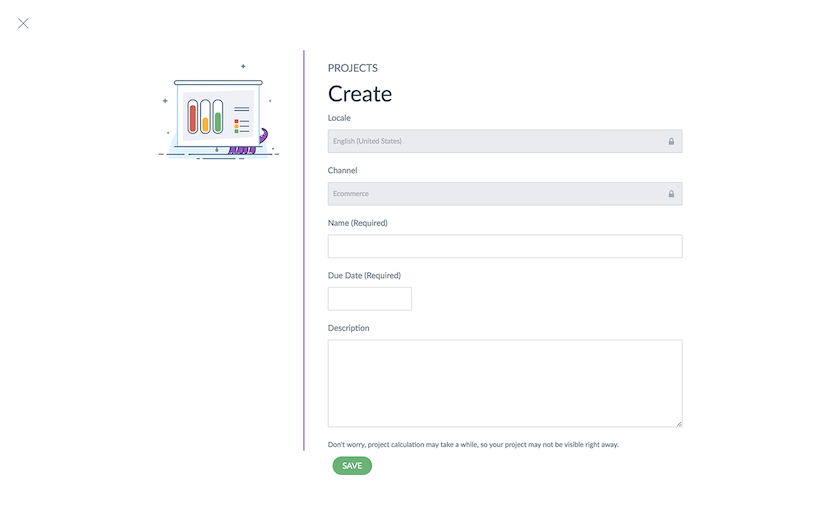
- You can now add:
- a project’s label: the name you want to give to your project. For instance, ‘New
- Summer Collection Website’
- a project’s due date: the date the project must be over at, for instance, 30/May/2018
- a project’s description: the project’s description will appear on the dashboard
- Click on Save to finalize the project’s creation
Your project is now saved and it will be calculated.
Calculation is a process that will check for each product:
- The family it belongs to
- The required attributes of the family and if they are already filled in
- The attribute groups of required attributes
- The user groups having the edit permissions on attribute groups, selected categories and locale
Don't worry, project calculation may take a while, so your project may not be visible right away
The project follows the lifecycle of the catalog and evolves with it. It really reflects the status of the catalog and what each user has to do. For example, if a catalog gets some new products, the project will be impacted and the users will have new products to work on.
A project is updated when you save a product in the Product Form or in a sequential edit and once per 24 hours to handle catalog structure updates.
How to find a project?
All projects you can work on, or projects you have created, can be visible from the Views/Projects selector.
A search field is available above the list: start typing the first letters of the project’s label and the list will be updated with the projects’ labels matching your request:
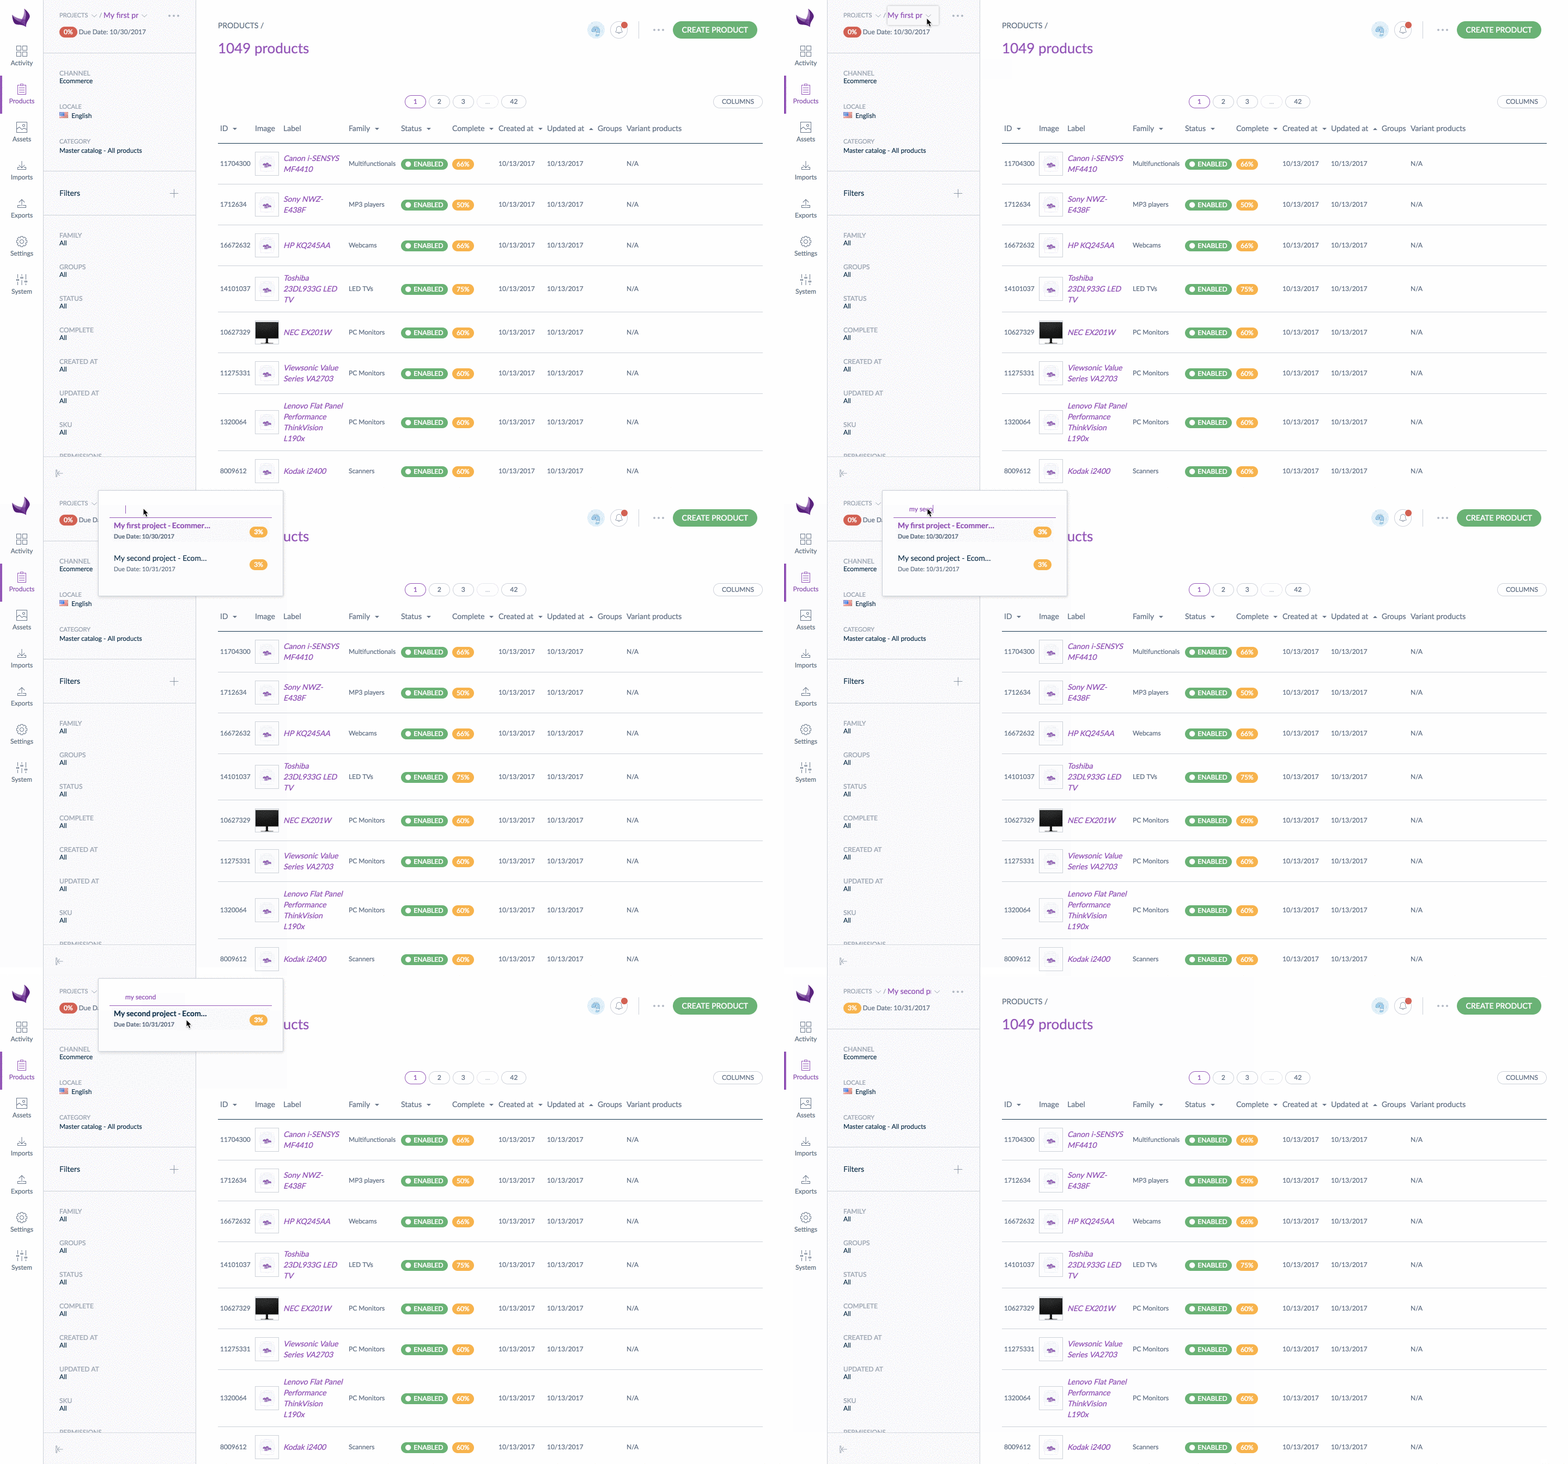
Along with the project’s label, you will find other information:
- A percentage: this is the percentage of products completed according to your permission(s) (see done products). You might not have rights on all products
- A color (green: done, orange: in progress, red: to do)
- The project’s due date
- Its channel and locale
Your project is also added in the dashboard through a new widget: See Dashboard widget’s project article.
How to edit a project?
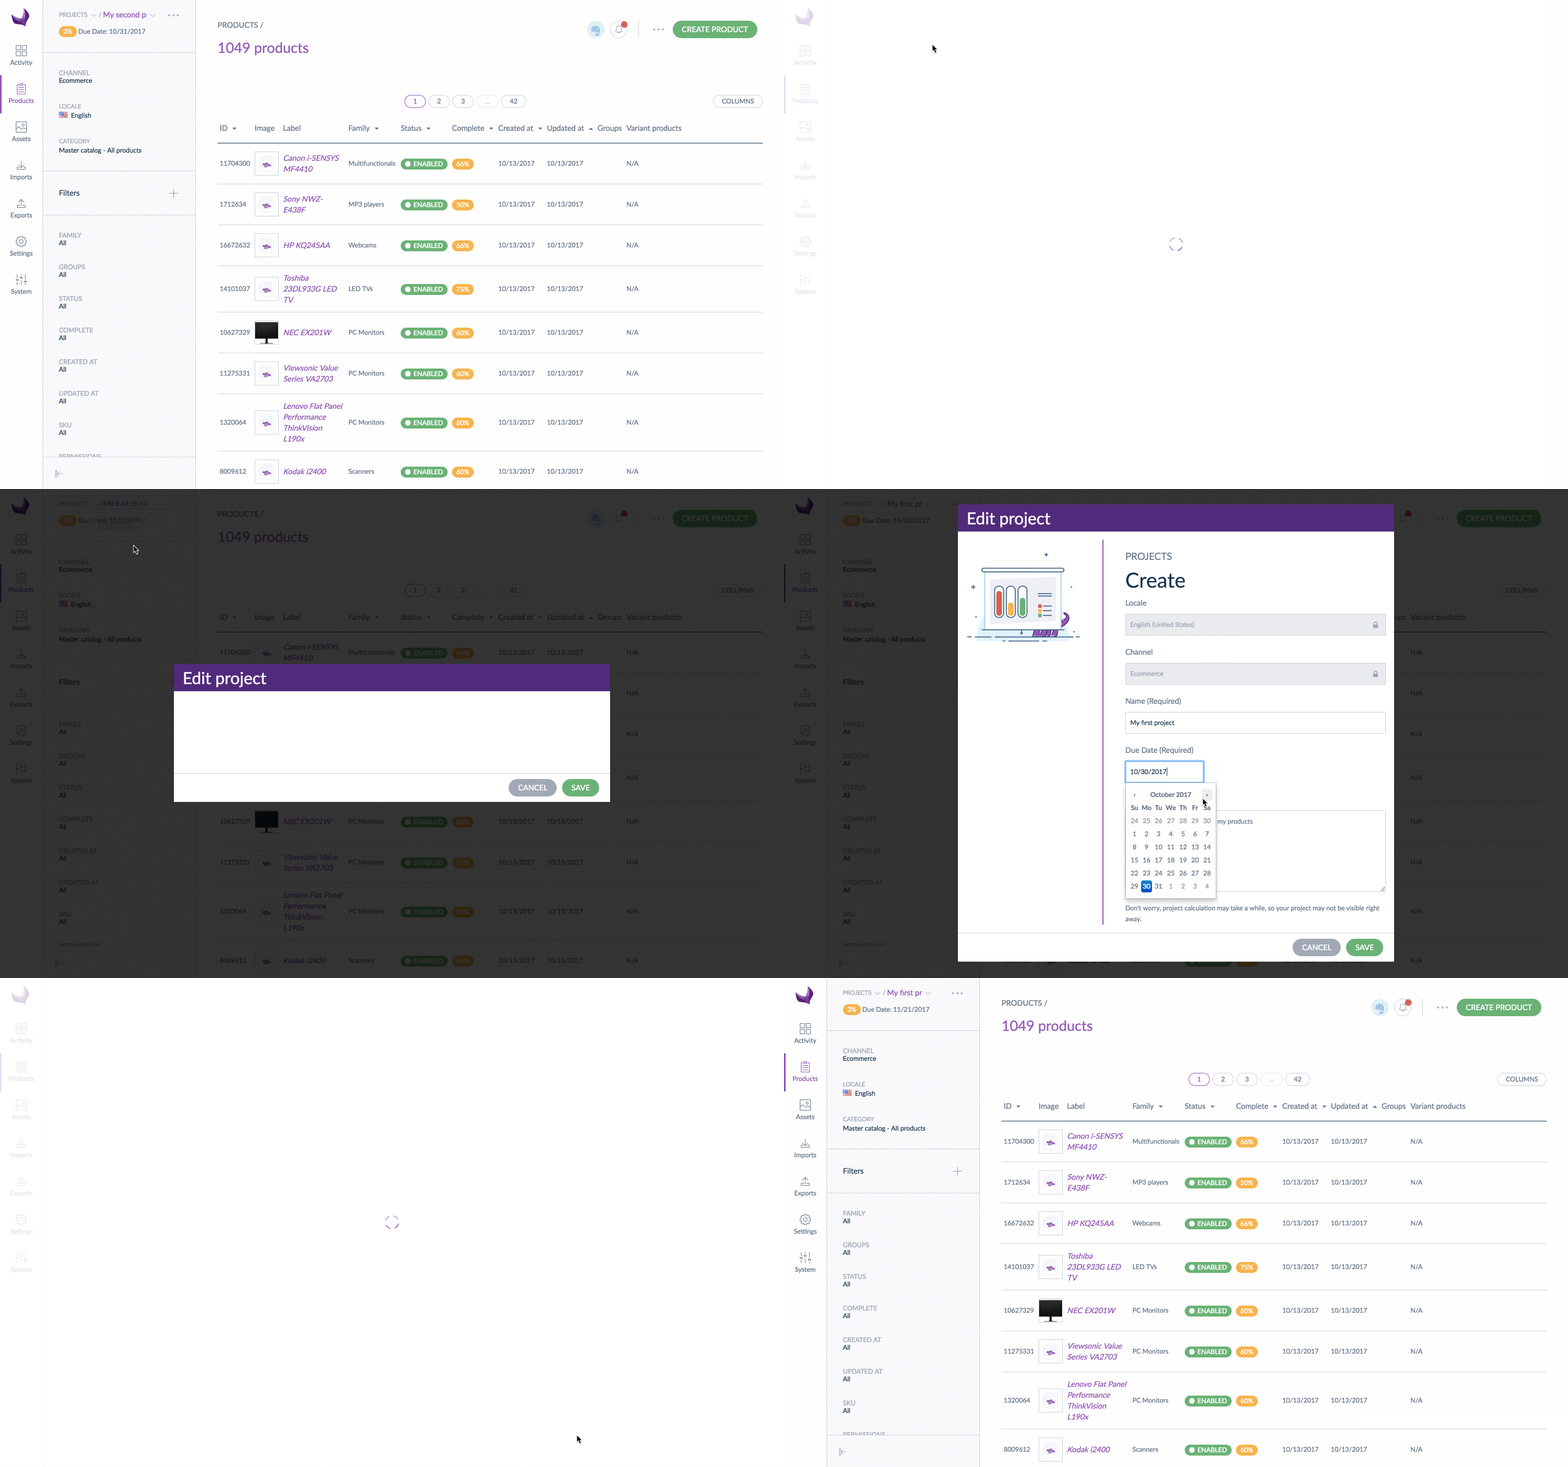
If you have created the project, you can edit all project’s information: label, due date and/or description but you cannot edit the project’s settings like the product’s category, locale, channel, active filter views. If you need to do so, then you will have to create a new project.
Select your project in the project’s list.
Click on the "..." icon and then "Edit Project", a project window is prompted:
- You can edit label, due date and/or description
- Click on Save and the project will be updated accordingly
How to delete a project?
If you have created the project, you can delete it when:
- the project is completed and your products are ready to be exported
- you do not need it anymore
- some settings have changed: locale and/or channel so you need to create a new project
Here are the different steps:
- Click on the ... nearby Views/Projects selector
- Select Projects
- In the projects drop down, select your project
- Click on ... and select Delete project to definitely remove the project
- A confirmation window is prompted to allow you to Confirm or Cancel your action
Be aware this operation cannot be reverted.


