
Set up your Onboarder instance
The Akeneo Onboarder instance creation is managed from the Project console of the Akeneo Portal.
Following the purchase of an Onboarder instance, an email is sent to the Onboarder administrator inviting them to fill in the setup form to create the instance.
You can set up the instance from the link in the email or by accessing the instance configuration page on the Project console.
The technical prerequisites have to be filled in before the setup form except if you are linking the Onboarder to a Serenity instance.
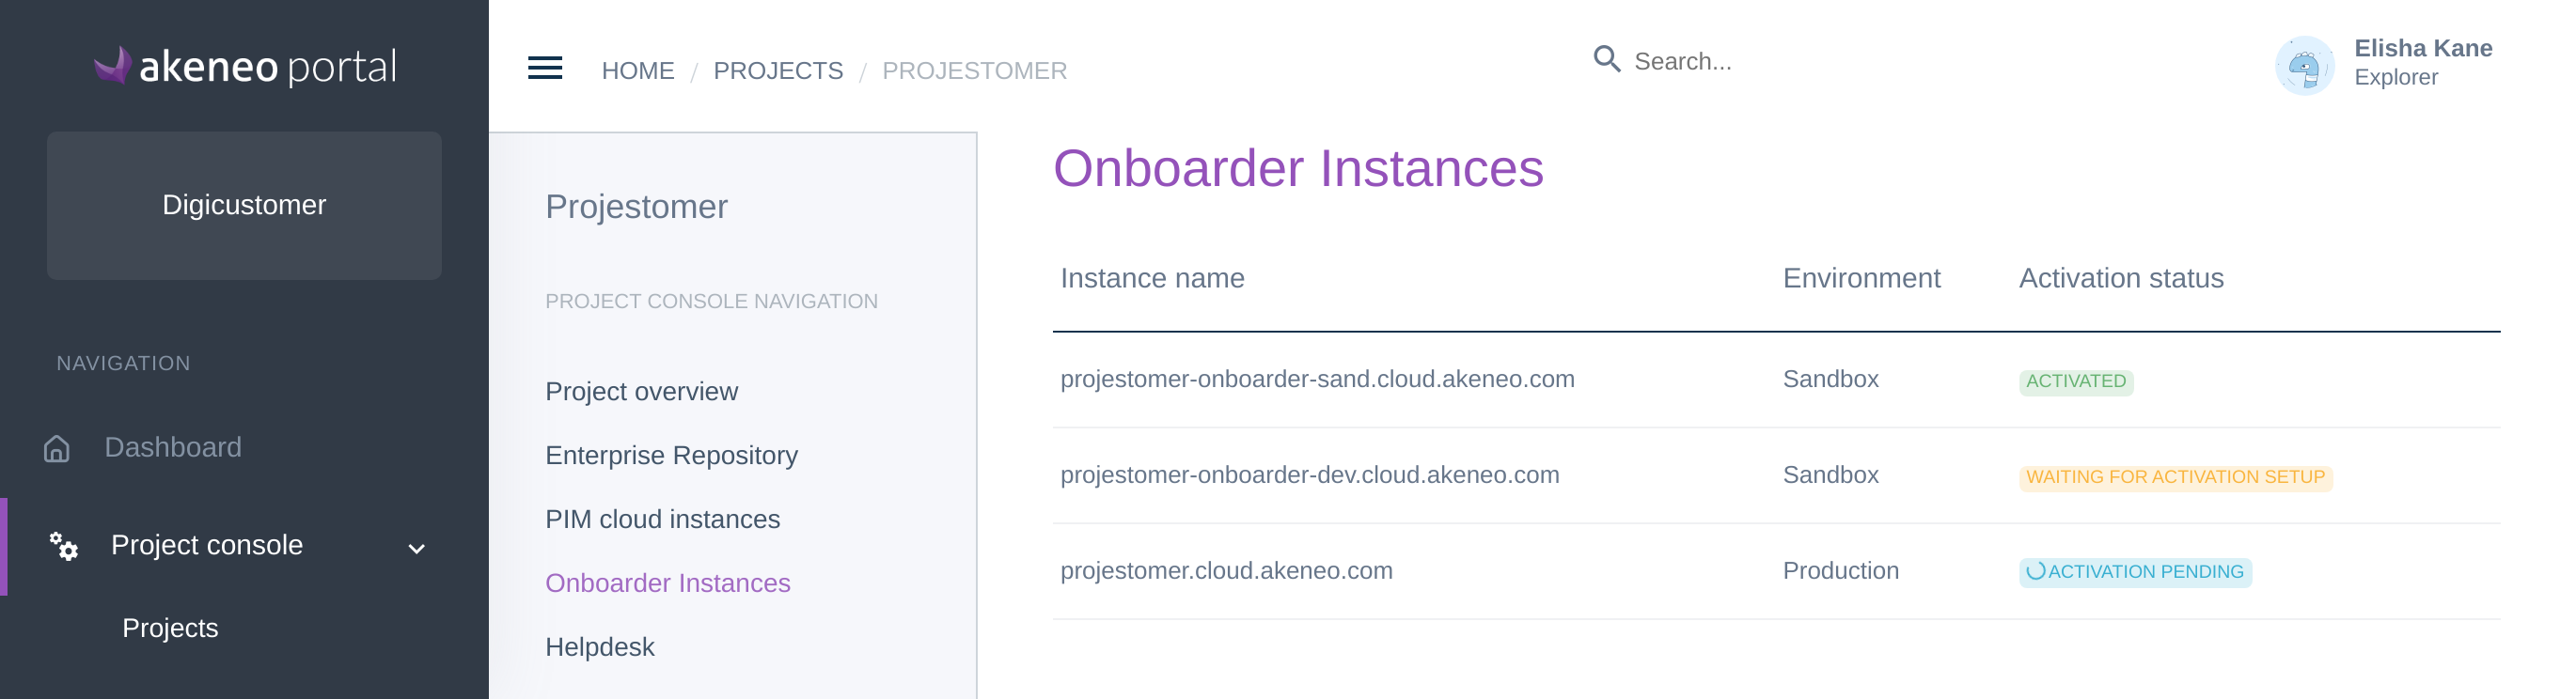
- First, from the menu, go to Project console / Projects and select your project.
- Go to the Onboarder instance tab, and open the instance with the status Waiting for activation setup, by clicking on the instance line.
- Then fill in the form with the missing prerequisites in order to create the Onboarder instance.
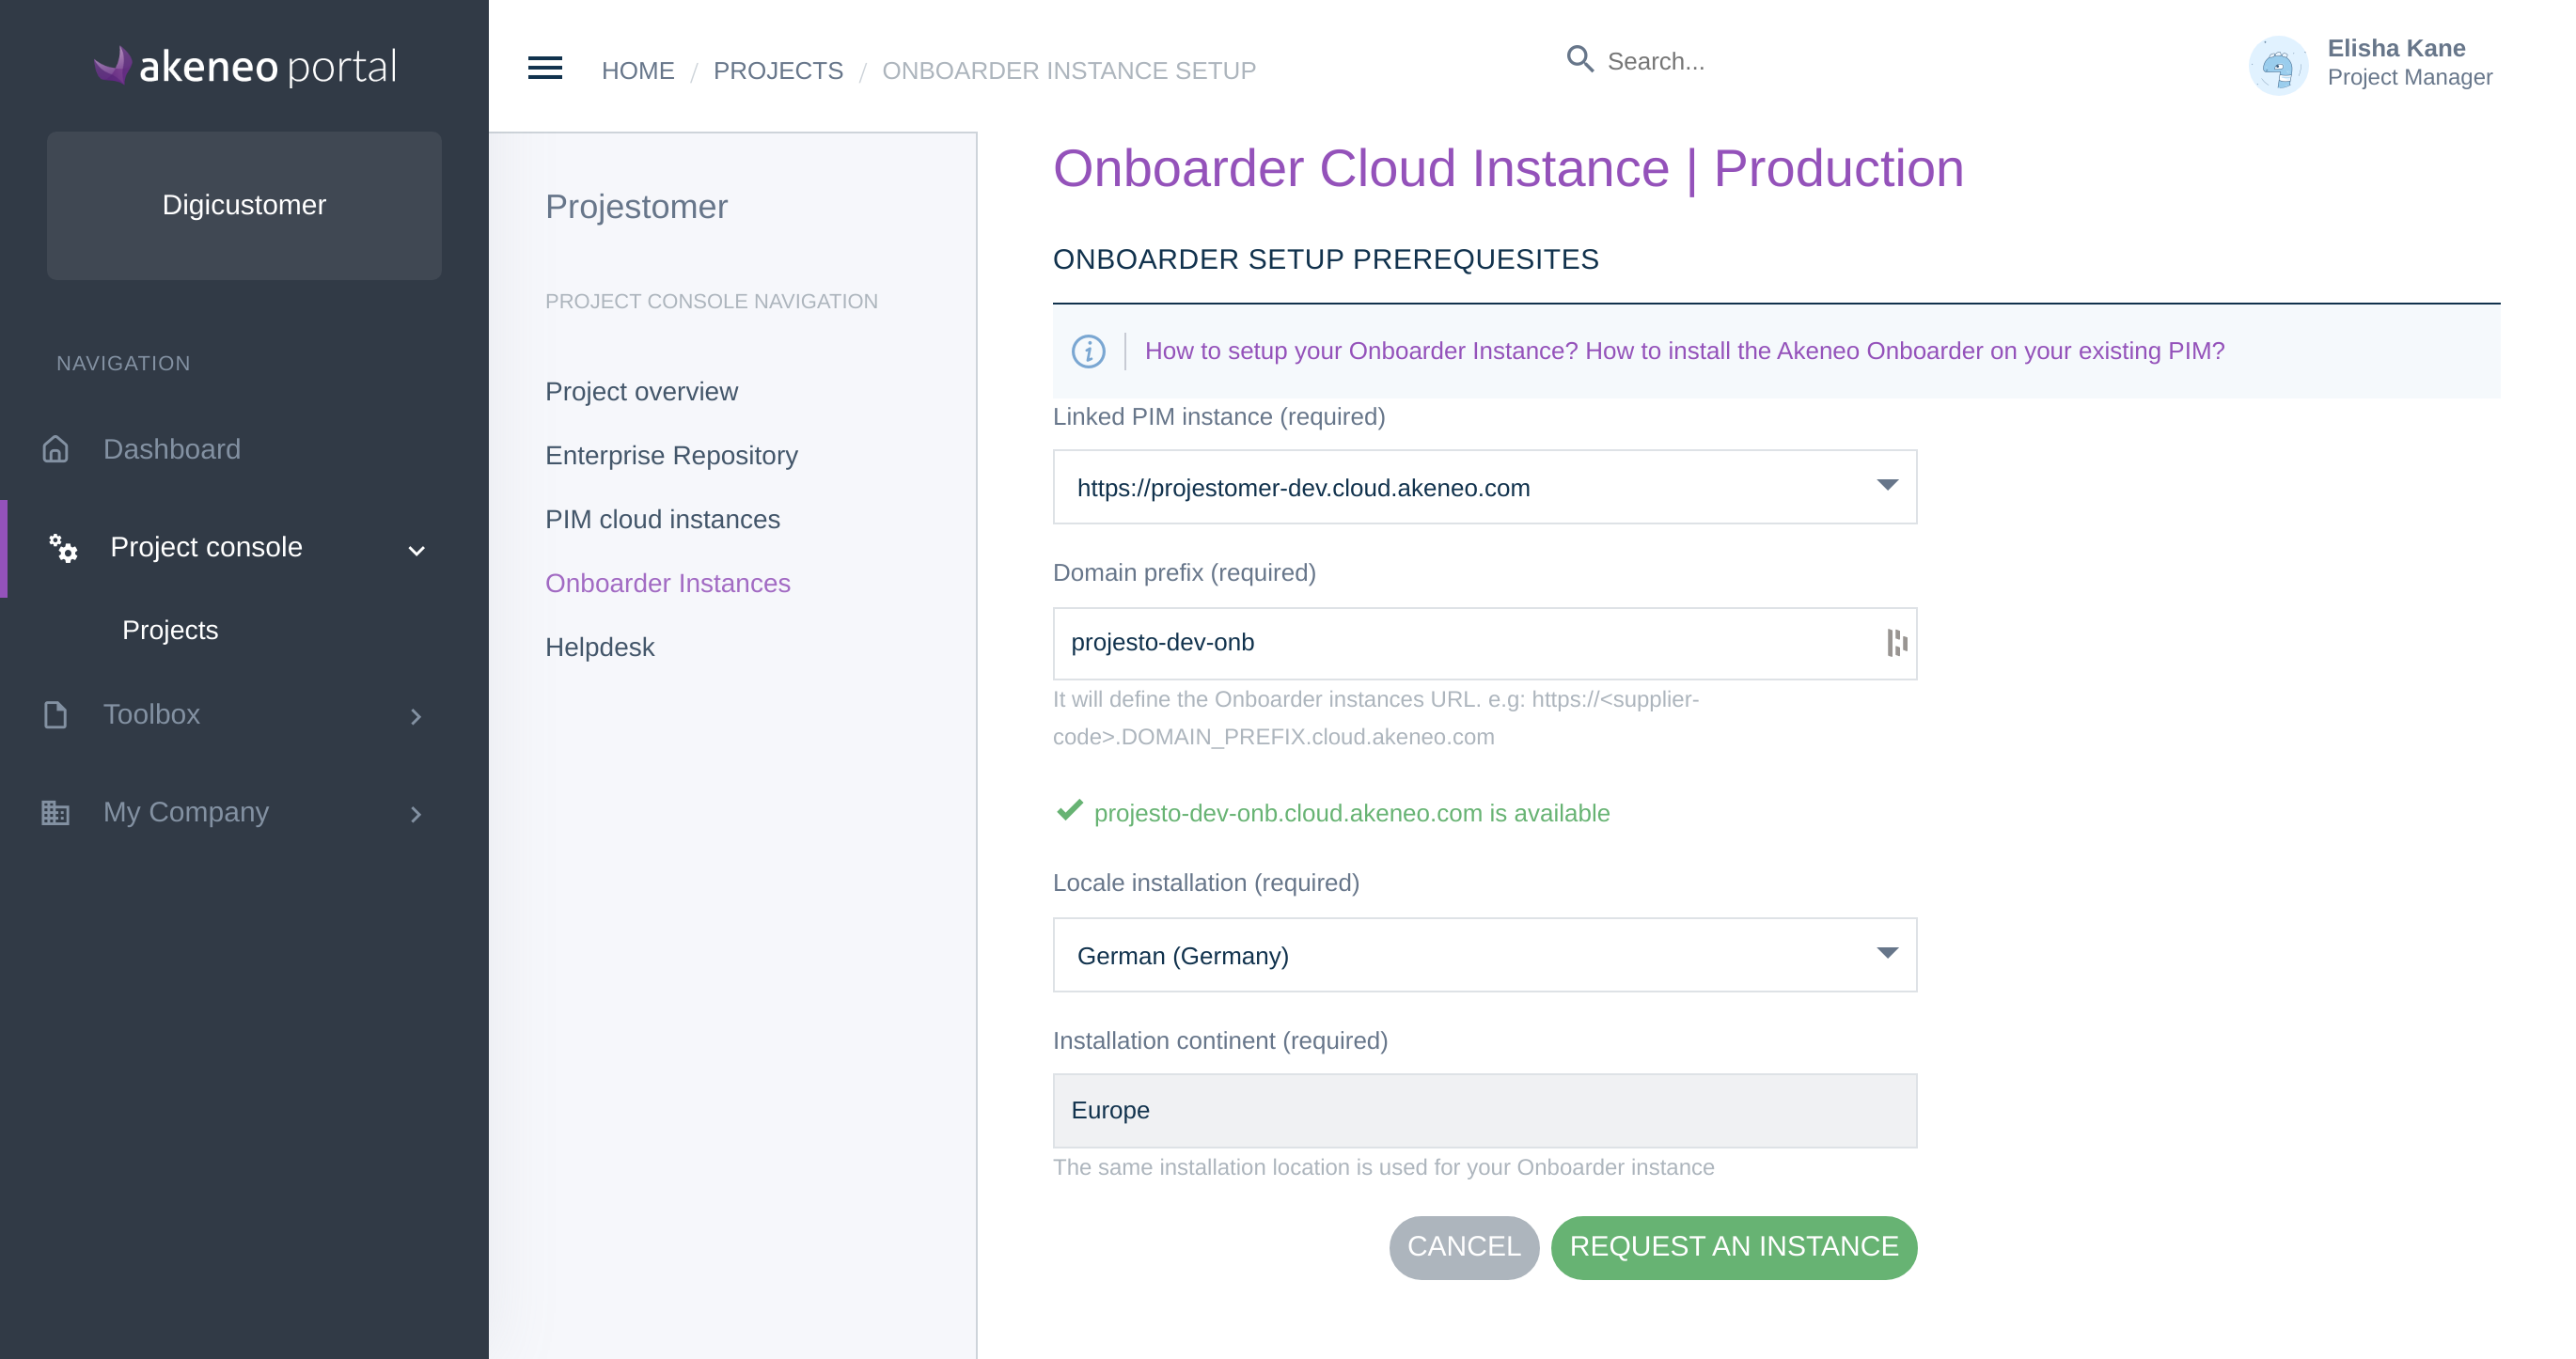
Link your Onboarder to an existing PIM Cloud instance
- Select a Linked PIM instance in the list.
- Choose a Domain prefix, which is going to define your Onboarder instances URL (e.g: https://<supplier-code>.your_domain_prefix.cloud.akeneo.com). An instant check is done to see if the name is available.
- Select an Installation locale for your Onboarder.
- The Installation location is chosen with your linked PIM instance.
- Once the form is filled in, click on Request an Instance.
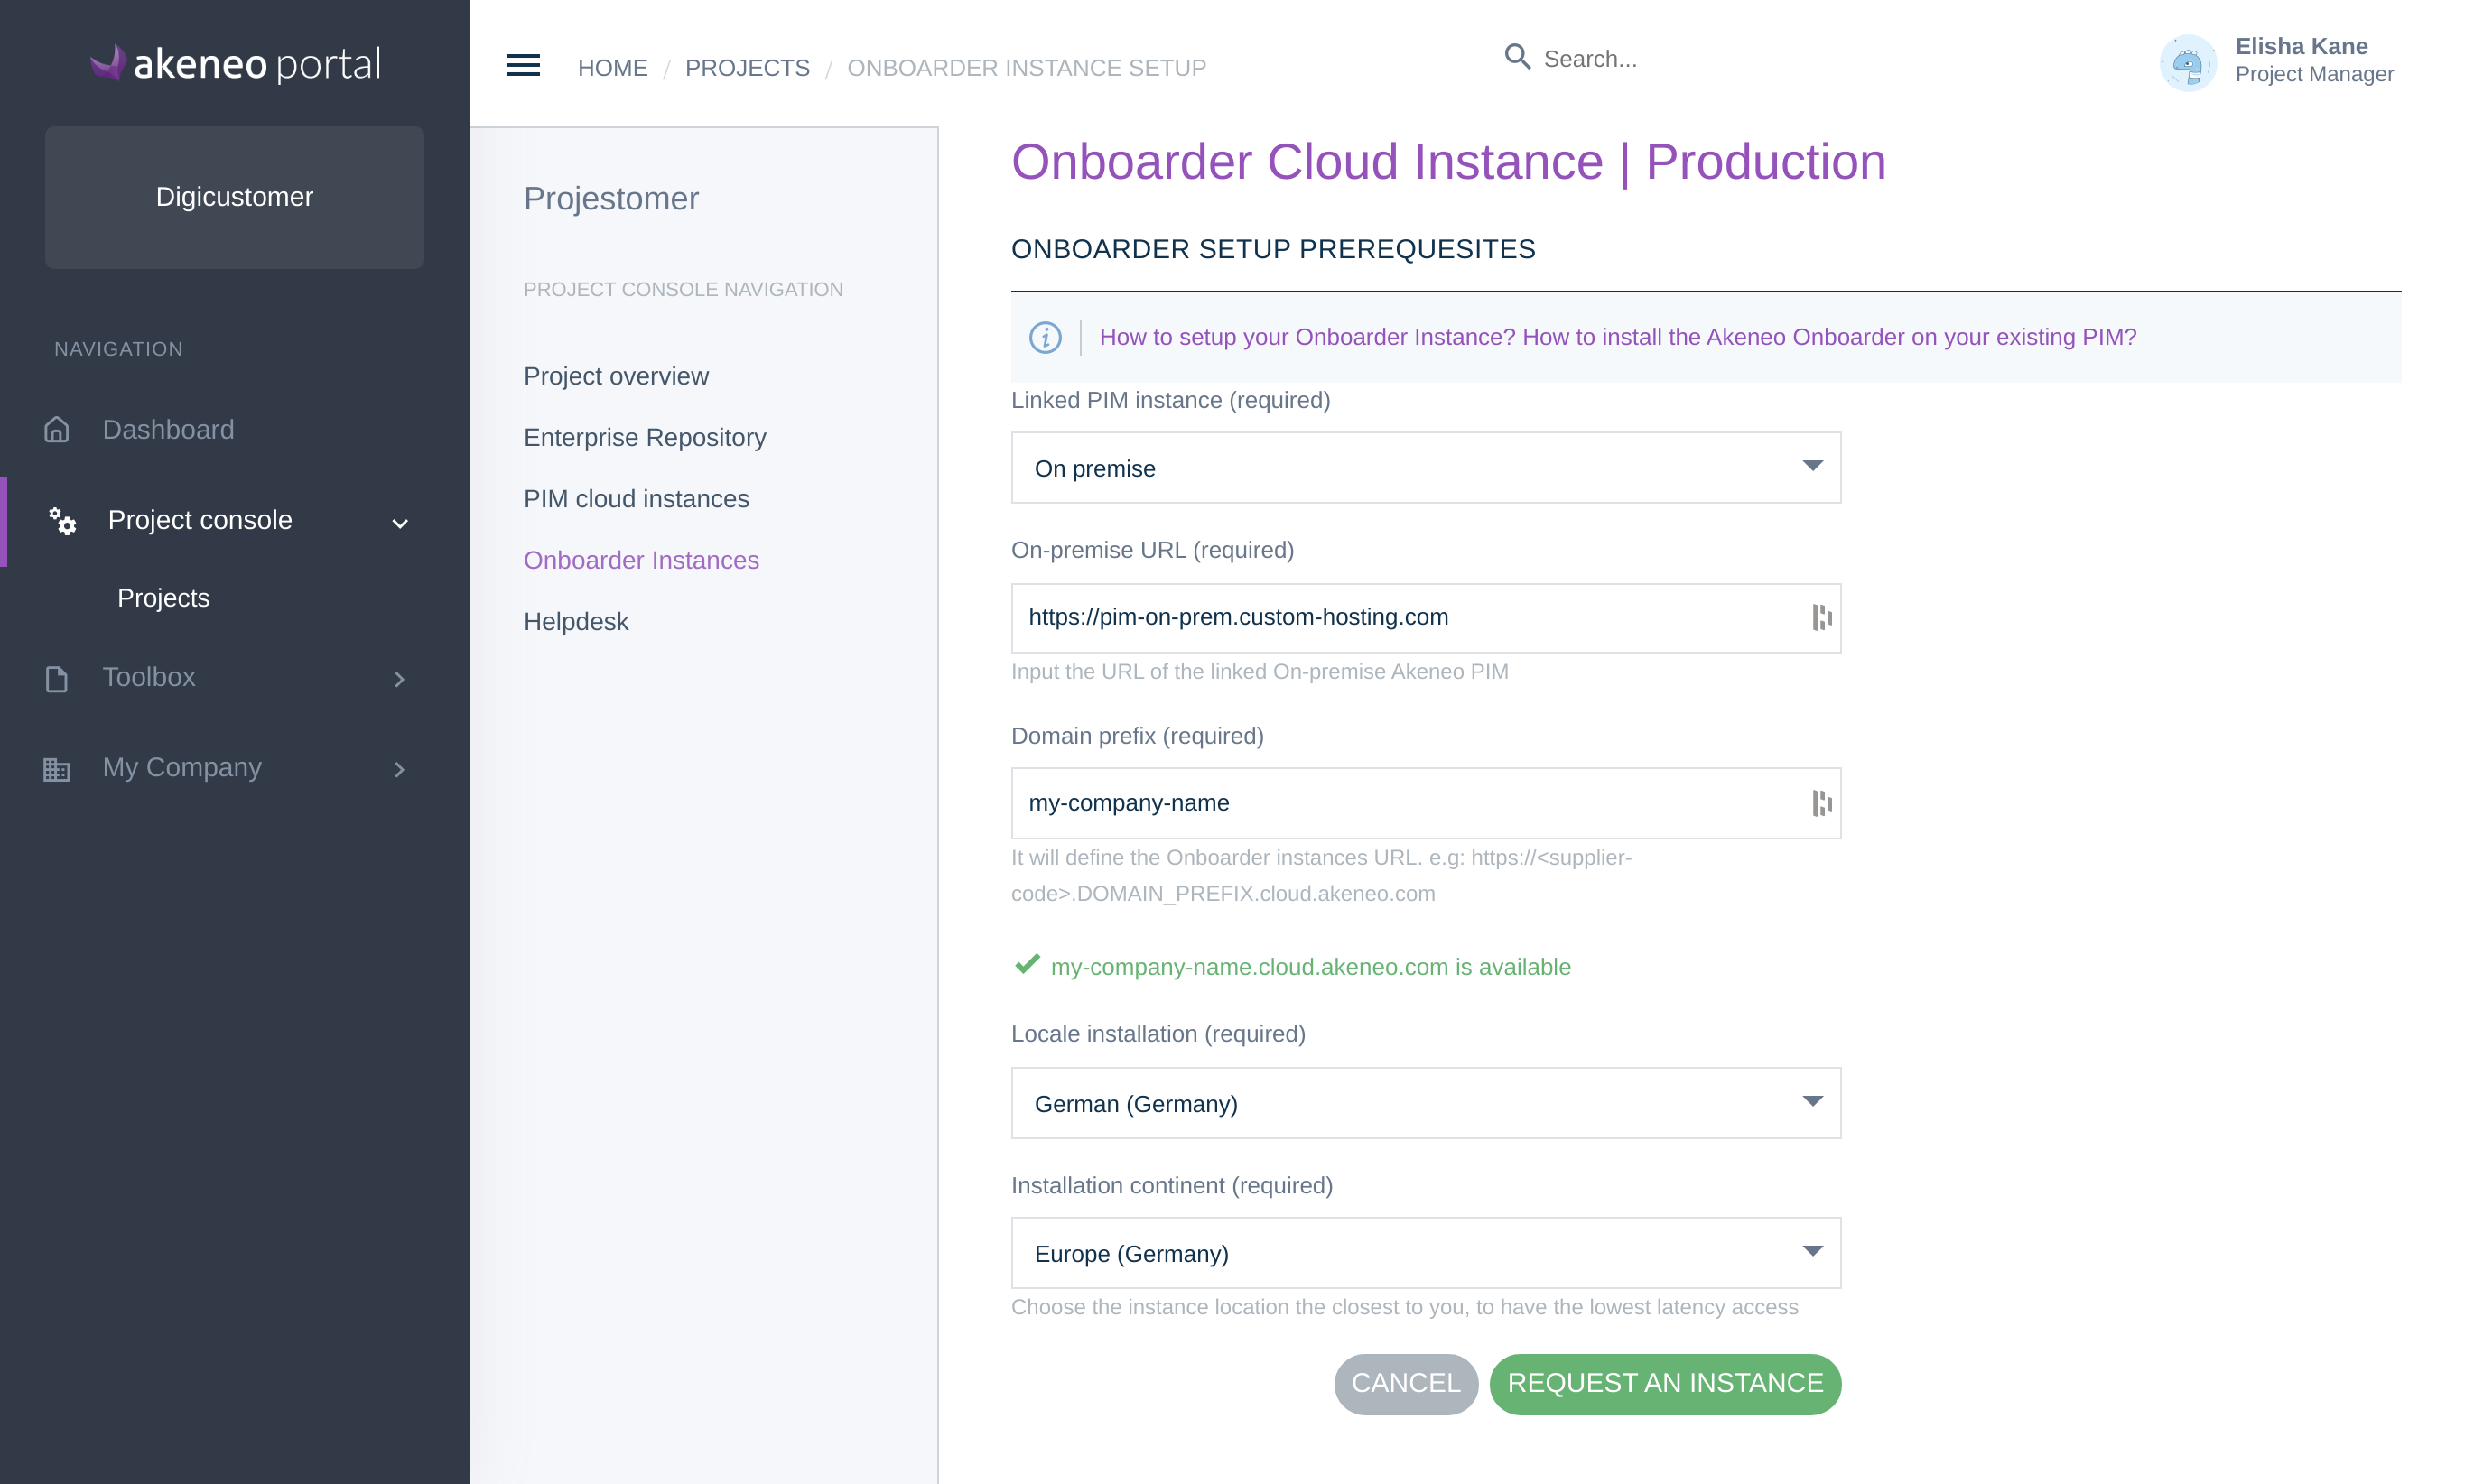
Link your Onboarder to an on-premise instance
- Input your On-premise URL. This is the root URL of your Akeneo PIM if it is self-hosted. Please note that this URL must be publicly accessible on the Internet.
- Choose a Domain prefix, which is going to define your Onboarder instances URL (e.g: https://<supplier-code>.your_domain_prefix.cloud.akeneo.com). An instant check is done to see if the name is available.
- Select an Installation locale for your Onboarder.
- Select an Installation location for your Onboarder instance. It should be the closest to you to reduce latency access.
- Once the form is filled in, click on Request an Instance.
Those data cannot be modified once submitted.
Once the request is submitted, it takes some time to process. During this time, you will see your instance status is Activation pending.
Once the instance is created, the Onboarder administrator will be notified by email, and the instance status will change to Activated.
Access your Onboarder instance properties
Once the instance is set up, you can access the instance properties.
- First, from the menu, go to Project console / Projects and select your project.
- Go to the Onboarder instance tab, and open the instance by clicking on the corresponding line.
- On the Properties sub-tab, you can see the information filled during the setup and the name of the Onboarder administrator who received the credentials.
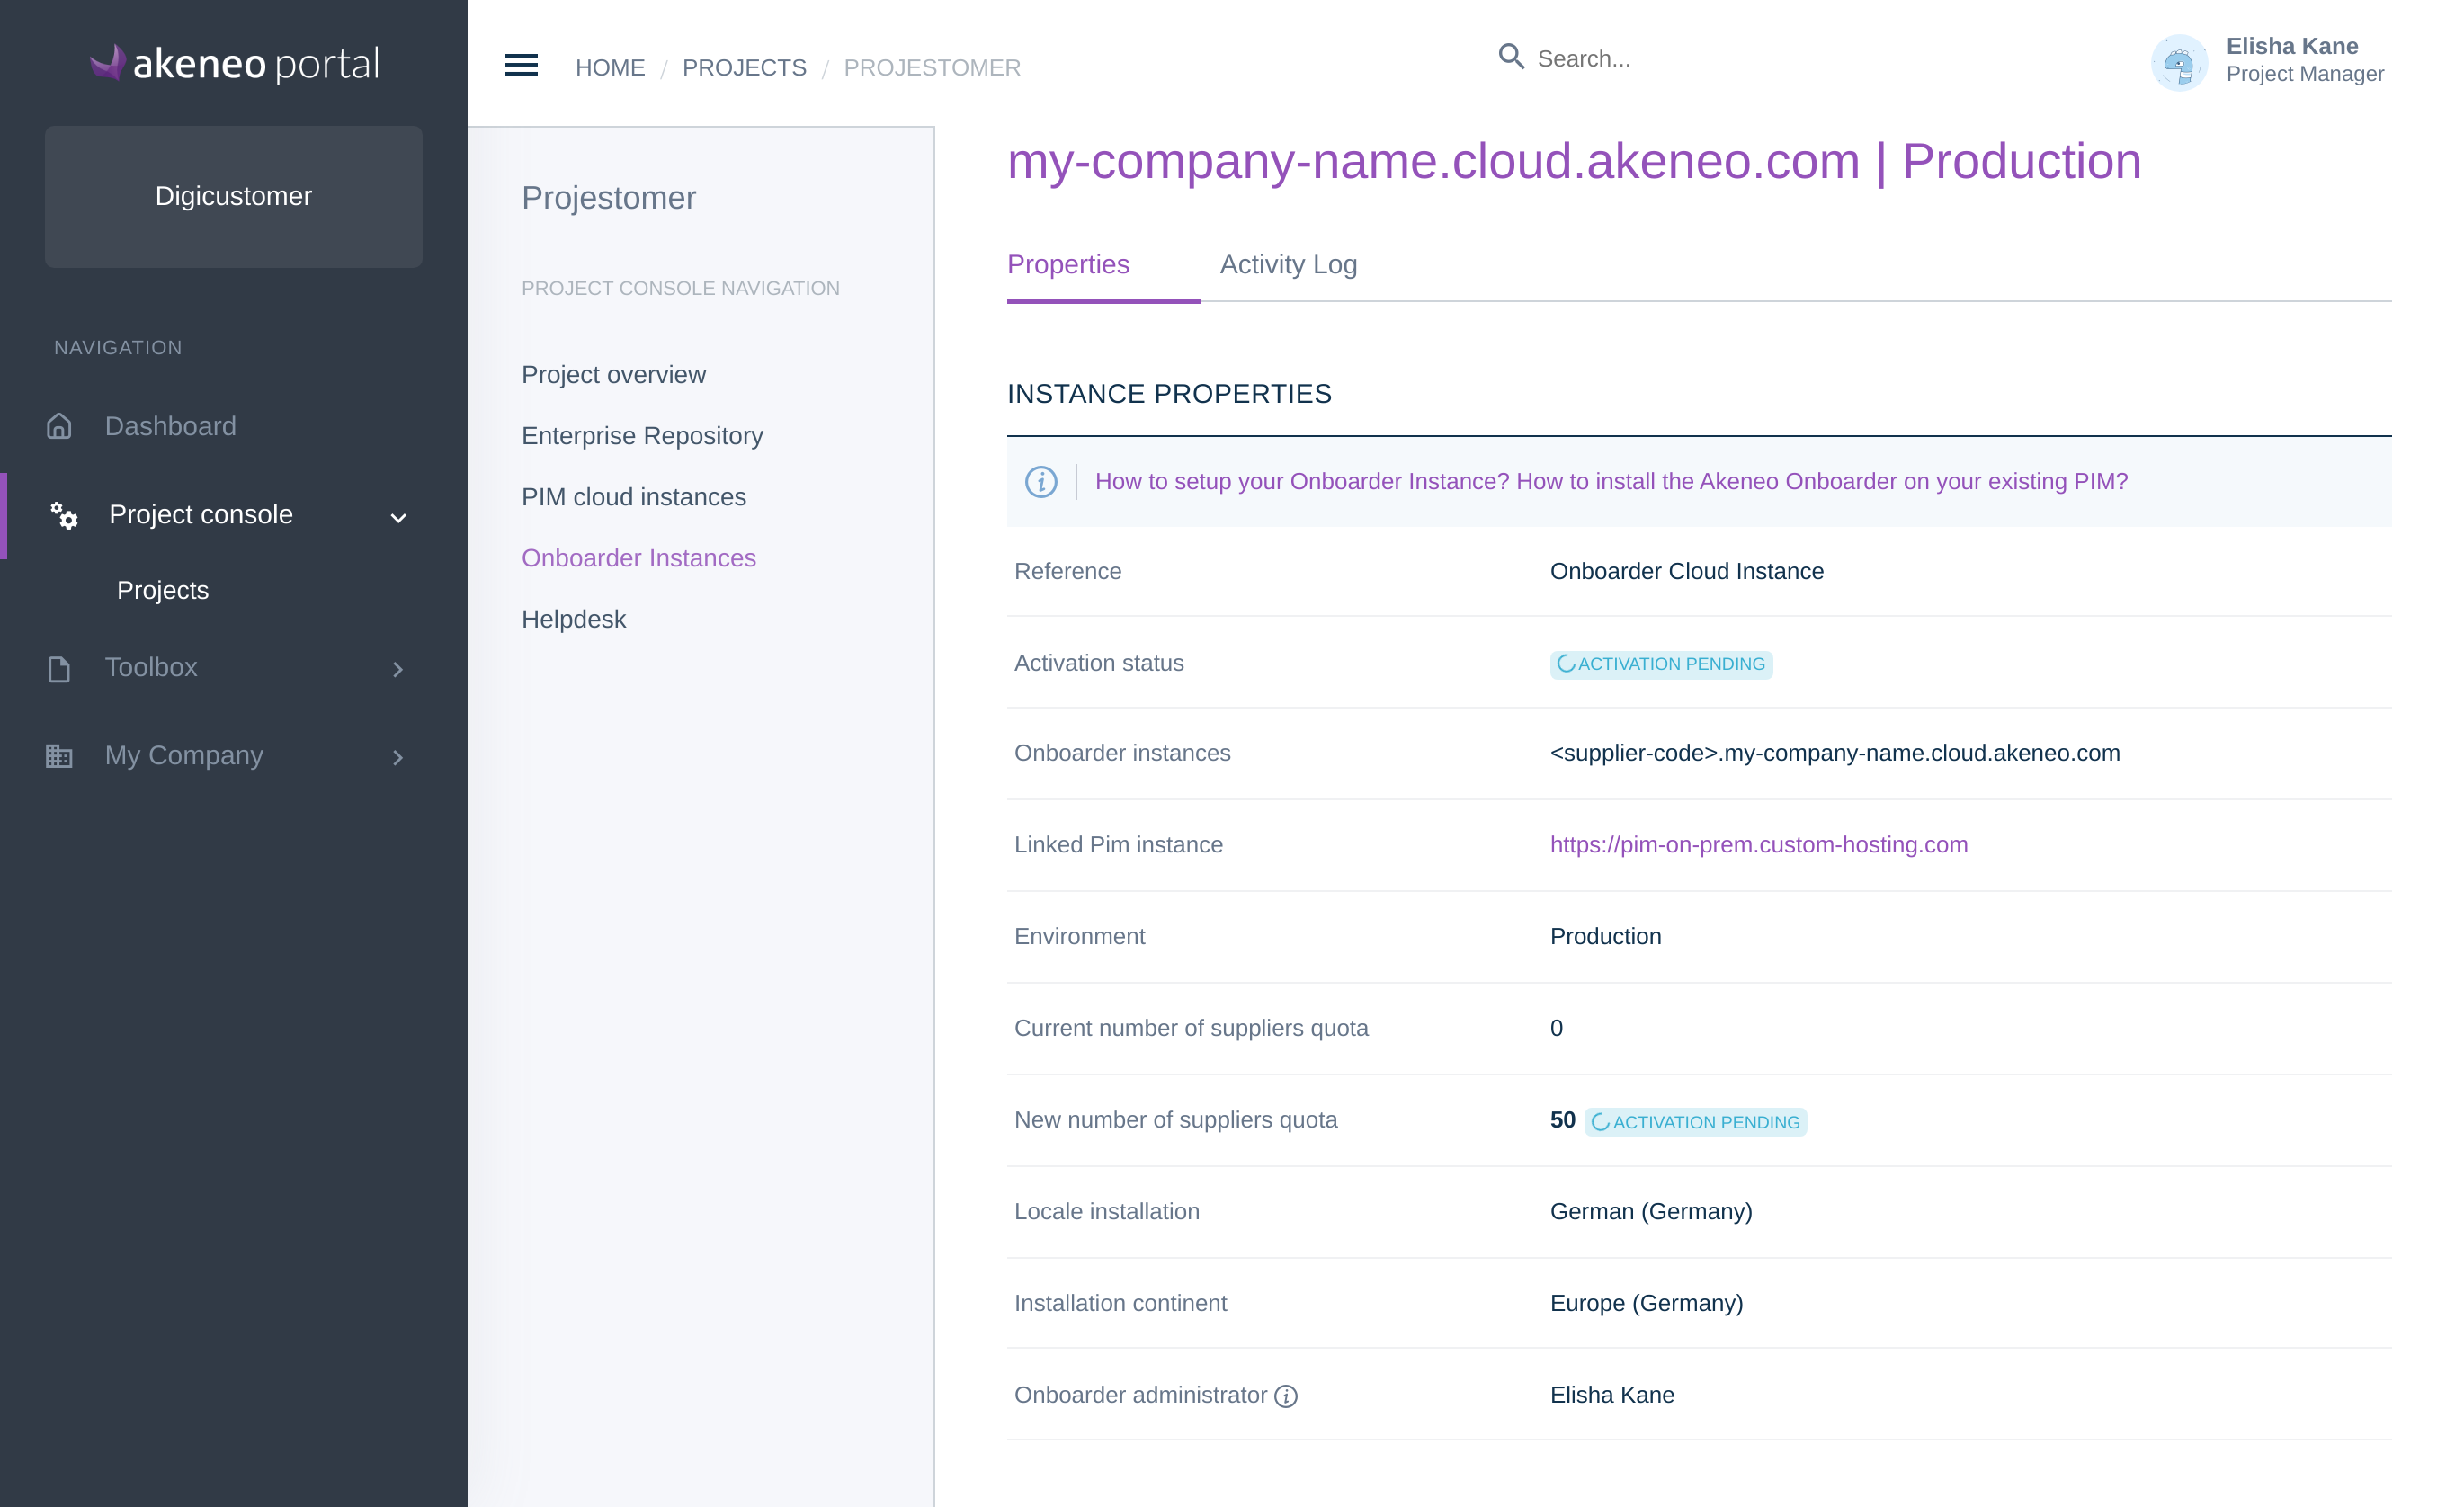
To update your number of suppliers quota, ask your Customer Success Manager, and you will be notified when the change is effective.
Get the activity log on the Onboarder instance
In the Onboarder instance, on the Activity Log sub-tab, you can see when the activation was done, and when the supplier quota was updated.
