

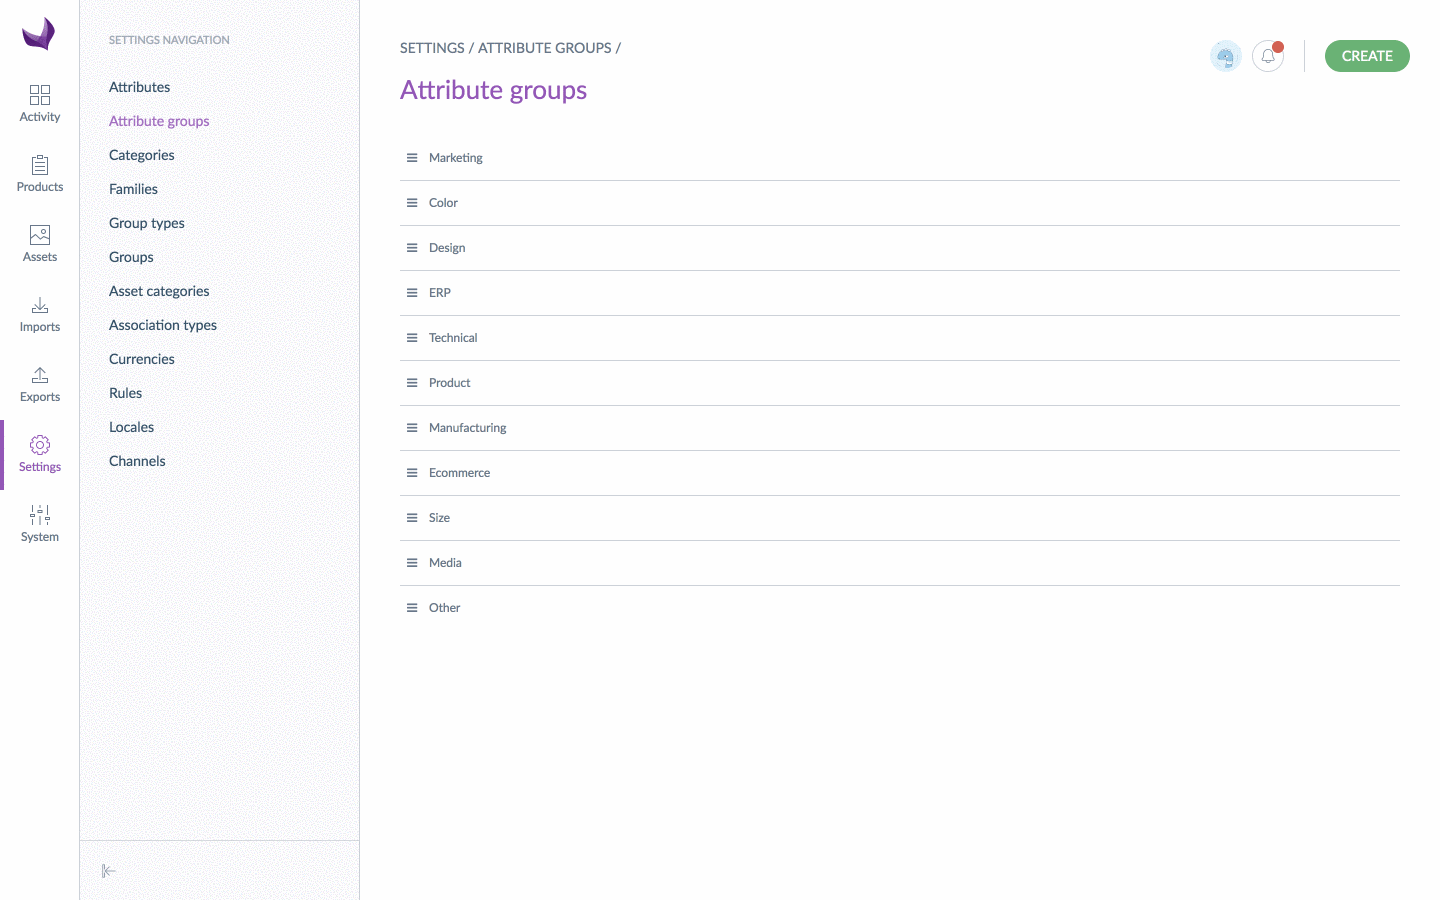
List attribute groups
To view your attribute groups, go to Settings/Attribute groups.
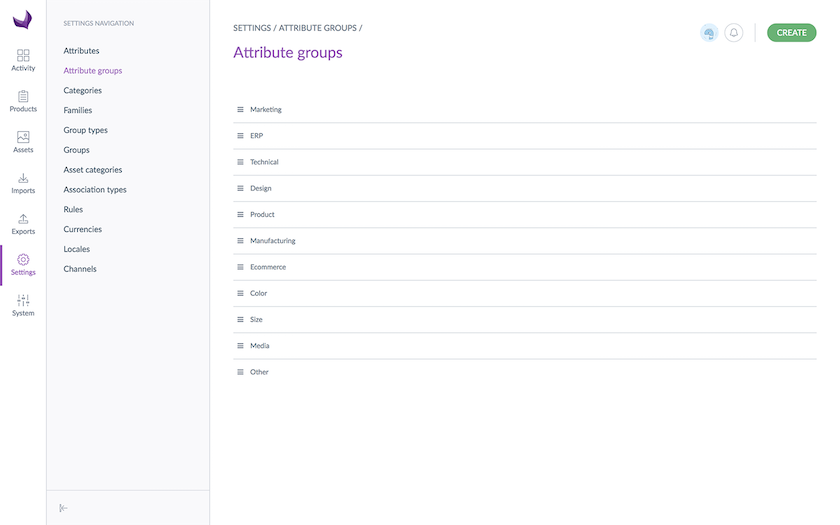
Other is a default attribute group managed by Akeneo and it cannot be deleted. If you do not create attribute groups, all product attributes will be gathered in this group.
Sort attribute groups
To sort attribute groups, you can drag and drop the attribute groups:
- Go to Settings/Attribute Groups
- Place your mouse over the icon nearby the attribute to move
- Once your mouse changes into a cross, put the group higher or lower
Create an attribute group
You must have specific permission to create an attribute group in the PIM.
To create an attribute group:
- Go to Settings/Attribute groups
- Click on the button Create
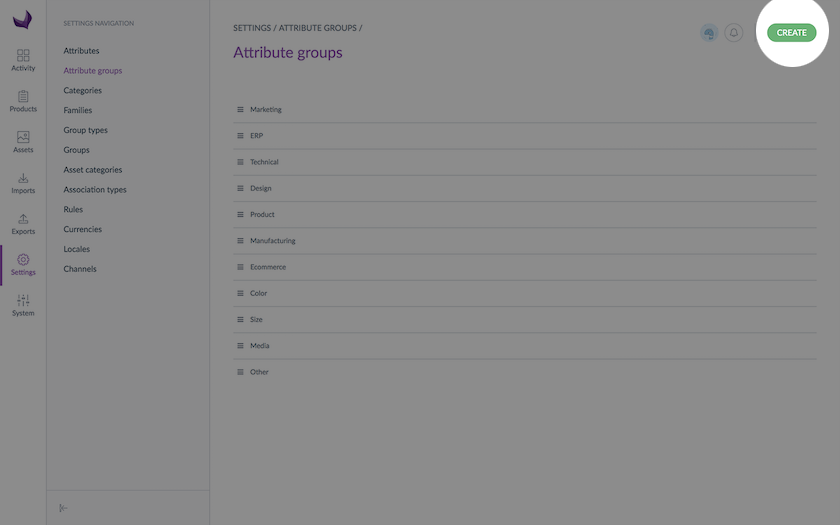
- The page of the new attribute group is displayed
- Enter a unique code and labels
- Click on Save
The attribute group has been created and is now visible on the left side of the screen along with the other attribute groups.
Once you new attribute group is created, you can order it.
Edit an attribute group
Edit labels
To edit an attribute group’s labels:
- Go to Settings/Attribute Groups
- Select the attribute group to edit in the left panel and click on its label
- The attribute’s page is displayed
- Change its labels
- Click on Save
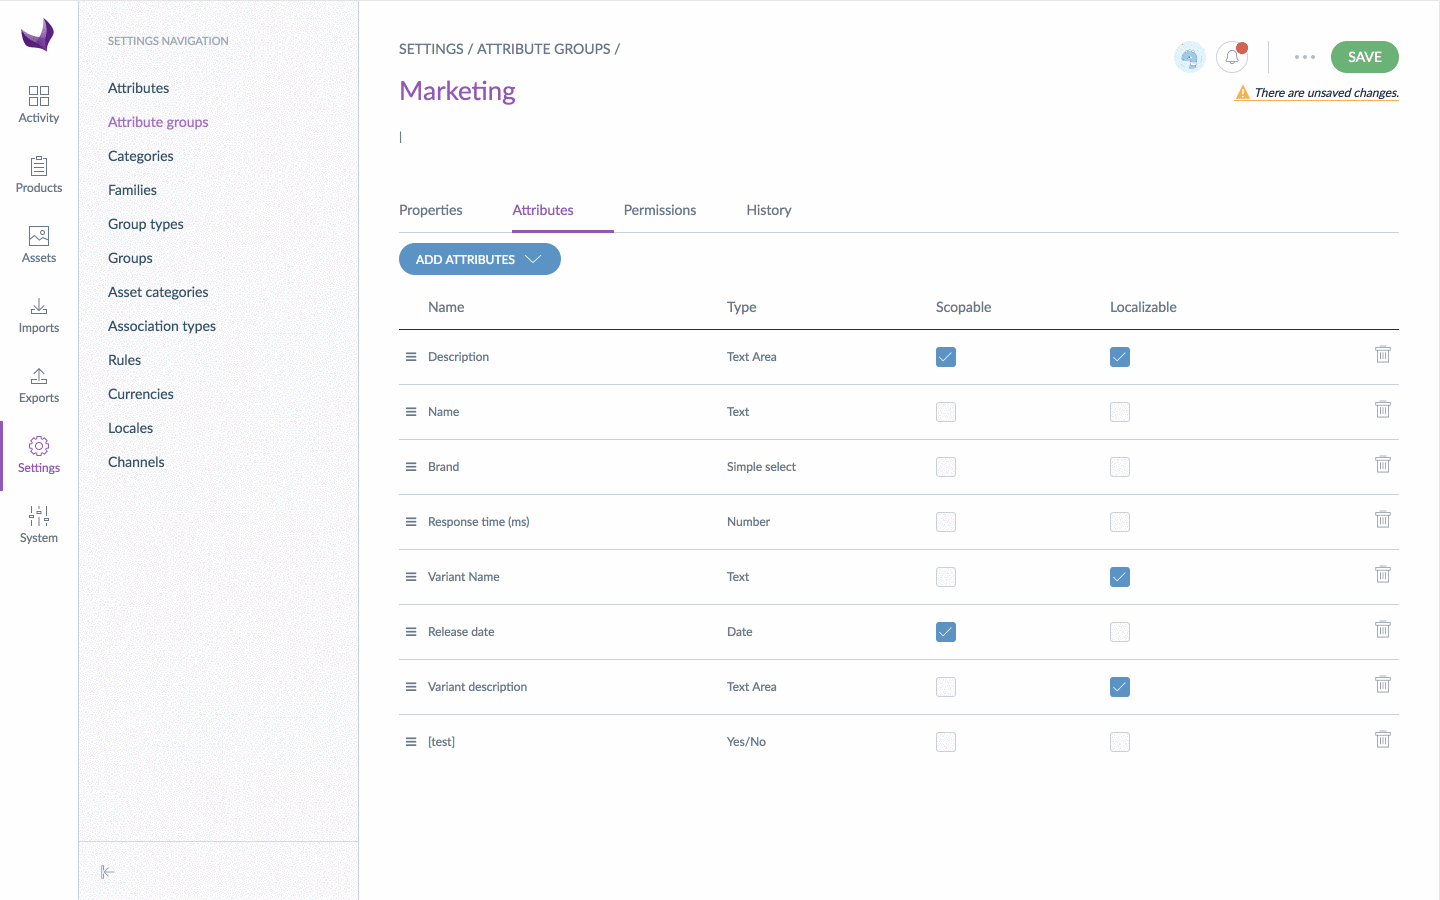
Add an attribute to an attribute group
Only the attributes belonging to the Other group can be added to another attribute group. To add attributes from another group, first remove it from its current group.
It is possible to add attributes to an attribute group:
- Select the attribute group, go under the Attributes tab
- Click on Add Attributes
- Select the attributes to add by clicking on the their labels (you can find an attribute by its label via the quick search box at the top of the list)
- Click on the Add button below the list
- Click on Save
The attributes are added to the current group.
If you do not see the button Add Attributes, it might be because you do not have the relevant rights. Please refer to Manage your user roles.
Remove an attribute from an attribute group
Attributes can be easily removed from groups.
To remove an attribute:
- From the Attributes tab of an attribute group, click on the Delete icon to remove the relevant attribute.
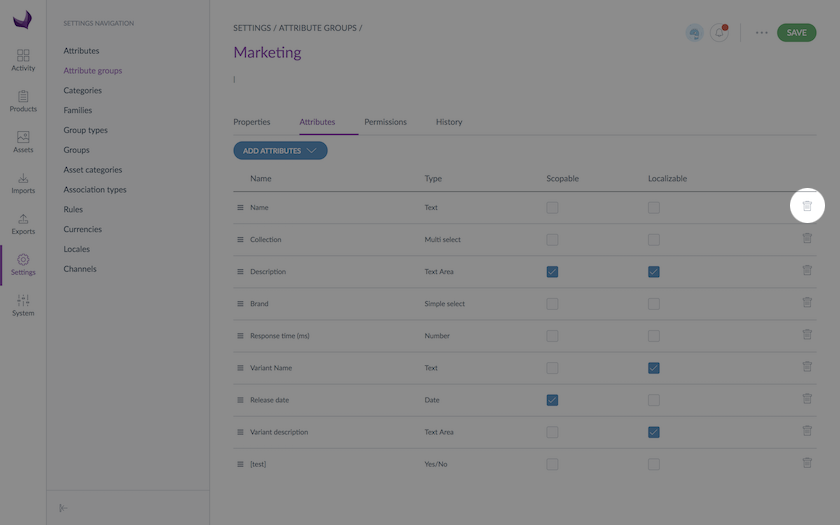
- Confirm the action via the validation popin
- Click on Save
The attribute is put back in the group Other and can now be added to another group.
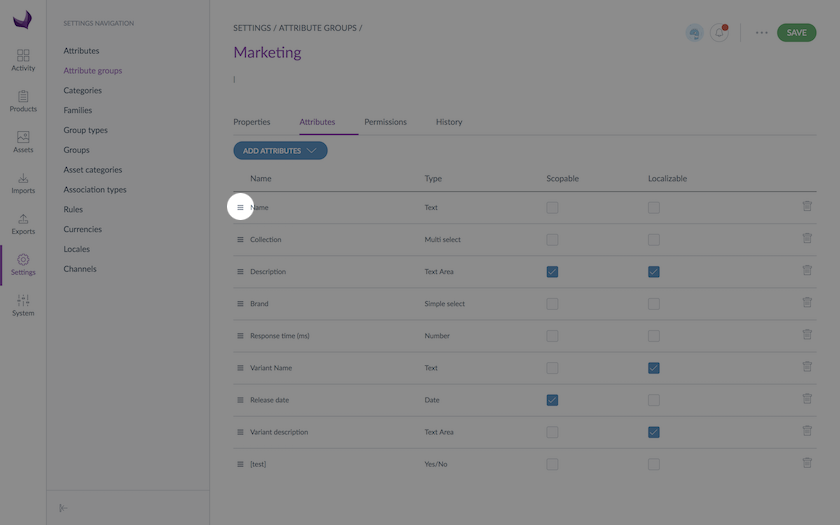
Sort out attributes
Like attribute groups, you can sort attributes belonging to a same group.
To sort the attributes, you can drag and drop attributes:
- Go to Settings/Attribute Groups to open the attribute group
- Click on the attribute group to be edited
- Click on the Attributes tab to display the list of attributes included in the group
- Place your mouse over the icon nearby the attribute to move
- Once your mouse changes into a cross, put the attribute higher or lower
Check the attribute group history
Changes made on an attribute group are recorded and visible under the History tab of one group. For example: label change, attribute change, etc.
For each change, a version of the attribute group is created. The following information is tracked down for each version:
- The person or system that generated changes
- The date and time (up to seconds) at which the changes took place
- The old value and the new value of each modified field
To view the versions of an attribute:
- Open and edit the page of the attribute group
- Click on the History tab and the list of versions will be displayed
Delete an attribute group
Deleting an attribute group does not remove the attributes it includes. The attributes will be again visible in the default attribute group Other.
Other is a default attribute group managed by Akeneo and it cannot be deleted.
To delete an attribute group:
- Go to Settings/Attribute Groups to list the attribute groups
- Click on the attribute group to be deleted
- Click on ... for other actions and then Delete on the top right corner
- Confirm the action via the validation message